Cloud SOAR Global Functions Menu
Cloud SOAR is a pure web-based application that does not require an additional add-on or client to deploy. The Global Functions Menu consists of all Cloud SOAR configuration and administrative options you'll need, such as user access, integration configurations, and auditing information.

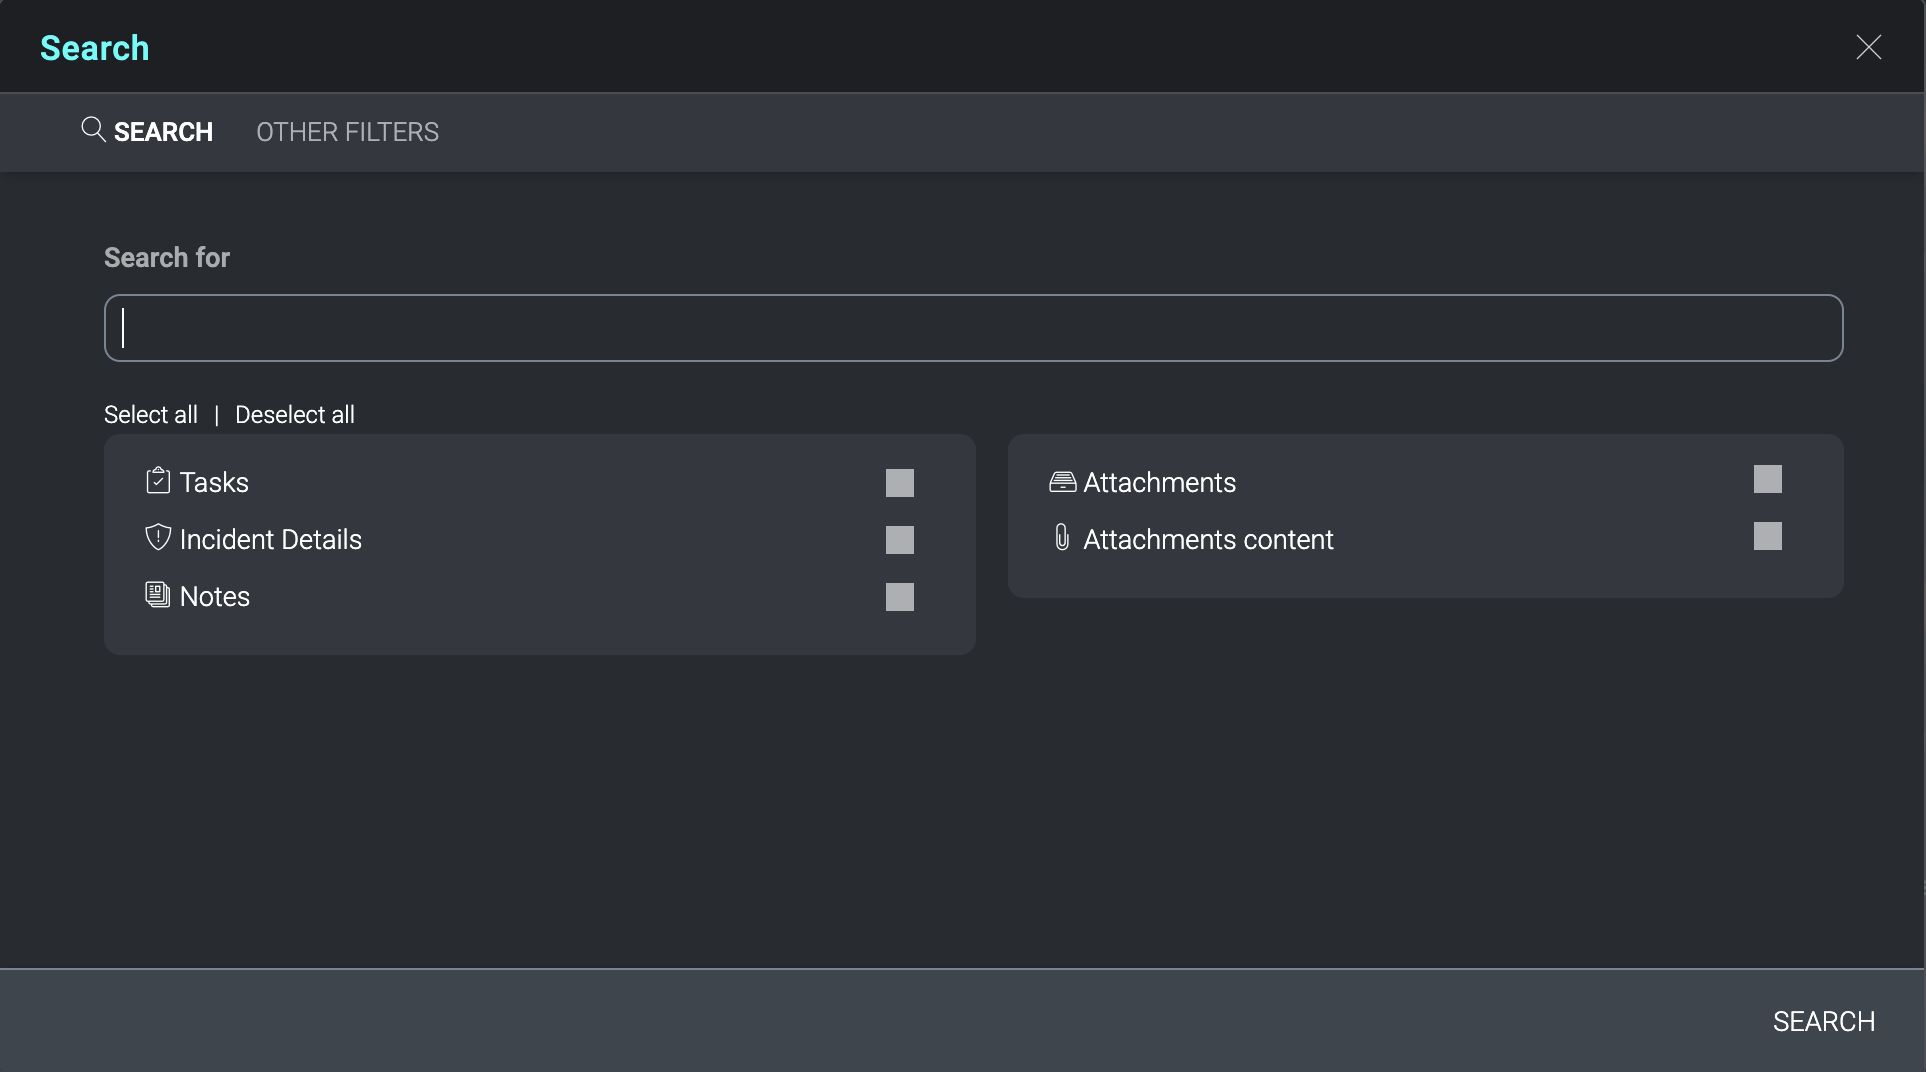
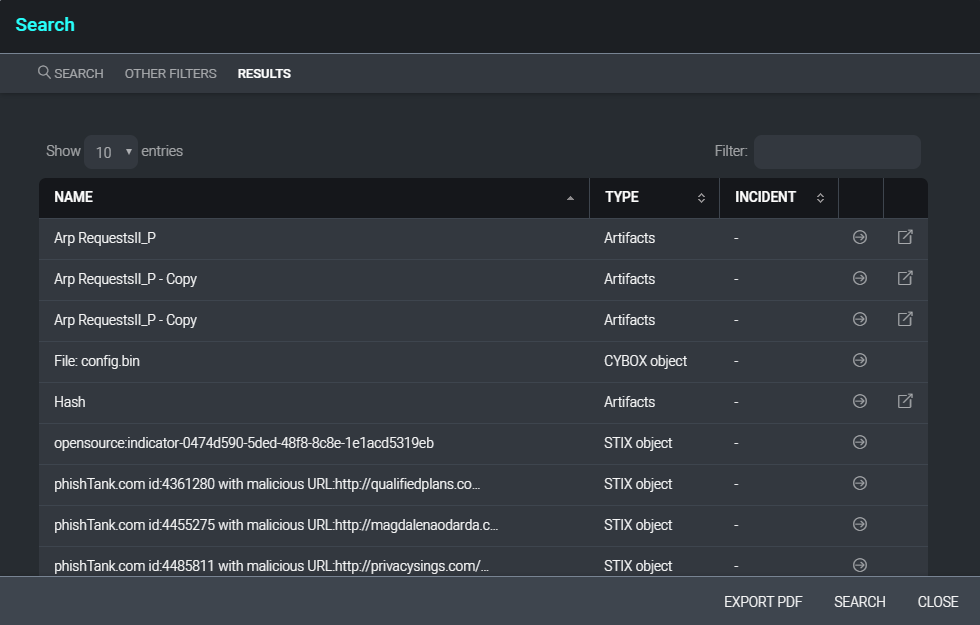
Global Search
Global Search allows you, with the appropriate permissions, to perform exhaustive searches throughout the application modules and all recorded information.
All searchable Cloud SOAR sections are listed and individually selectable. To search, enter the search criteria in the search bar, then select the sections you wish to search and click Search.
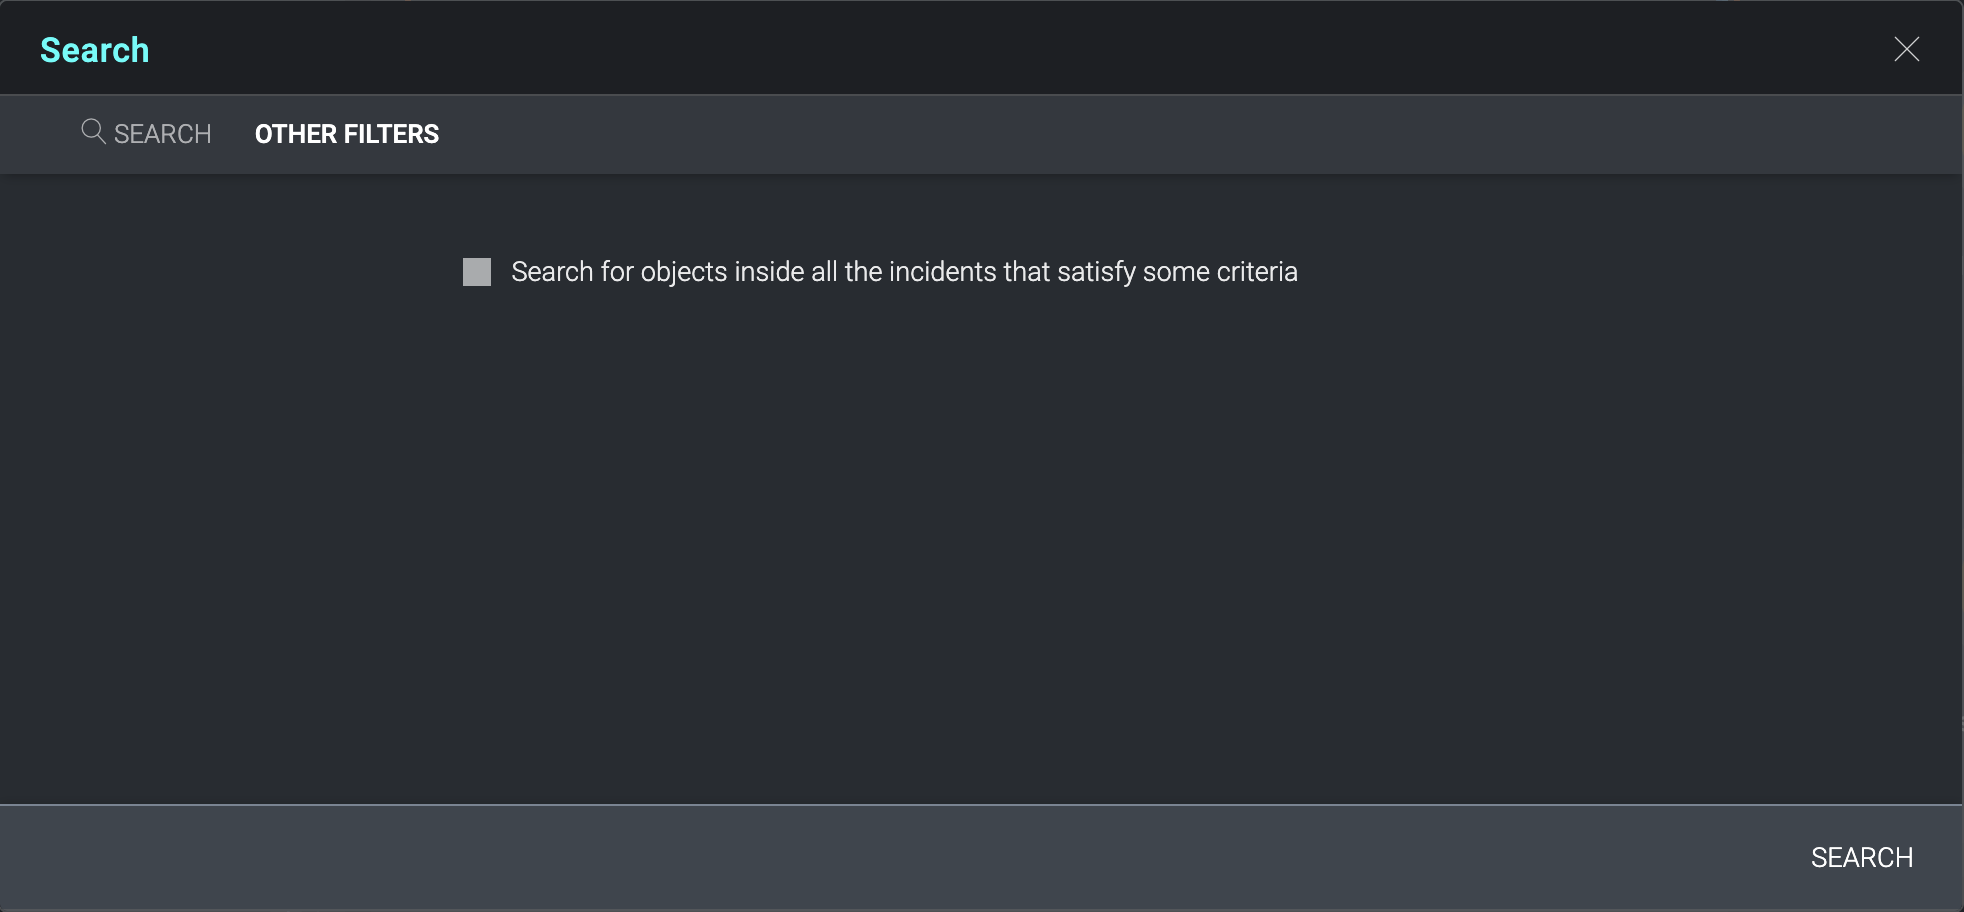
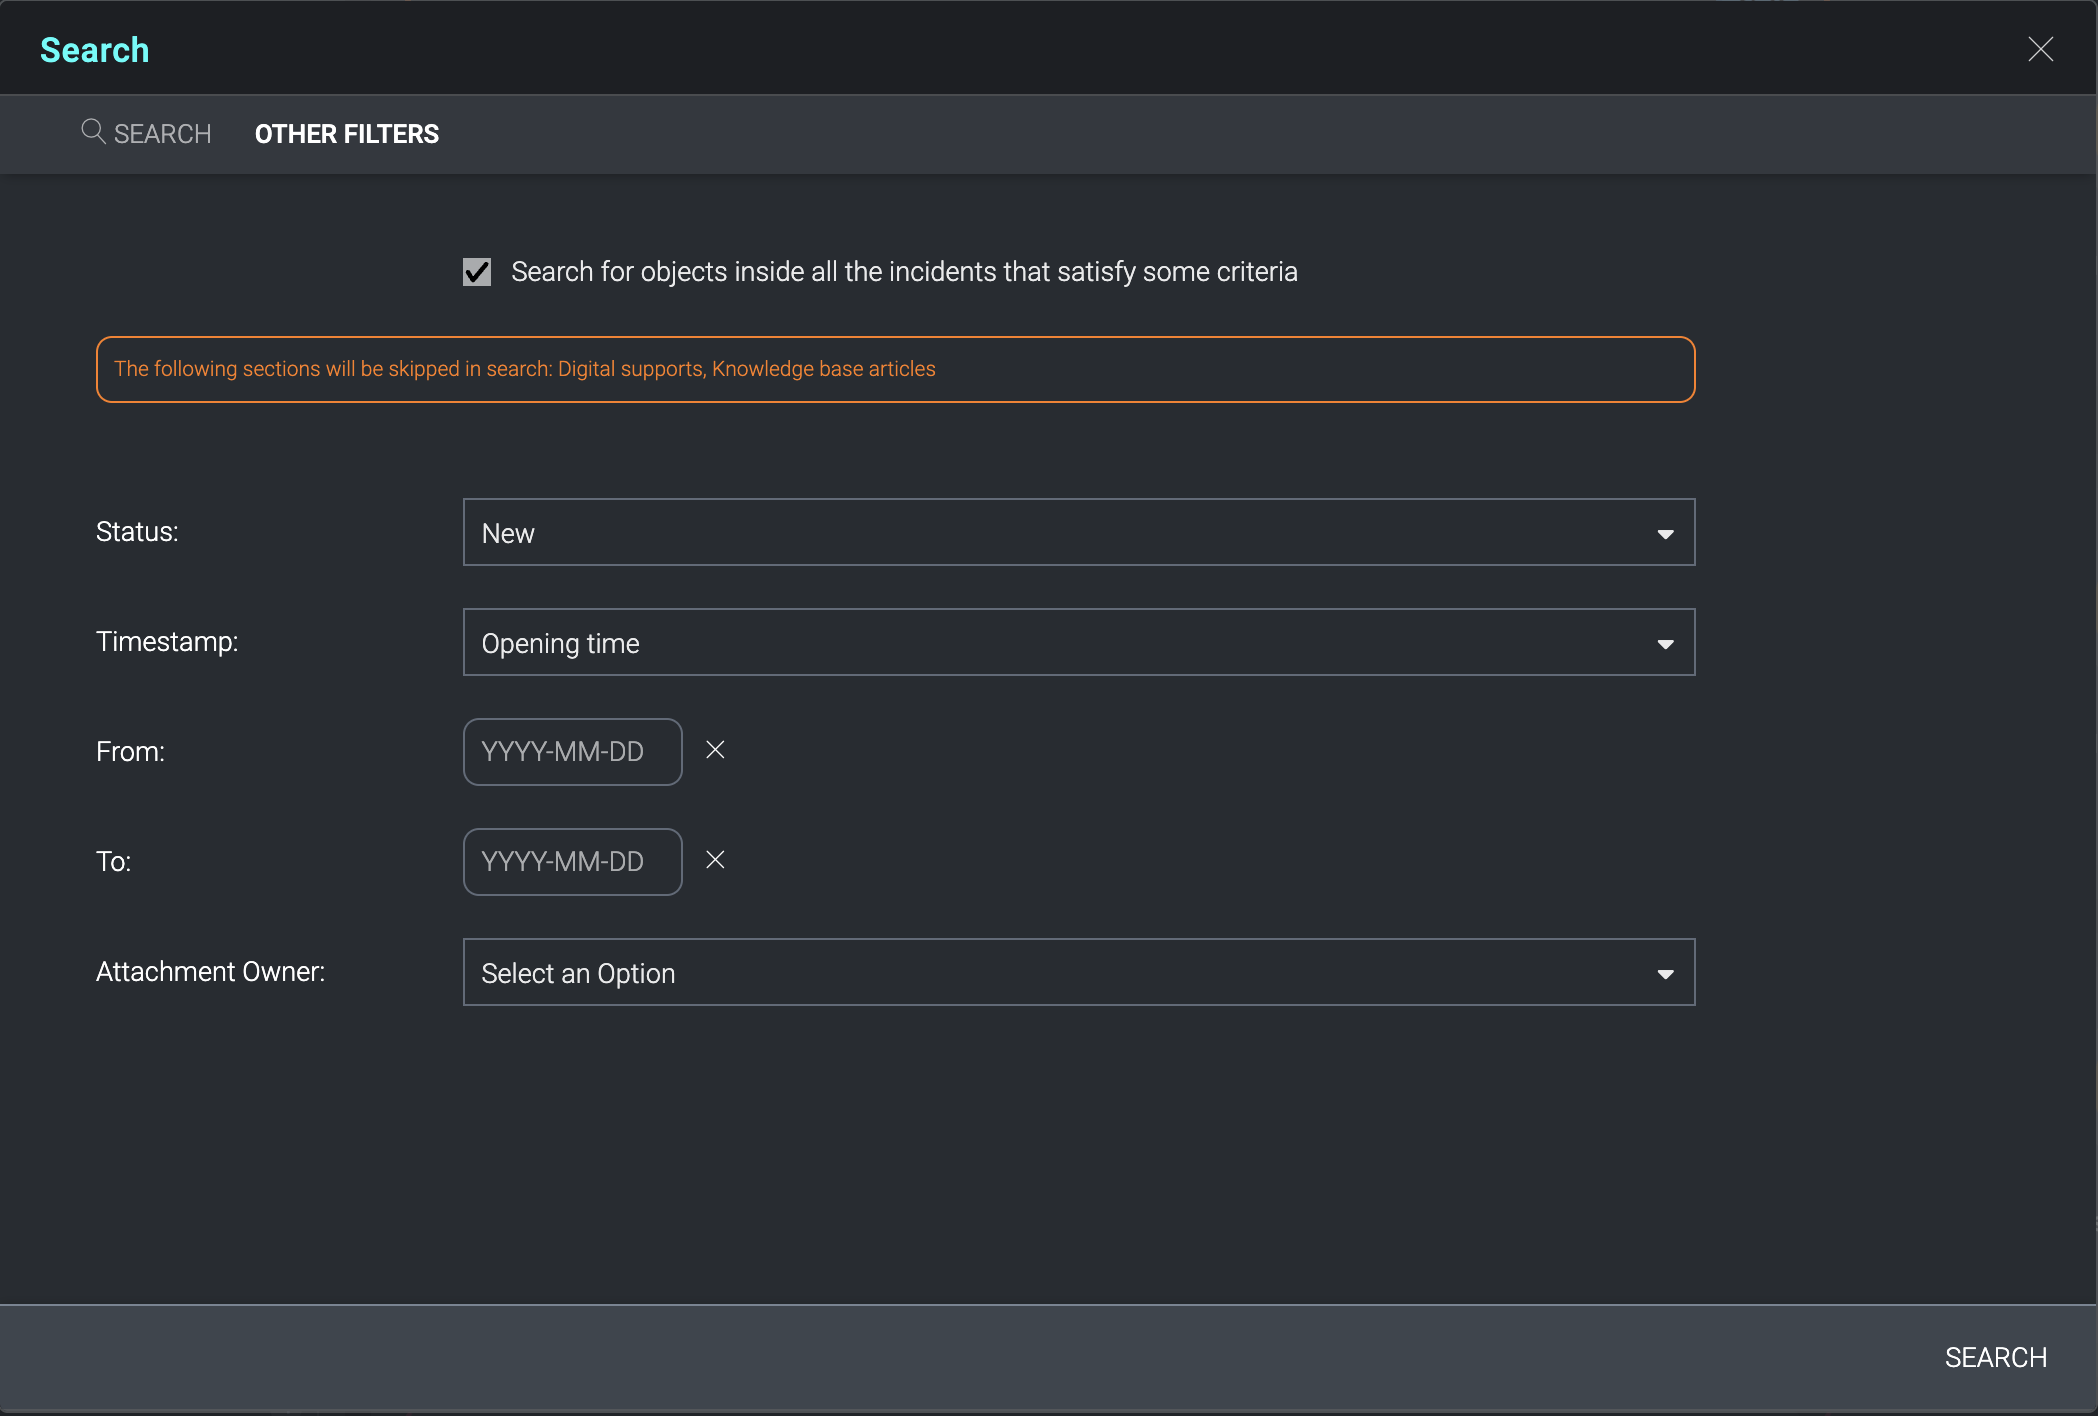
The Other Filters tab permits a more targeted selection of search criteria. Targeted searching does not extend to the data inside Digital Support or Knowledge Base articles.
When a search result is located within an incident, the incident number will be displayed in the Incident column. Clicking on the incident number will open the incident in a new window. Clicking on the arrow at the end of each search result will display the details of the individual search result in the current window. Search results may also be exported to a PDF file by clicking on Export PDF at the bottom of the search results window.
Automation
The Automation section contains all the functions related to automation and orchestration processes of the Cloud SOAR platform.
To access this section, click the cog icon (![]() ) > Automation.
) > Automation.
See Automation for in-depth information.
Playbook
Playbooks, previously known as Playbooks, are the core of Cloud SOAR's automation capabilities. Playbooks permit administrators to create automated and semi-automated workflows utilizing Cloud SOAR integrations, tasks and a variety of flow control decisions and other actions.
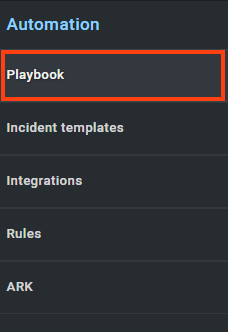
Playbook workflows can be configured to execute automatically without human intervention, or can be executed in an interactive mode, where user input is required to authorize predefined actions.
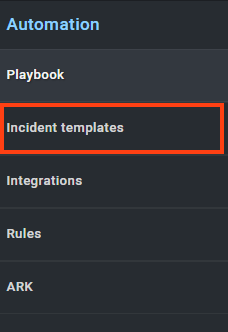
Incident Template
Incident Templates allow you to define a certain number of incident attributes that will automatically be set each time an incident is generated based on the template. This may include type, classification, incident assignment, playbooks or any other incident attribute.
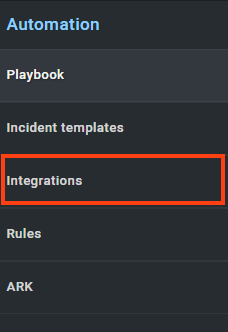
Integrations
The Integrations section allows administrators to configure bidirectional integrations with third-party technologies, as well as view the supported actions for each integration. In addition, this section allows administrators to manage custom scripts, which can be written in Python, Perl, PowerShell or Bash.
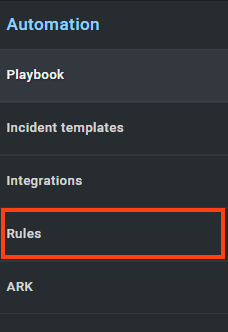
Rules
The Events Automation tab enables you to establish any daemonized integration rules to define what occurs when data is received from each of these sources. These rules allow specific data to be parsed from the incoming data sources and the acted upon automatically or through manual actions.
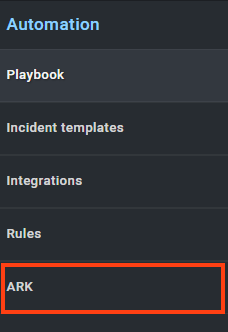
ARK
ARK or Automated Responder Knowledge is the Machine Learning component of Cloud SOAR which implements the Supervised learning in Case-Based Reasoning (CBR)algorithm.
CBR solves new problems by adapting previously successful solutions to similar problems, in Cloud SOAR this can be leveraged by analyzing solved incidents to hint steps and procedures to operators in new similar threats.
ARK assists operators during investigations in two main areas: Automatically suggesting/prompting next actions/tasks in Playbooks (until version 5) and Correlation/ Deduplication of similar threats into 1 unique incident.
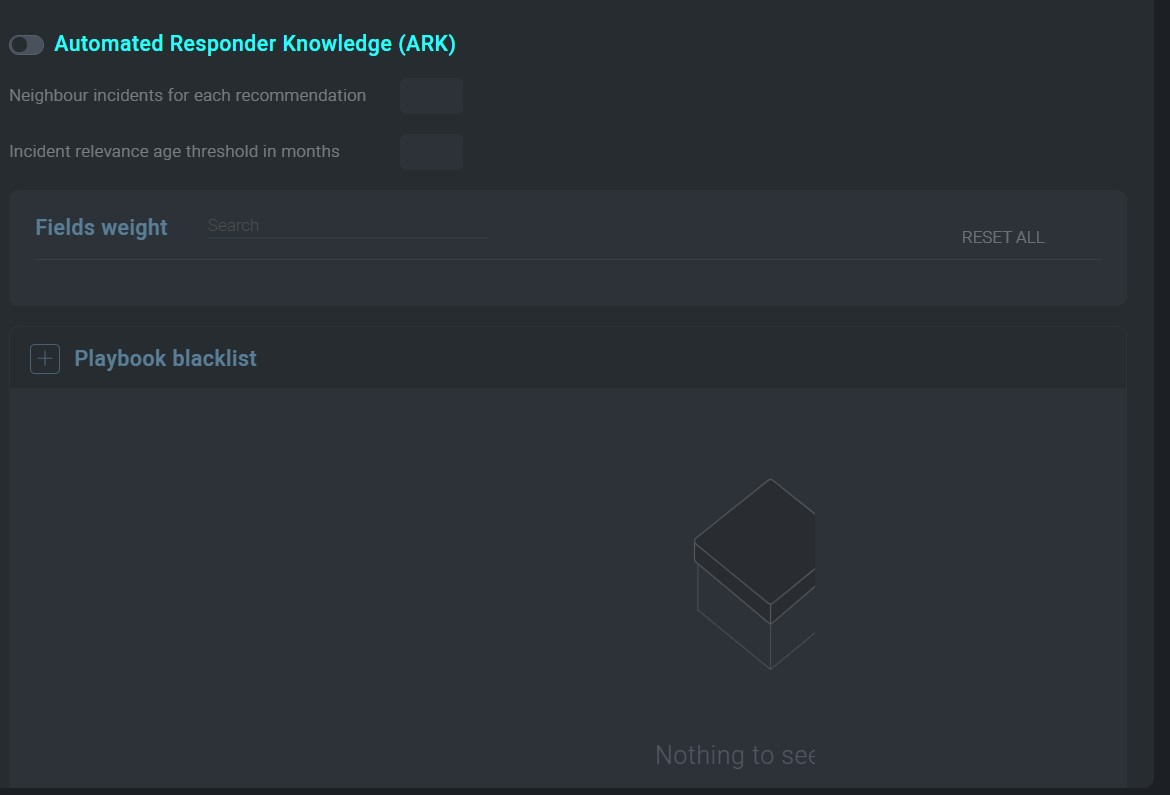
To enable ARK, click the cog icon (![]() ) > Settings > ARK and make sure you have it set to ON.
) > Settings > ARK and make sure you have it set to ON.
From this page, it’s possible to configure also other ARK Settings such as the Neighbor incidents considered for each recommendation and an age relevance threshold. Those two parameters will allow you to tune the incidents that the Machine Learning algorithm will consider.
When an incident is created in Cloud SOAR, the Incident Type field will be the one defining which Playbooks you can attach to that incident.
ARK Usage
ARK has a correlation and deduplication or merging mechanism you can use with the ARK OIF.
ARK 2.0 OIF is a custom Sumo Logic integration which allows investigators to implement a mechanism for deduplication and correlation of ingested alerts and Cloud SOAR incidents.
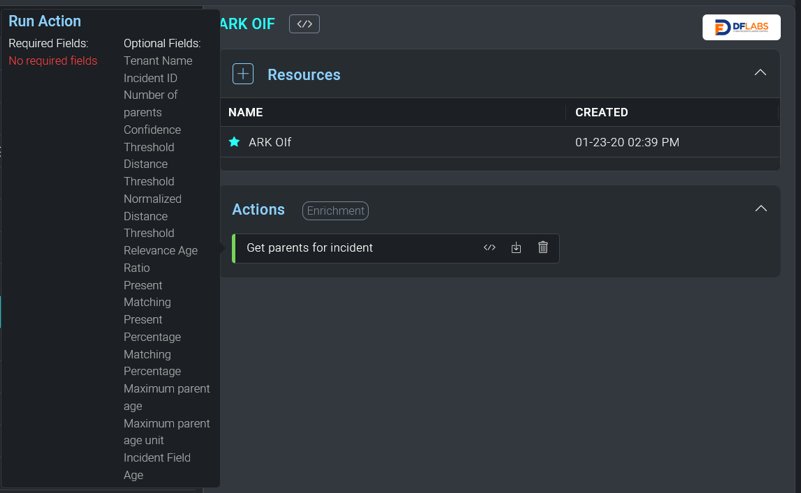
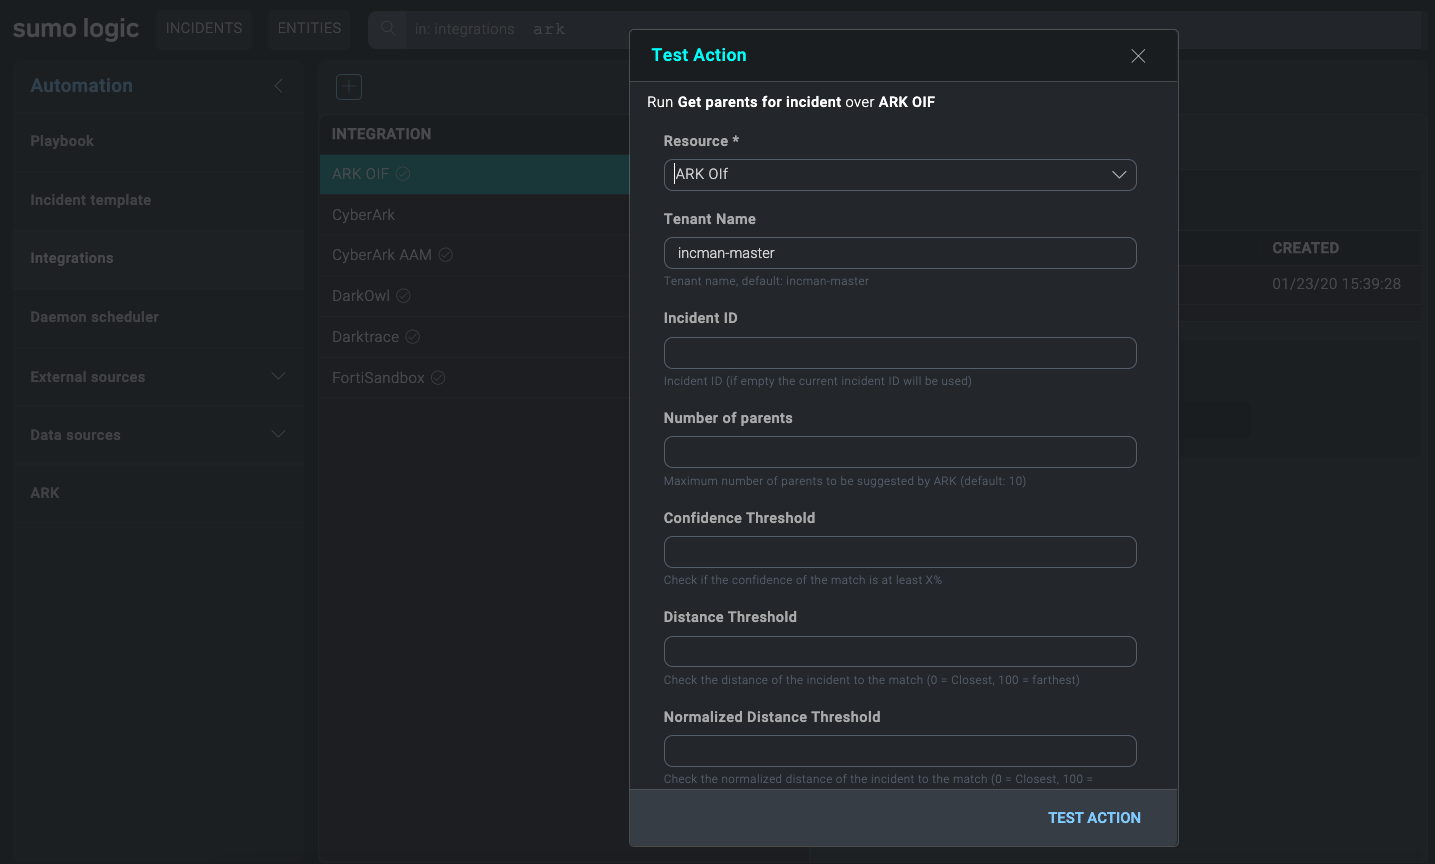
OIF ARK enrichment action “Get parents for incident” allows you to retrieve every incident (as proposed parents) that is similar to the analyzed one.
Each optional field allows you to fine tune the weight of the fields, acceptance thresholds and of the algorithm which needs to be trained and fine-tuned in order to get correct and reliable results.
Alert deduplication or merging can be achieved by utilizing ARK OIF enrichment actions and Cloud SOAR’s unique Triage capability.
Triage is a customizable section which can be used for enriching and preprocessing multiple different scenarios.
By dispatching the ingested alerts into Triage events, Cloud SOAR can automatically enrich each event, deduplicate them based on the logic configured in our associated Playbooks (which can invoke Ark OIF enrichment) and decide if Cloud SOAR should aggregate multiple entries in one unique incident, create multiple incidents for each event or if a similar incident has already been created, to update the existing incident with updated information.
Cloud SOAR can also correlate existing incidents to check if specific data is already present in the Cloud SOAR Database. It is crucial that all merging or deduplication must be done prior to conversion of an alert into incident. For example, a Triage event that allows you to invoke one or multiple playbooks for each Triage event created.
Settings
The Settings section contains several Cloud SOAR administrative functions. To access, click the cog icon (![]() ) > Settings.
) > Settings.

The following sections detail the various setup and configuration options for the Cloud SOAR platform. Although initial configuration can be performed in any order, the following sections are ordered in the suggested order for initial configuration.
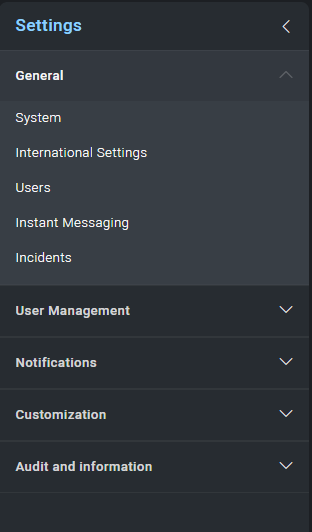
General Settings
The following options can be configured under General Settings:
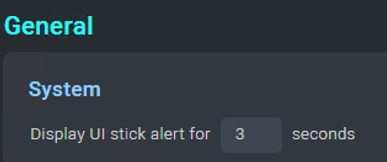
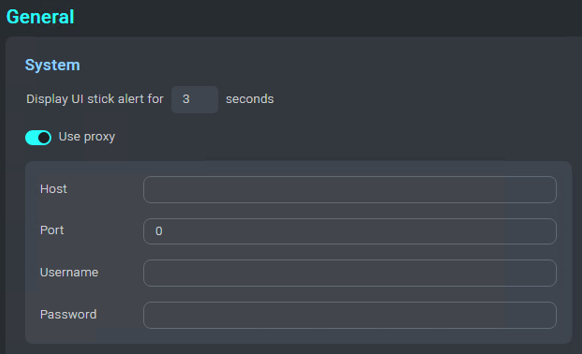
System
- Display Notification __ Number of seconds
- Display Session Timeout __ The Session timeout in minutes will be applied to the next user login.
International Settings
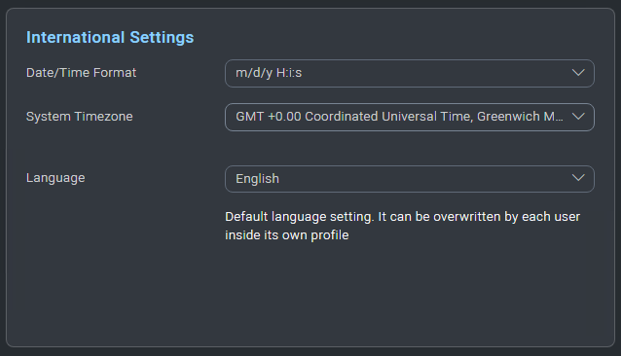
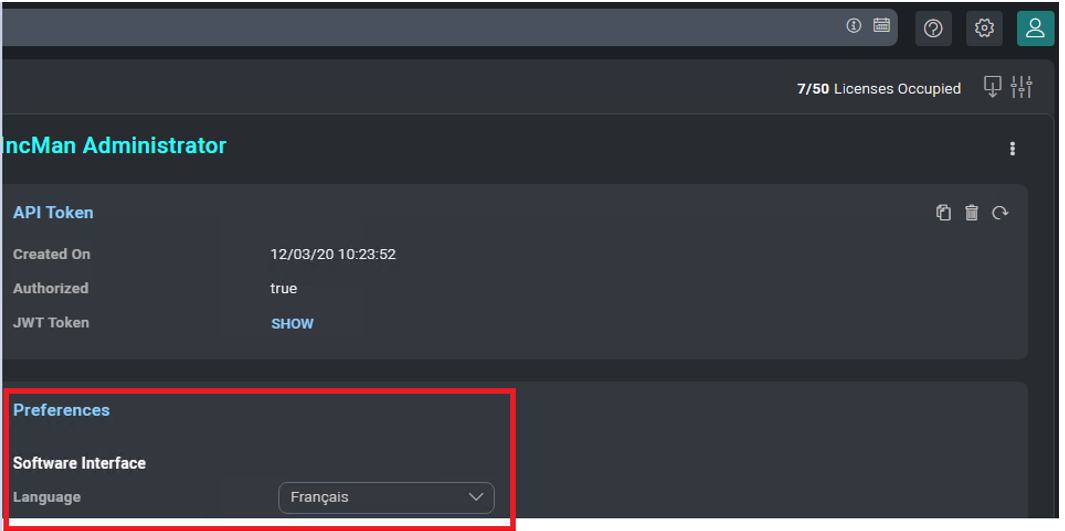
Language Settings
French language is now enabled in Cloud SOAR. It can be enabled under user profile section.
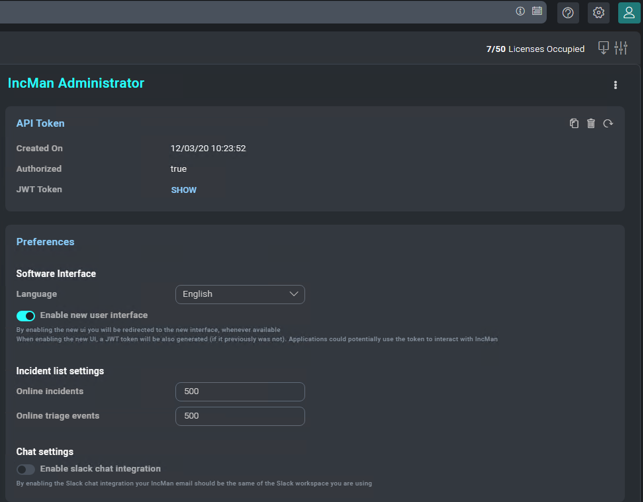
Instant Messaging
Instant Messaging integration can be enabled from here.
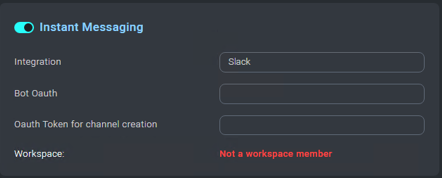
The same integration has to be updated under the user profile configuration.
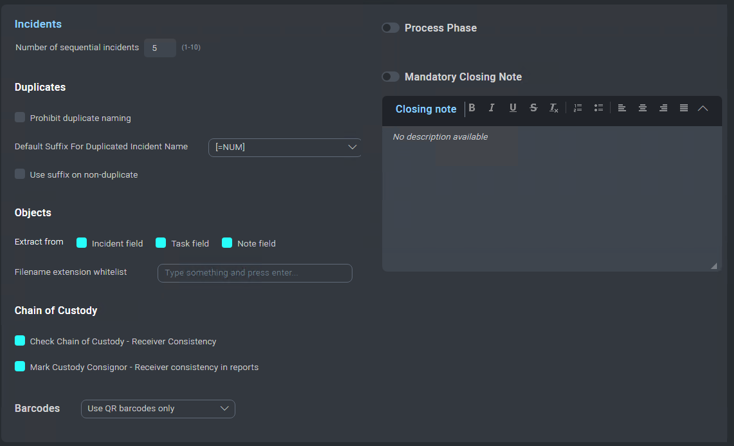
Incidents
There are several Incident settings that you should consider when configuring Cloud SOAR.
Cloud SOAR's Automatic Observables Harvesting feature examines free text areas of Cloud SOAR to gather observables, such as IP addresses, domains and email addresses. When enabled, Cloud SOAR will automatically harvest these observables and add them to the appropriate observables section within the incident. Checking the boxes under Automatically extract Observables elements from will cause Cloud SOAR to perform Automatic Observables Harvesting on the checked sections.
Under the Incident settings, it is also possible to make a final incident note mandatory before the incident can be closed. This can be used to enforce the policy of recording the final disposition of an incident before it is closed.
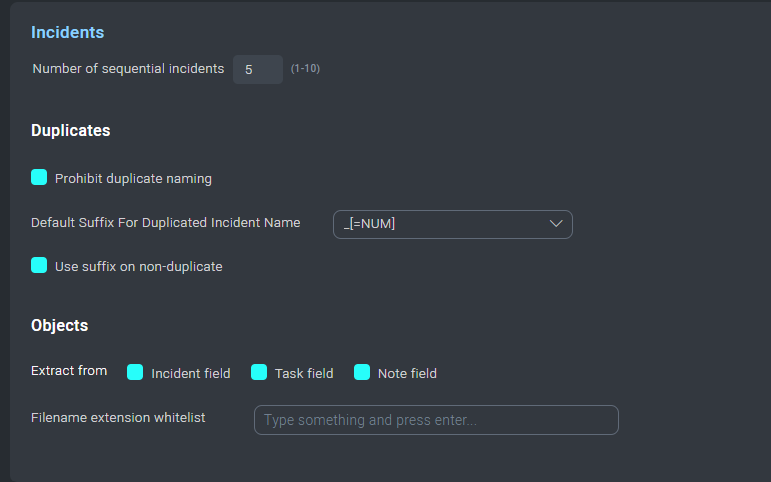
For more information, refer to Incidents and Triage.
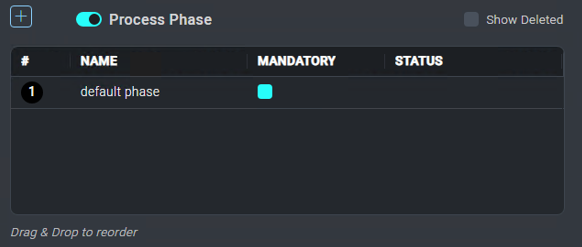
Incident Process Phases
Cloud SOAR allows managers to monitor the progress of incident phases as the incident progresses. These phases and their properties can be configured by administrators in the General settings page.
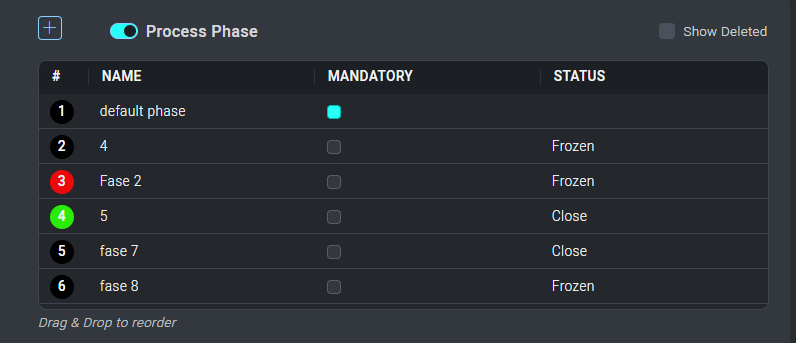
In addition to the phase name, administrators can determine whether the phase is mandatory and the status of the incident when the new phase is reached. Administrators may also disable phase management at the top of the Incident Process Phase section or choose not to show the phase management section in the Incident Details screen.
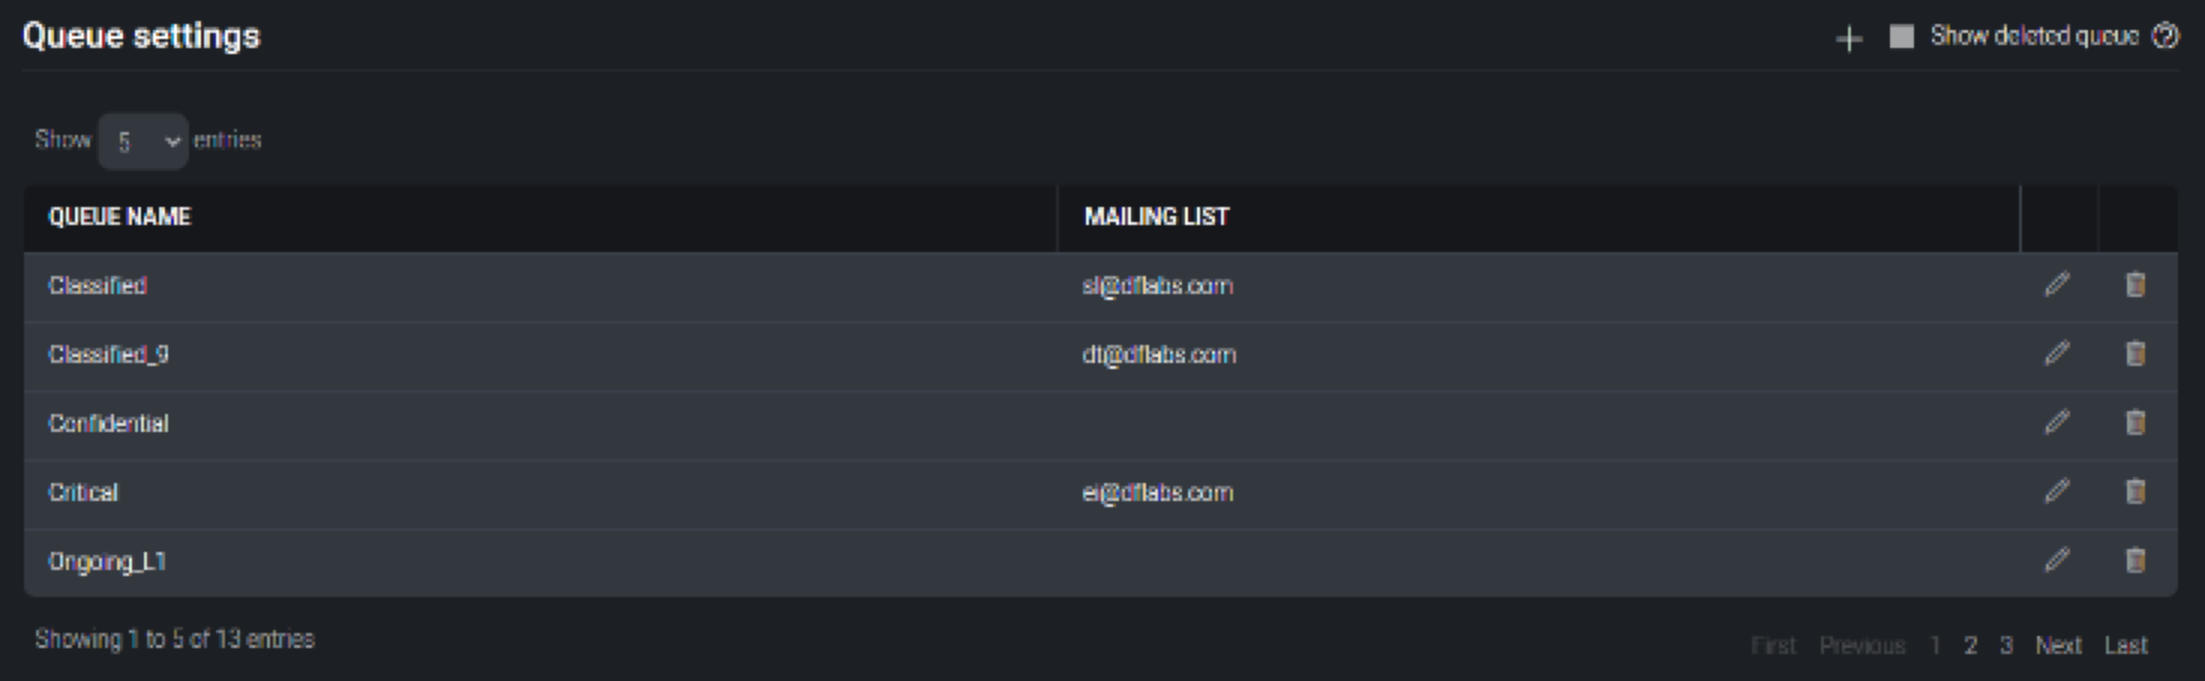
Queue Settings
One or more queues may be configured which can be used to assign incidents to until they are ready to be assigned to users. Queues can be managed at the bottom of the General settings page.
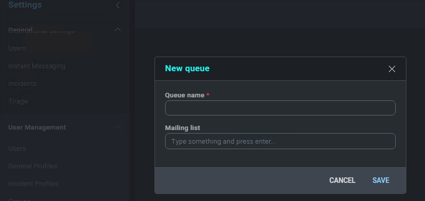
Click the + button in the upper right-hand corner of the queue settings to add a new queue. There are no restrictions on the number, or the scheme used to create queues. Common schemes are to create one general queue, a queue for each analyst tier, or a queue by job function.
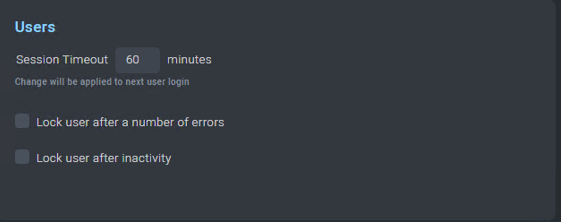
User Settings (Security)
- Lock users after a number of consecutive login errors
- Lock users after their inactivity.
- Possibility to change the password policies
Internet Connection Settings
User Management
When setting up Cloud SOAR, one of the first tasks an Administrator will want to accomplish is adding their user base. Just like Active Directory User and Group management, User Management allows you to create users, groups, and user profiles.
You can create granular role-based access control rules that dictate the permissions users have both within the Cloud SOAR platform and individual incidents. This section also allows administrators to configure Cloud SOAR to work with existing LDAP or Active Directory resources.
Profiles
The Profiles menu contains the different profiles: what a user can see and do within the Cloud SOAR platform and what a user can see and do from within an Incident.
By default, Cloud SOAR comes pre-loaded with Administrator and Read Only profiles. To create a new profile, click the + symbol in the top left corner of the screen.
A new configuration box containing all available permissions within the Cloud SOAR platform are displayed. These permissions are as follows:
- Incident refer to the Main Menu modules highlighted previously. Configuring these permissions will determine what access a user has to different areas of the Incident section.
- Settings refer to the Settings module located in the Global Functions menu. Configuring these permissions will determine what modules under Settings the user can view/modify.
- Search and Reporting refer to the Home section located in the Main Menu.
- Automation refers to the Automation Section in the settings menu. Configuring these permissions will determine for example, what integrations can be viewed or modified
- Entities refers to the Entities section located in the Global Functions menu. Configuring these permissions will determine what the user can view/modify within the entities module.
Groups
Once general and incident profiles have been created, administrators can add these profiles to their appropriate Groups. Navigate to User Management and select Groups.
Click the + again to add a new group. When the configuration screen is displayed, name the new group and assign its profile; click Save to continue. Group privileges override user privileges. If a user belongs to more than one group, the privileges of all groups are merged.
Users
Under the User Management dropdown choose Users and click + to begin adding the user's details.
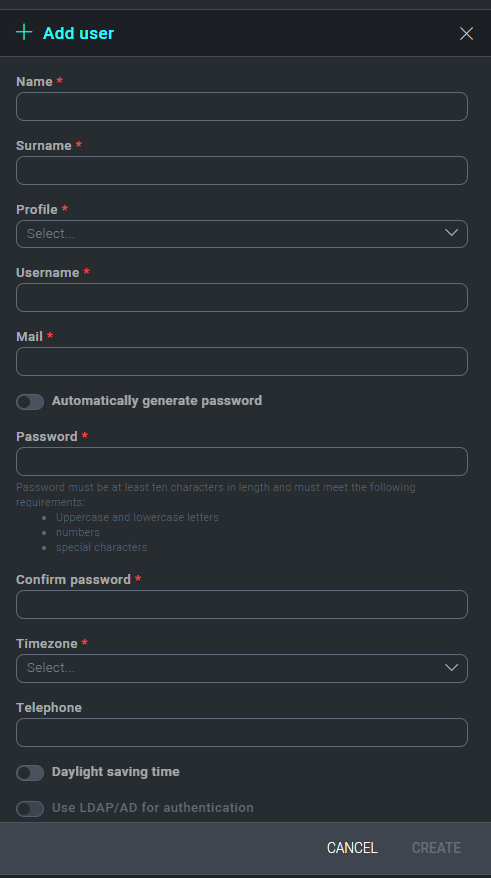
The General tab contains the usual user account attributes such as name, email, address, username, etc. Select the user's Profile from the dropdown list to apply their permissions.
If you'd like to utilize your current Active Directory structure to manage your Cloud SOAR user base via LDAP authentication, select Use LDAP/AD for Authentication.
LDAP/Active Directory Settings
If you'd like to utilize LDAP/AD authentication, you can configure this feature under the LDAP/AD dropdown. This feature links a client's AD/AD infrastructure to the Cloud SOAR platform, ensuring all authentication policies are replicated when signing on in Cloud SOAR.
To enable the LDAP/AD integration, check Enable LDAP/AD Server Integration at the top of the LDAP/AD screen.
Insert the Host and Port Information for the LDAP/AD Server.
Port 389 is typically used for a standard communication port and 636 for a secure port.
Next, configure your reference field. References fields will work from 2 bits of data; SAMAccountName for a username or the individuals email address.
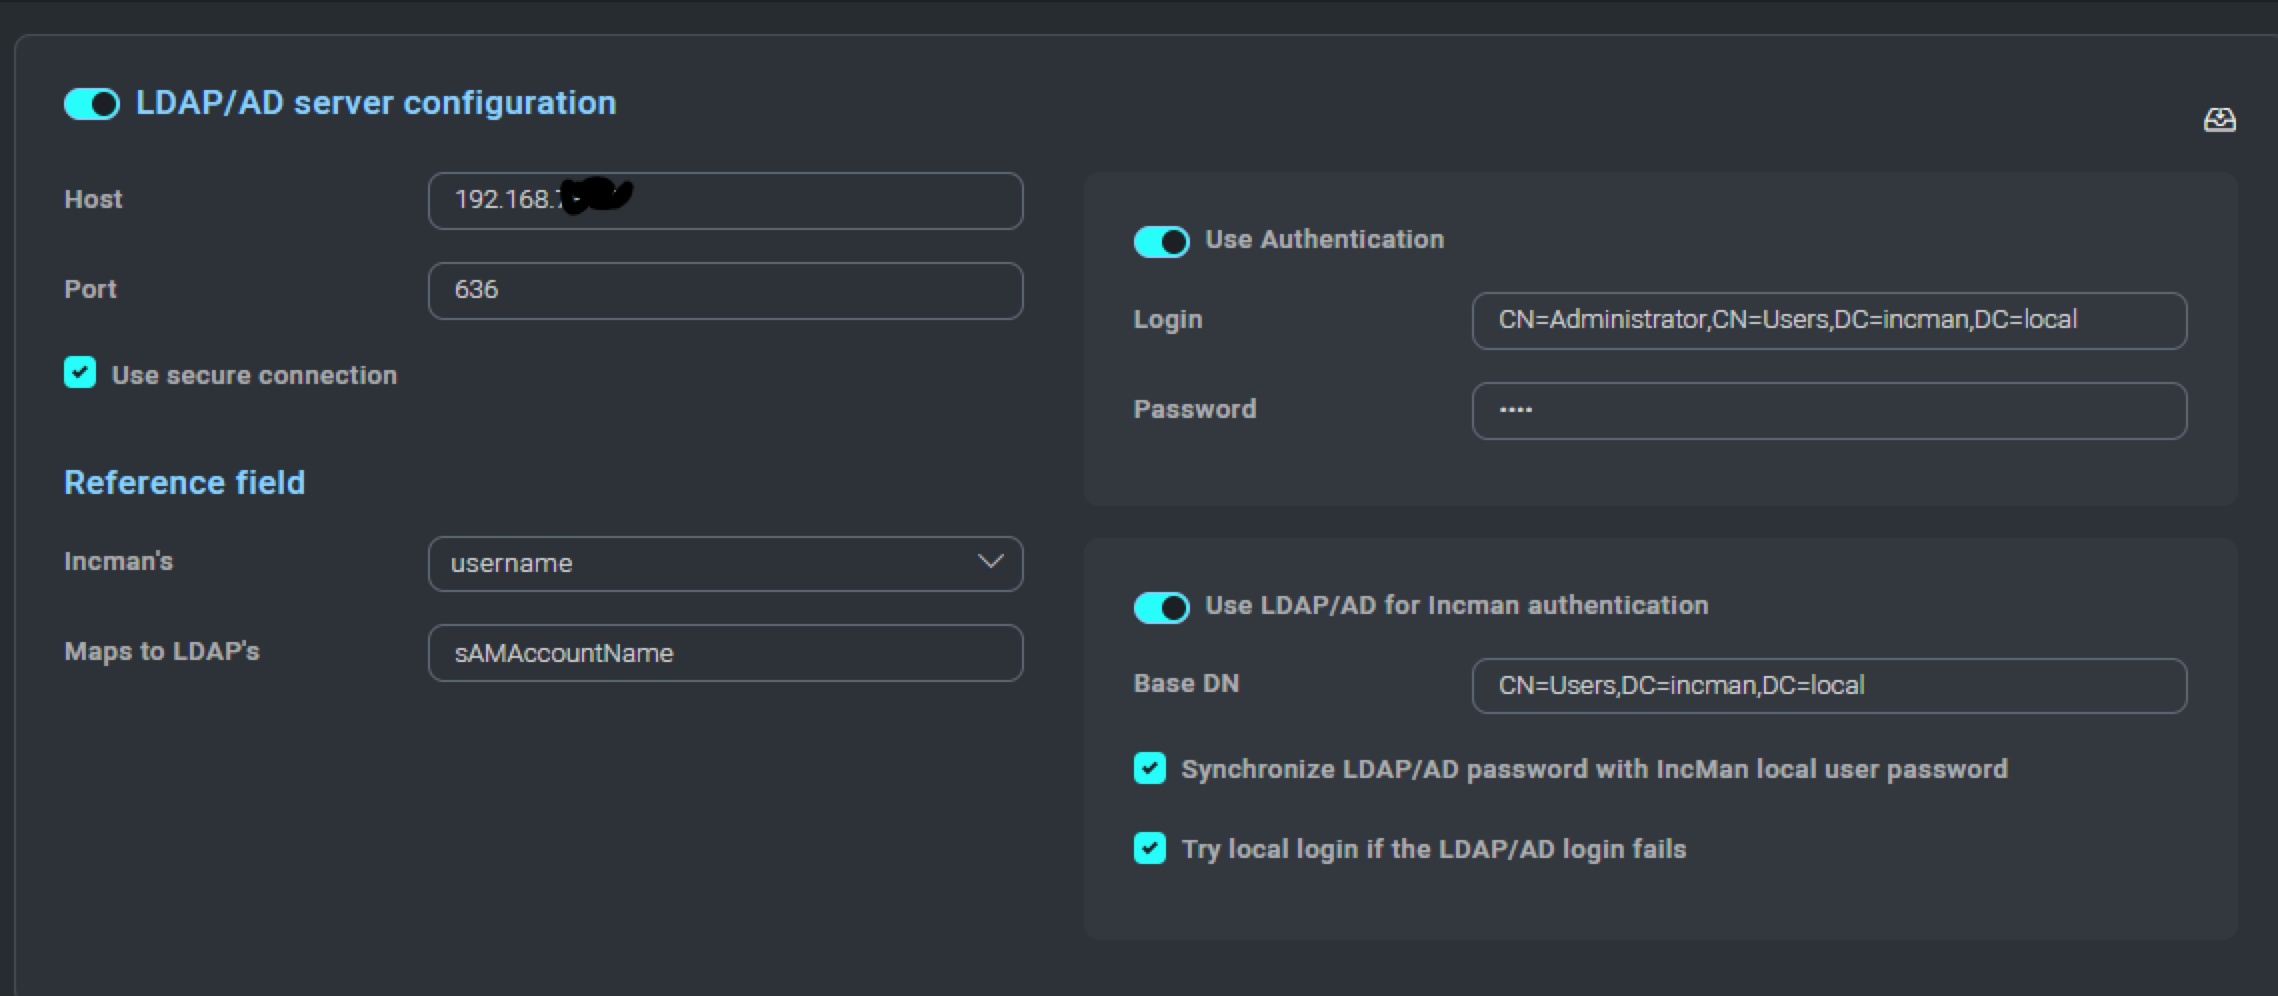
Authentication may or may not be required depending on user permissions on the AD/LDAP server. If your LDAP/AD server permissions require it, ensure that a user with the appropriate permission is used here.
Designate the domain component that we want Cloud SOAR to connect with when retrieving the authentication credentials. Configure which domain components will be accessed in the Base Distinguished Name (DN) field. You may also designate a failover local authentication if the LDAP/AD server would become unreachable. Be sure to include domain components that reflect the OU containing the user needing authentication.
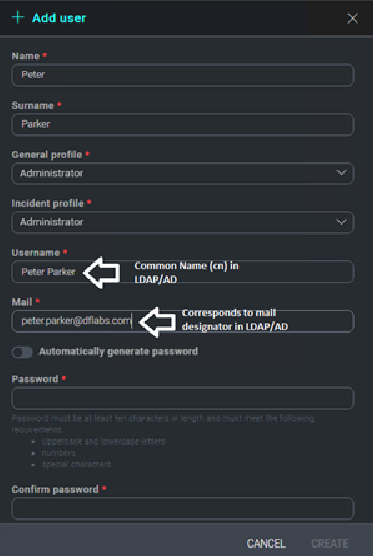
Configuring Cloud SOAR Users to Work with LDAP/AD
During user creation utilize the same naming/email schema that you have in your LDAP/AD Tree. In the example below The Cloud SOAR username, Peter Parker, would correspond to the CN for the user in your LDAP/AD tree.
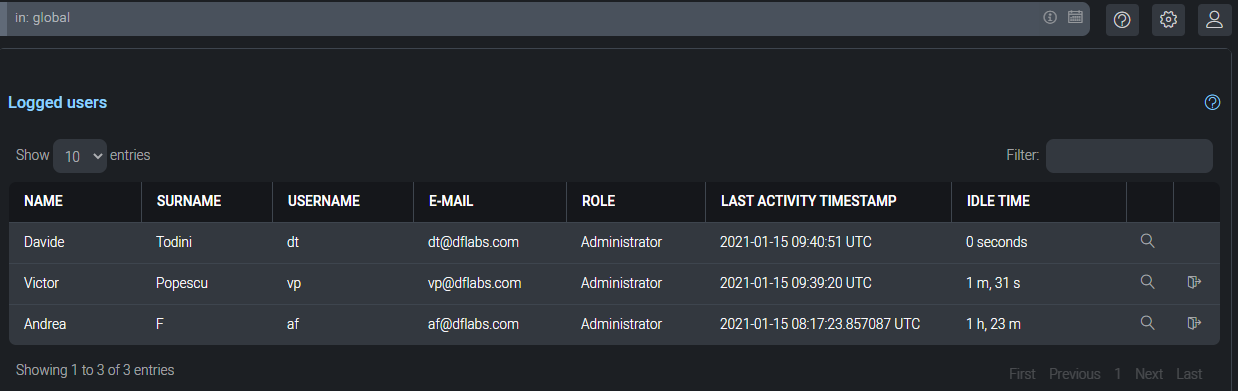
Logged Users
The Logged User section of the Cloud SOAR platform contains session information for the user who is currently logged on to the Cloud SOAR platform. For administrators of the Cloud SOAR platform, this section will show all authorized user session activity.
Notifications
Cloud SOAR allows administrators to configure notifications to Cloud SOAR users as well as other external users. These notifications can be sent via Cloud SOAR's internal messaging platform, as well as email and SMS. Watcher Groups can also be created, which allows Cloud SOAR to send notifications to those who are not necessarily assigned to an incident when certain conditions are met, such as notifying managers when a high severity incident is created.
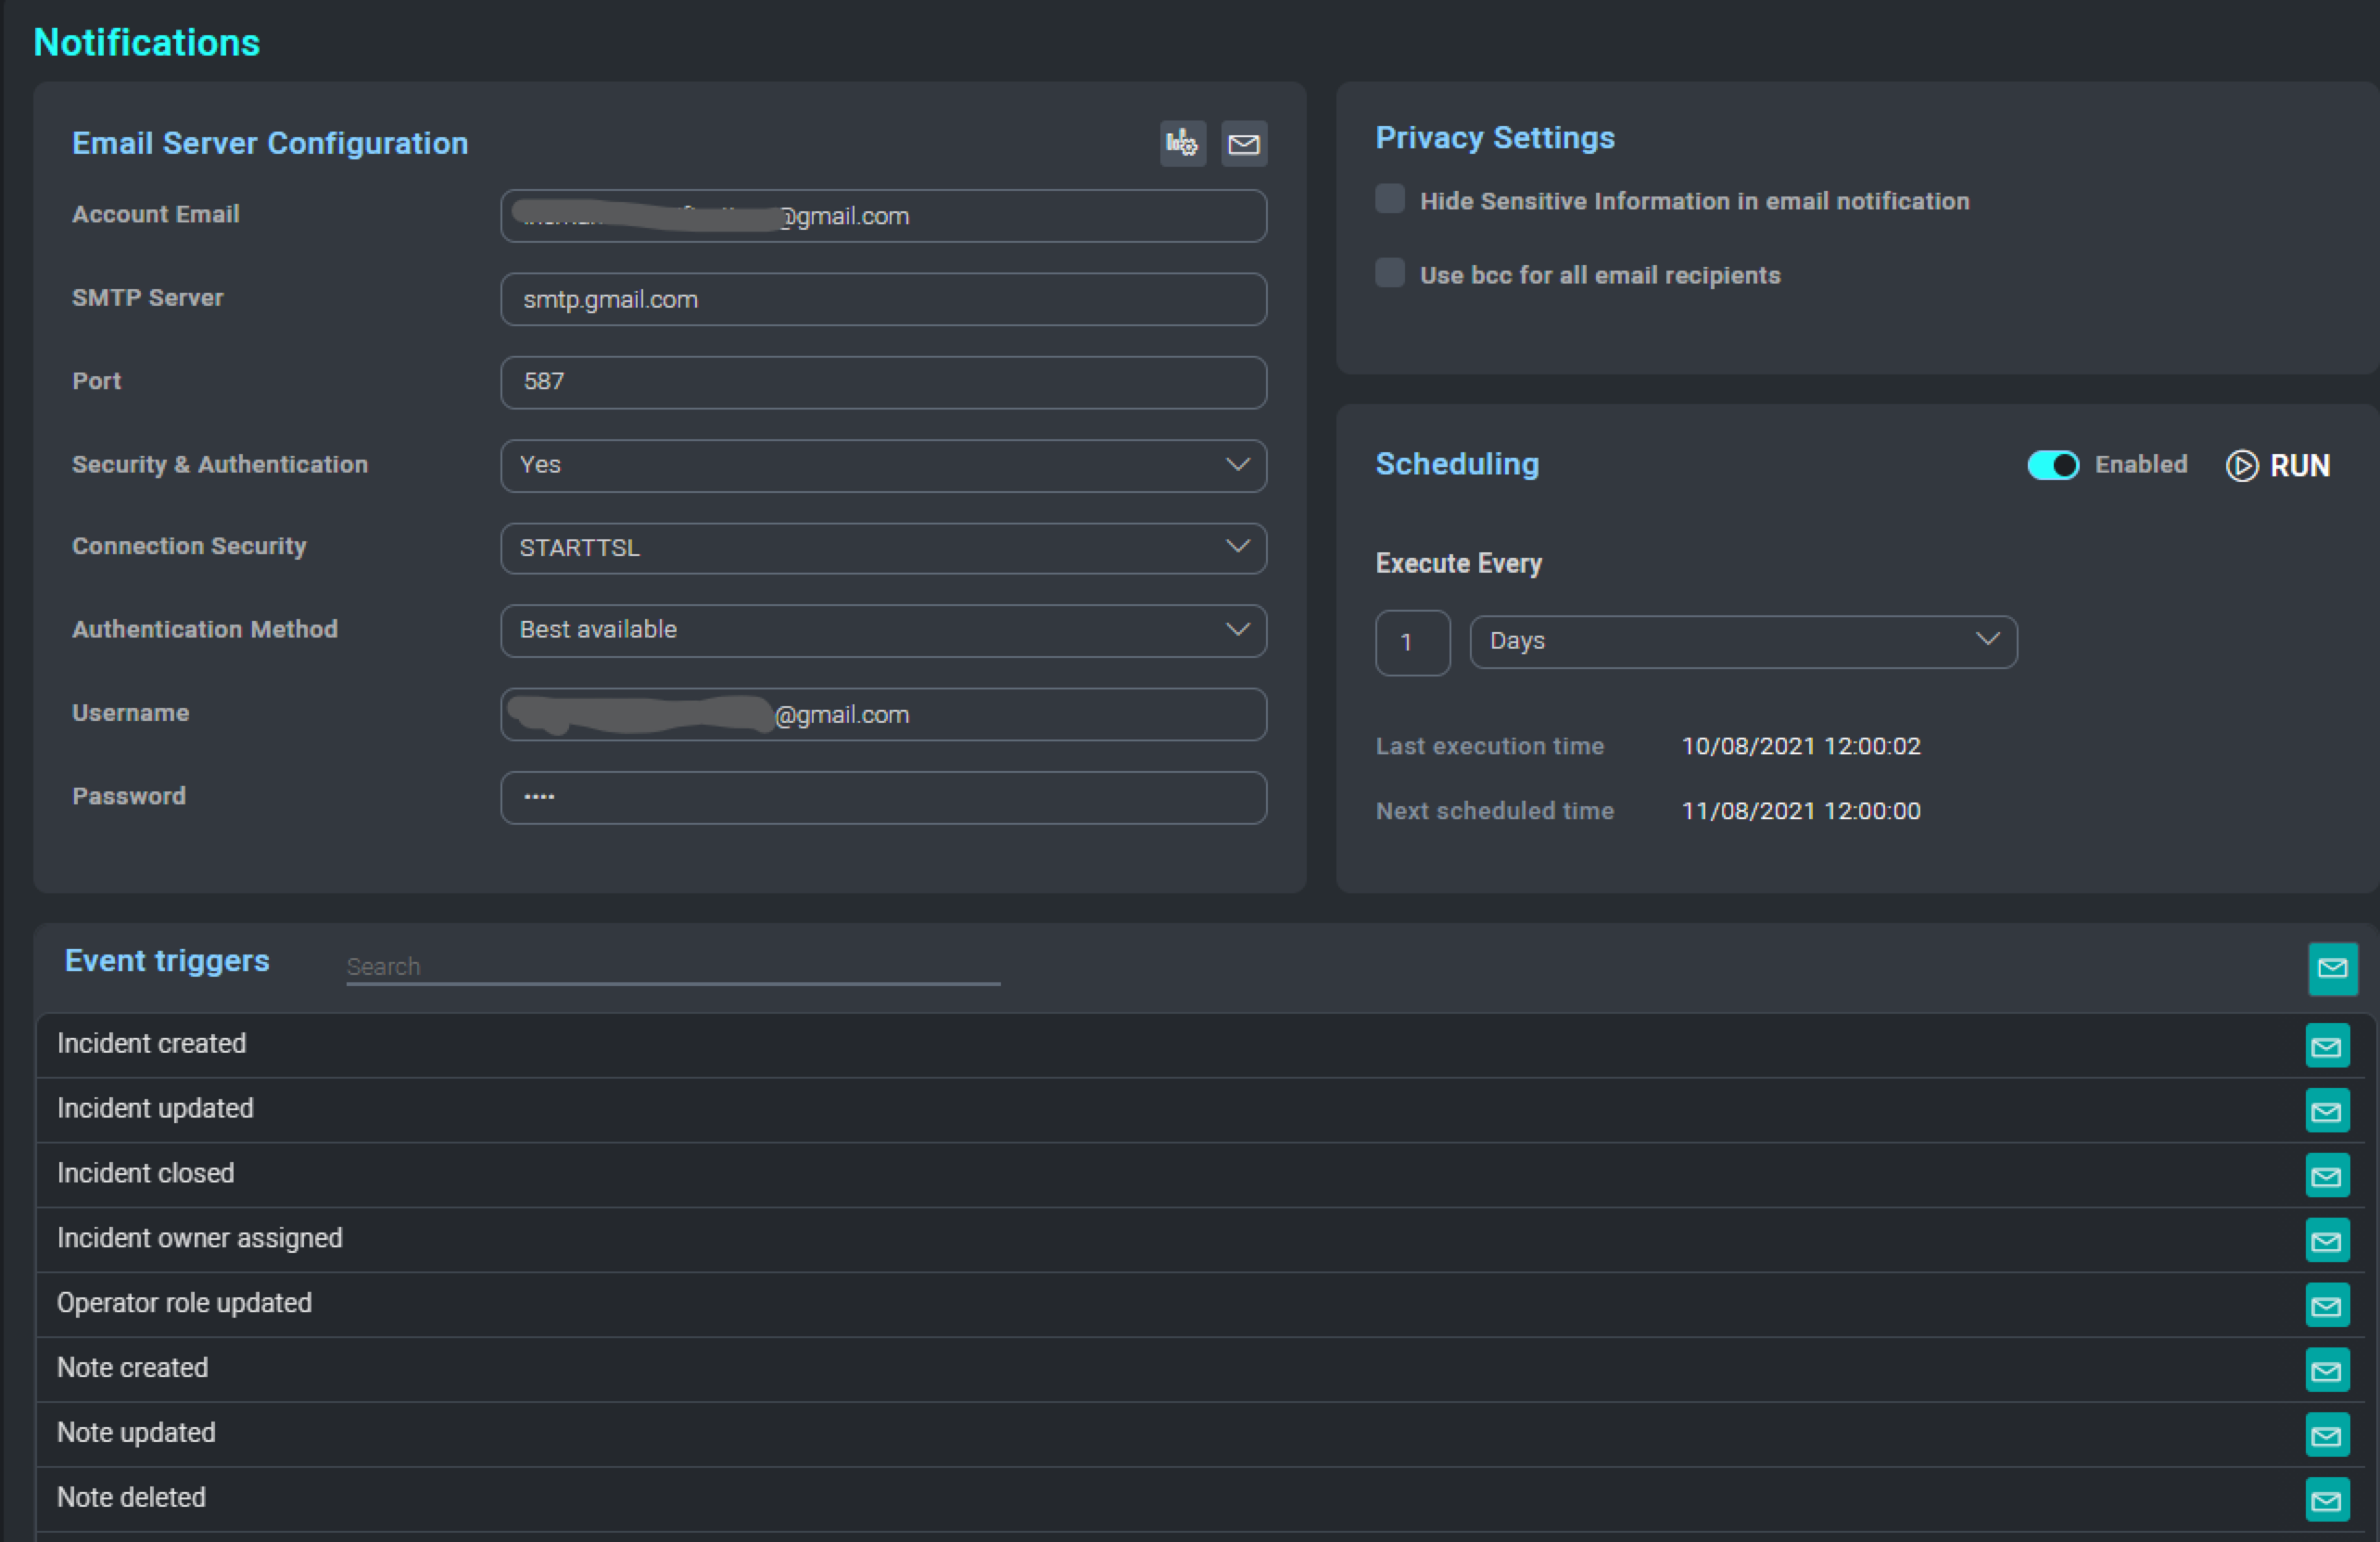
The Notifications selection enables you to configure outbound email (SMTP) settings, and set up text messaging for incident notifications. Notifications can be configured by clicking on Notifications from the Settings menu.
Email Server Configuration
Under the Email Server Configuration tab, users configure outbound mail and confirm privacy settings to fit their organization's needs. Once these options are set, Administrators can configure which types of events should trigger notifications to which users and by what means.
Mail Notification Queue
The Mail Notification Queue shows the status of all email notifications sent by Cloud SOAR.
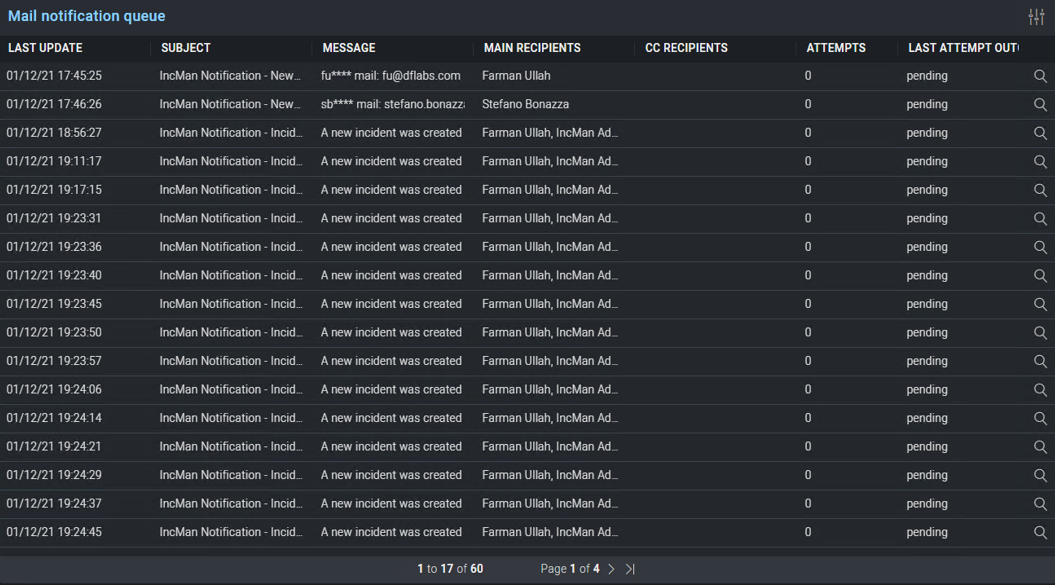
By navigating to the Mail Notification Queue, you can view any delivery failures, the details of the original notification, as well as have the options to resend or delete the notification.
Customization
Under the Customization dropdown, you will find an arsenal of tools at their disposal. These tools will assist in the creation of reports, custom fields, and incident elements, just to name a few. The full list of features is listed below.
Incident Reports
Report Templates allow you to build their own reports by selecting various components of an incident they wish to include in the report.
Custom Fields
Custom Fields allows administrators to edit existing fields as well as add new fields for almost every section of Cloud SOAR. All Cloud SOAR sections which permit custom fields are displayed on the left-hand side of the page. Clicking on any one of these sections will display all current fields for that section on the right-hand side of the page. Any existing field may be edited, to include changing the name or adding list values. The only attribute which cannot be changed is the type of the field, such as text or date. New fields may also be added from this page.
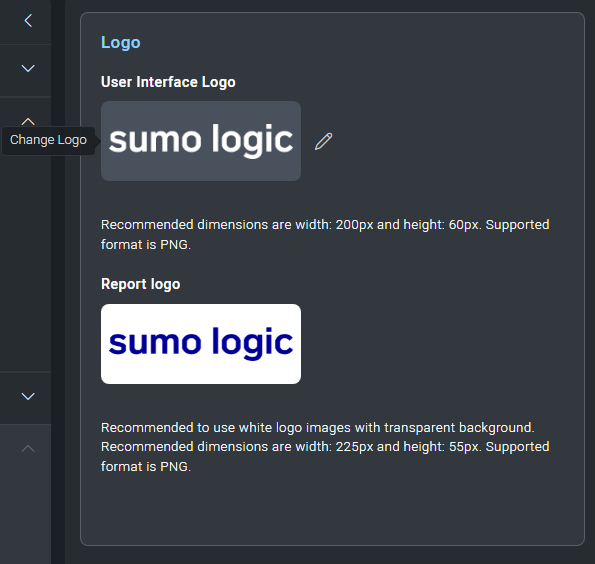
Logo
The Logo section allows administrators to customize both their Cloud SOAR user interface and reports with the logo of their company or the logo of their clients. This can be done by simply uploading their image in the specified .PNG file format size.
Incident Label
The Incident labels section allows an administrator to define labels for the different types of incidents that will be investigated. These labels can also be created during the automation rule and incident template creation process which will be explained in later sections.
Triage
Cloud SOAR's Triage module ingests events via the Cloud SOAR API and can be used to triage events which may be unverified or have a low confidence level before they are converted to incidents. The Triage module can be completely customized for use cases from financial fraud to network IDS alerts.
Audit and Information
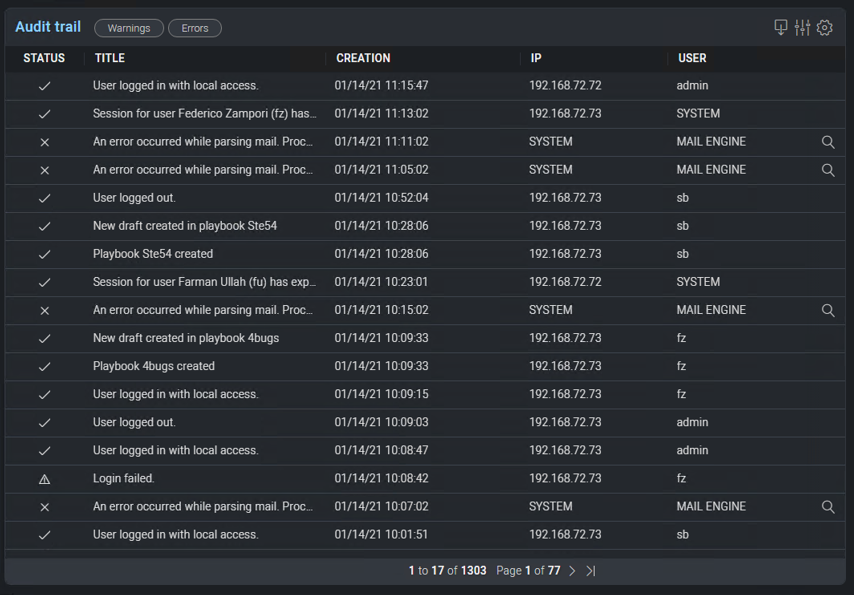
All audit and licensing information can be found under the Audit and Information tab.
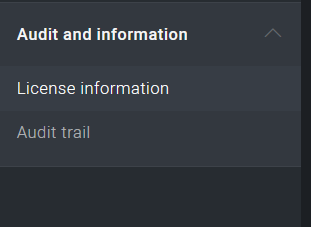

Cloud SOAR audit logs and activity can be reviewed under the Audit Trail section of the menu. You can filter through activity displaying only errors and warnings or build their own filters for review. Log rotation settings and the ability to export audit findings can be controlled from the Audit menu at the top of the screen.
The Automation Bridge Monitoring section displays the status of the automation bridges configured.
User Settings
The user icon in the upper right-hand corner allows you to view their profile and settings, as well as log out of the platform.
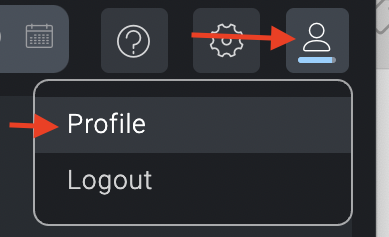
The Profile button will take you to the User Management section, where administrators can add and remove users, lock a user's account, force a user account to change their password or set its expiration period.
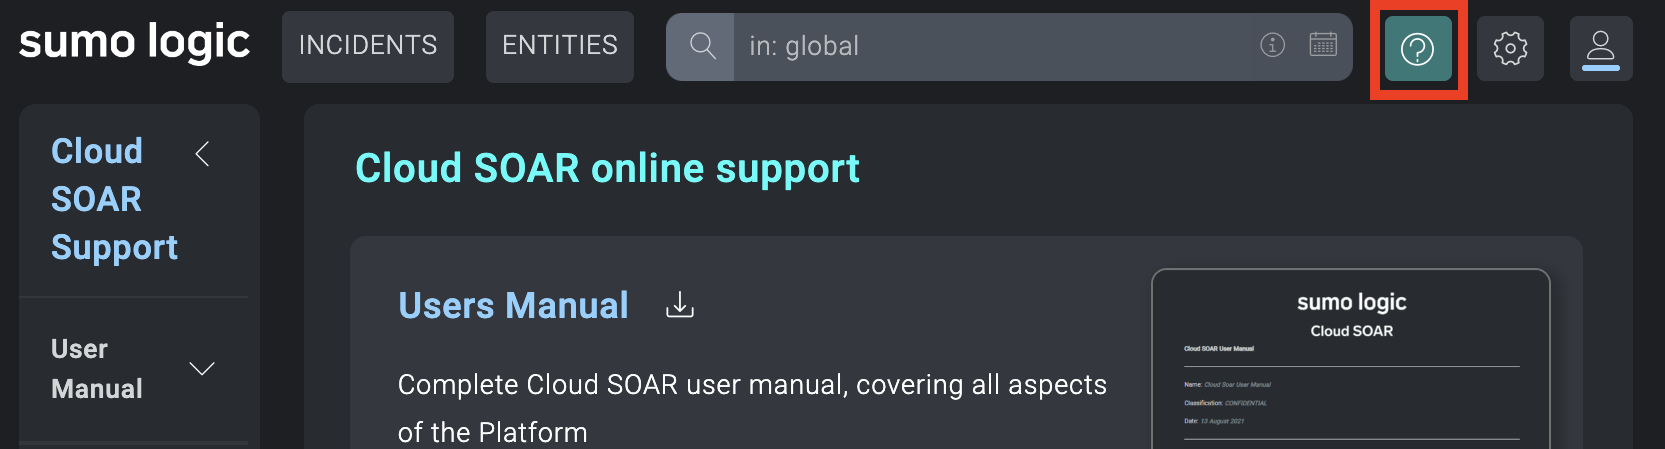
Support
Under the Support section, you can find valuable information such as the Cloud SOAR user manual, API Integrations, the Integration Framework, a link to our Community portal, as well as contact Sumo Logic for other support issues.
To access, click the question mark icon in the top nav.