Cloud SOAR Automation
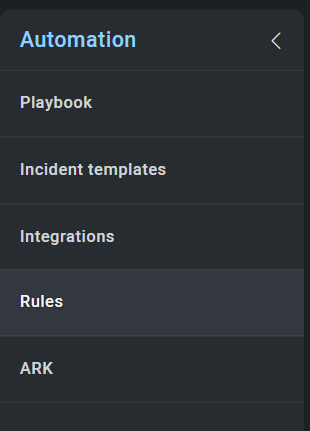
The Automation section contains the configuration tools for Cloud SOAR's automation and orchestration features. These tools include Cloud SOAR's Open Integration Framework (OIF), automation rules sets, and playbook editor as well as incoming event details.
To access this section, click the cog icon (![]() ) > Automation.
) > Automation.
App Central
App Central allows you to unlock the full Cloud SOAR potential. From this section, you can search and add new integrations, new playbooks, and even complete use cases with all the components needed (automation rules, integrations and playbooks) in one place.
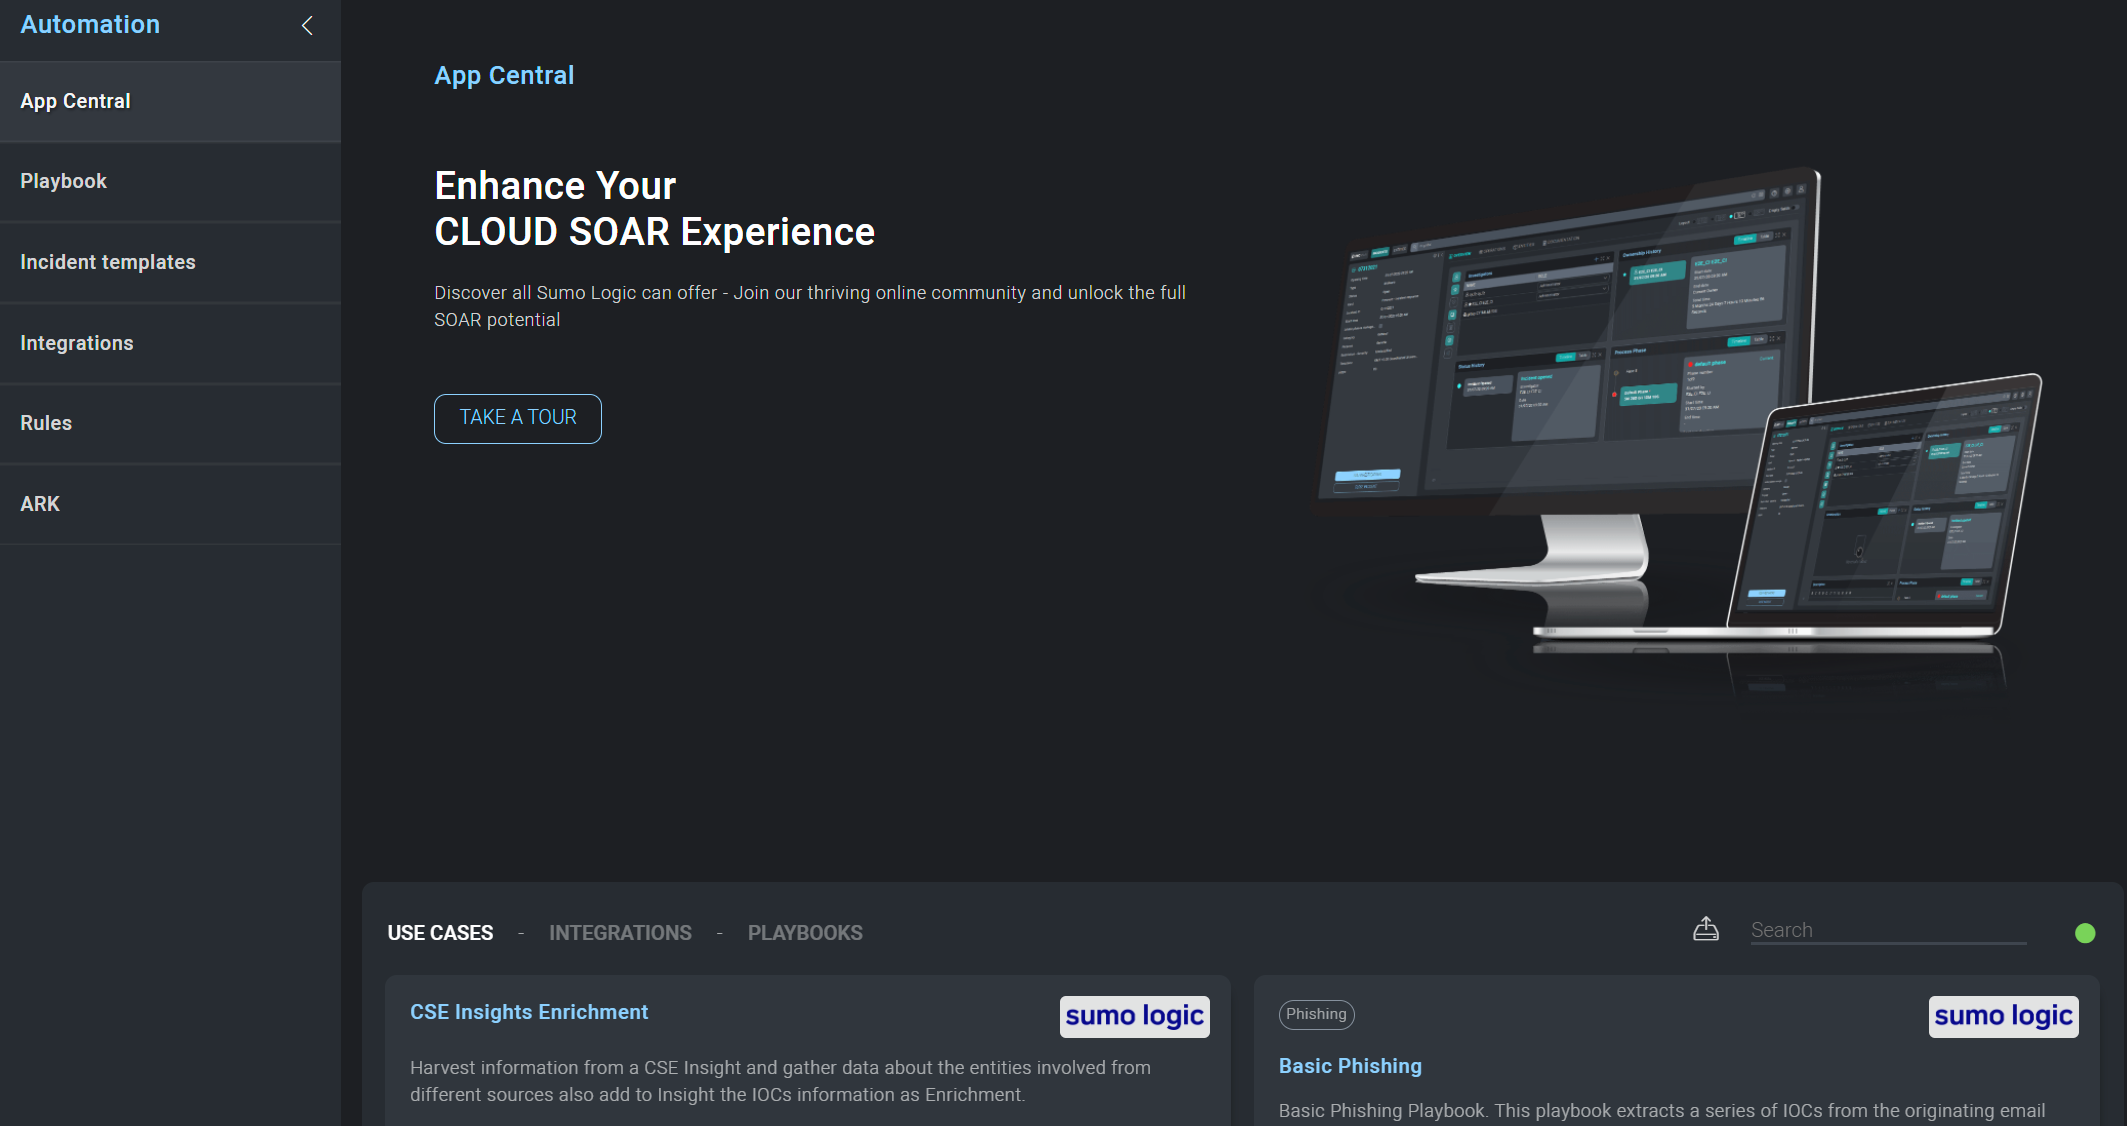
While browsing available integrations, you can check the details and all the actions available and install it.
Playbook
Create Custom Playbooks in Cloud SOAR.
A Playbook is a predefined set of actions or tasks to respond to a certain event or incident type. The creation and utilization of playbooks can allow an organization's teams to respond to an incident in a consistent, focused, and repeatable fashion.
Playbooks are automated workflows which can be configured to execute automatically without user intervention, acting on information from the incident, or can be executed in interactive mode, where user input is required to authorize predefined actions.
To configure a new Playbook, click the cog icon (![]() ) > Automation.
) > Automation.
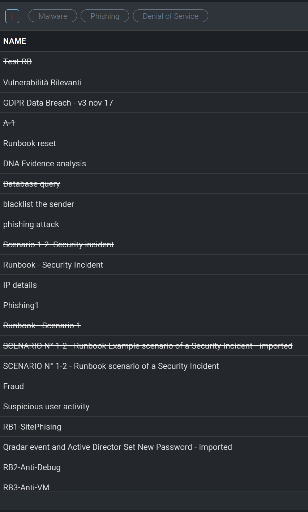
A list of any previously created Playbooks will be displayed on the left-side of the page. Click + to add a new playbook.
A new configuration box will be displayed. Name your new playbook, select the Incident Type to associated with it, and click save to continue. Learn more.
Once the new playbook has been saved, it will be displayed on the left-side of the screen. To begin to configure the new playbook, select it from the list and click the Edit button at the bottom of the screen.
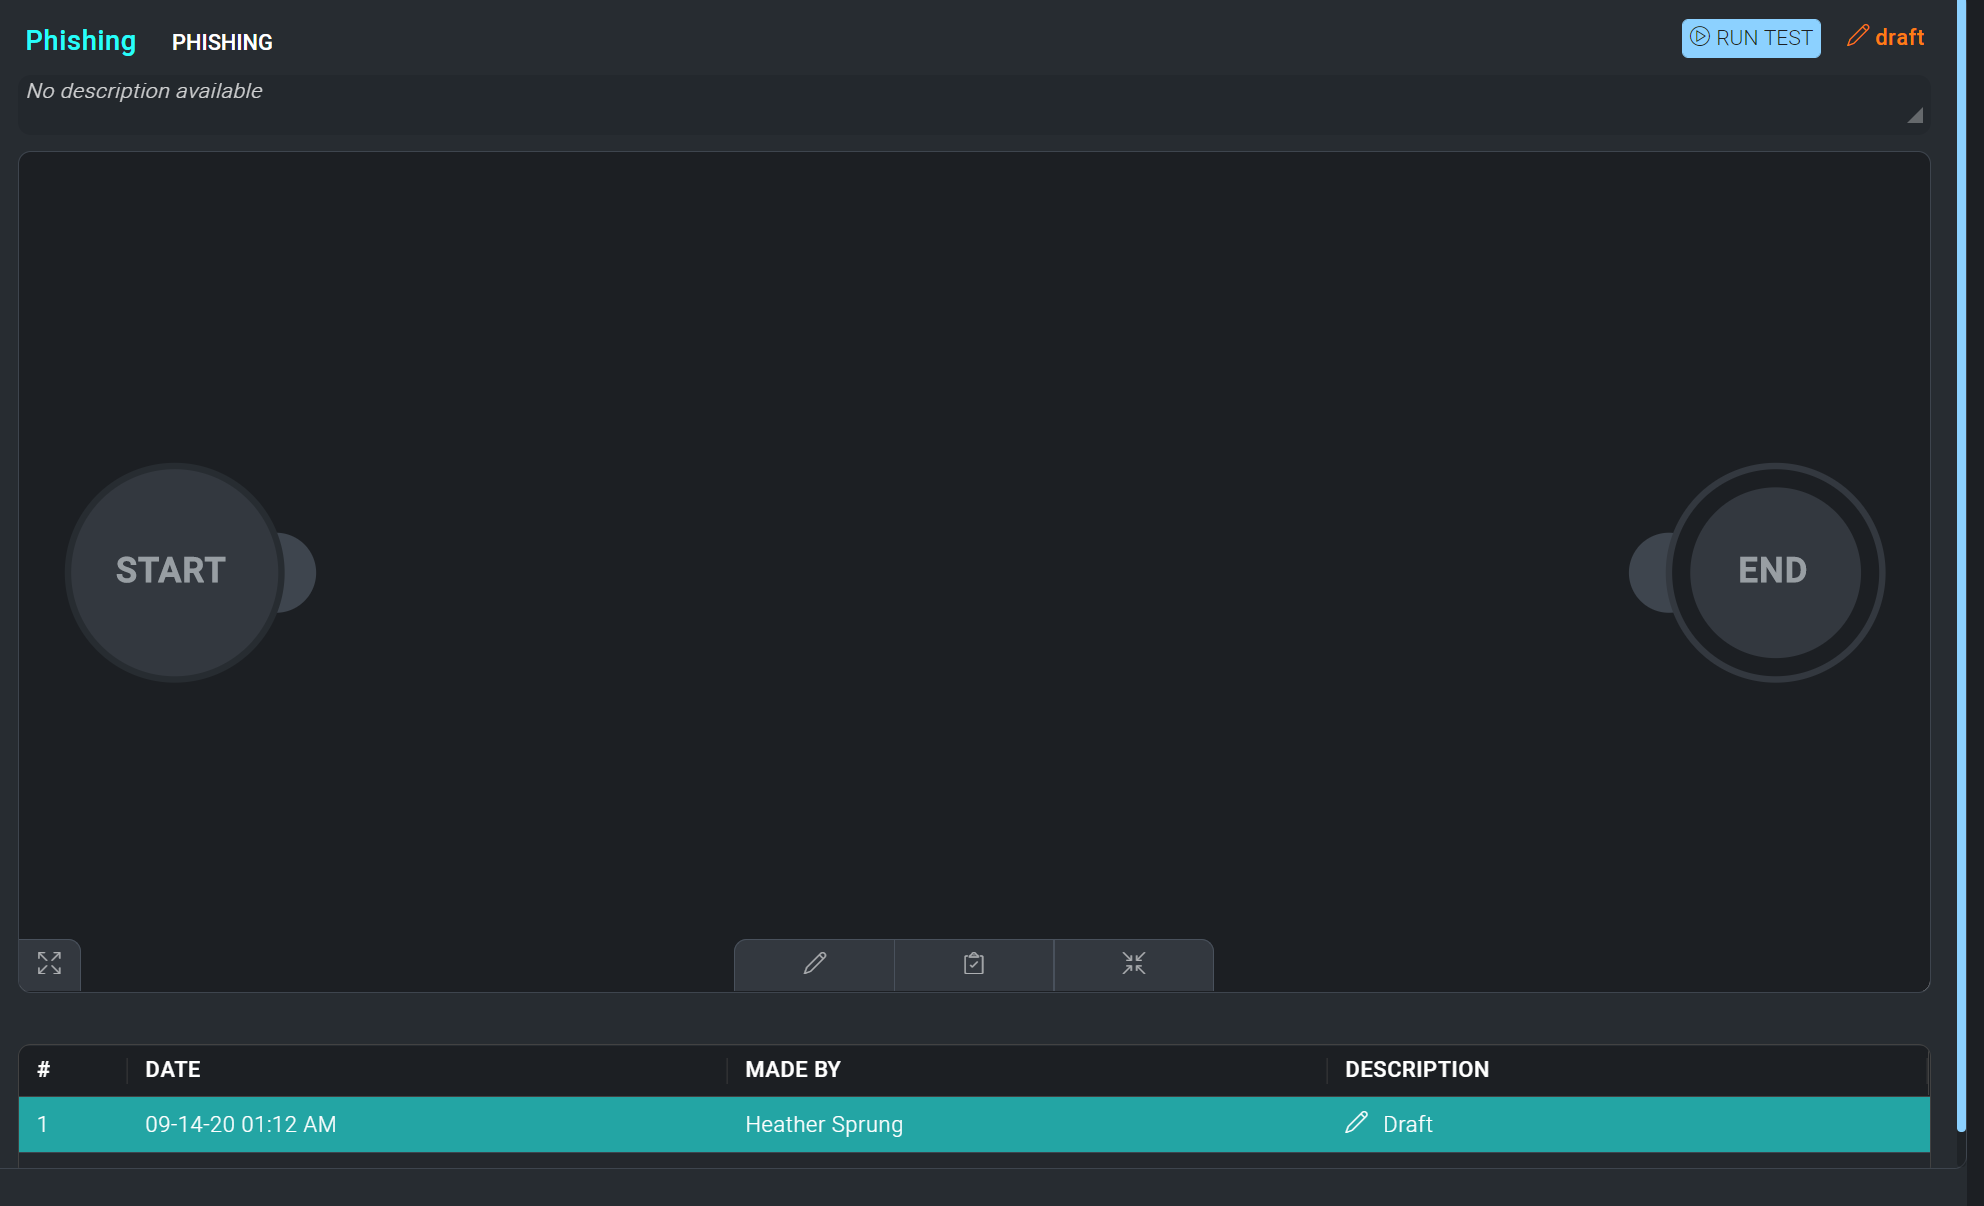
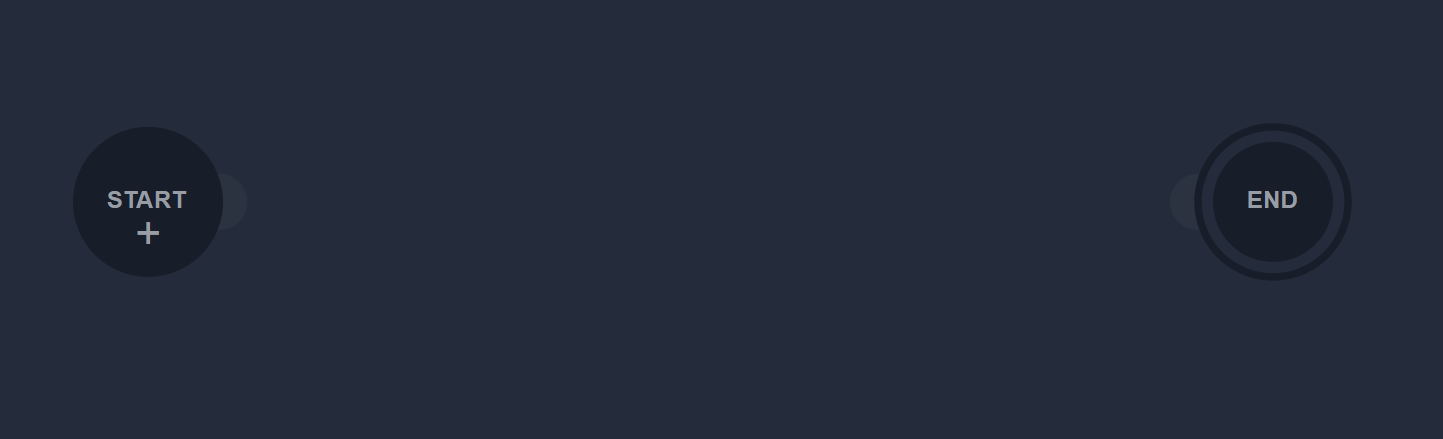
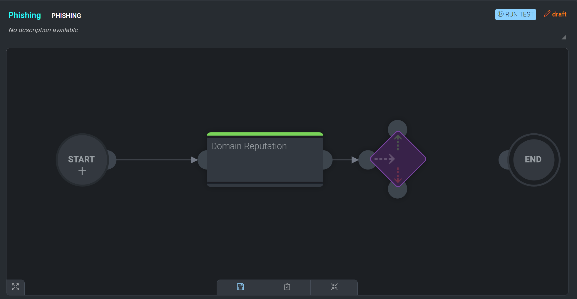
Opening the playbook will present a black screen with a Start node, and an End node. These nodes dictate the beginning and the end of the playbook's automation sequence. They can be dragged and dropped anywhere on the screen to allow for multiple integrations and conditional statements to be executed.
To begin to add the first node within the new playbook, click the + on the Start node.
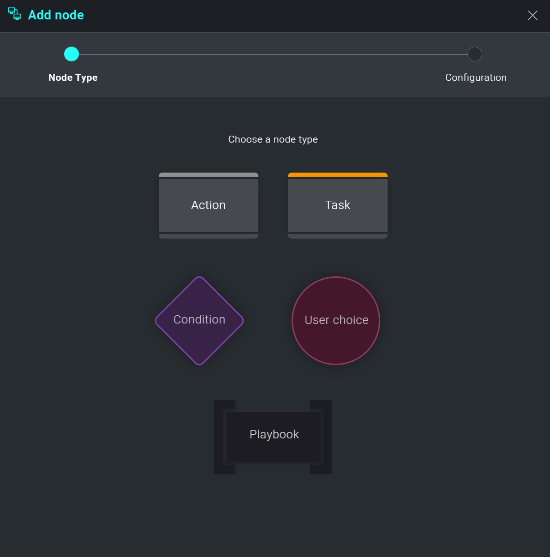
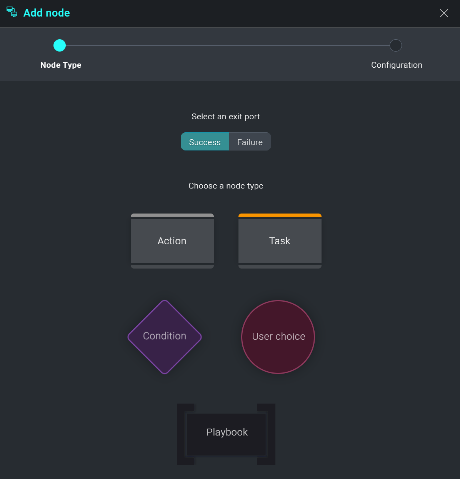
The playbook configuration page is displayed. It gives you the ability to choose from the following options:
- Action: Automatically take specific actions such as enriching data or taking containment steps when an Incident Template is matched
- Task: Assign a task to an Cloud SOAR user
- Condition: Use conditional statements to define what actions should be taken in response to previous input/output feeds
- User Choice: Pause automatic processing to allow for manual intervention
- Playbook: Call other R3 Playbooks in response to conditional statements and/or user choice actions
Action
Select Action from the node types. A new screen will be displayed showing all actions a user has to choose from. These action types (Enrichment, Containment, Custom Actions, and Notifications) will directly interact with Cloud SOAR's integrations to either gather data or initiate actions automatically.
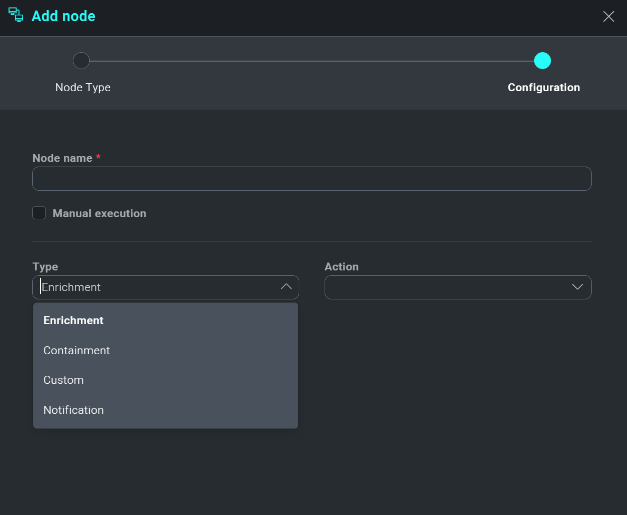
As an example, lets choose Enrichment from the action type screen. As with any action type we choose, a new section will be added to our configurations screen asking for more clarifying information on how we would like this action to be performed.
Title the enrichment action something that can easily be identified by the action that is being taken, such as Domain Reputation Check. Next, we want to choose the action, expand the Action dropdown list and review the available options.
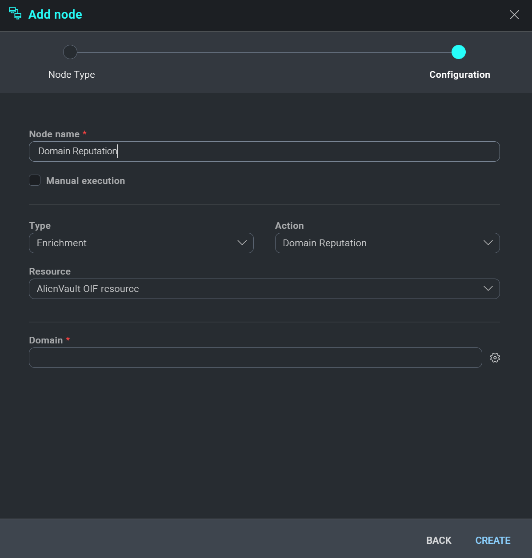
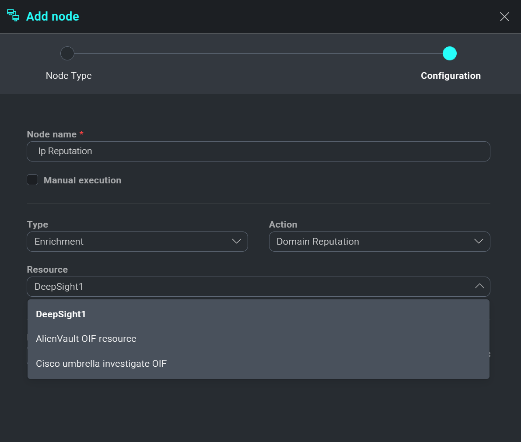
Expand the Resource dropdown list to view all active Integration feeds. The feeds found in each action type are those who can execute the specified action (i.e. blocking of an IP address can be done through firewalls/WAFs, etc.). Once a resource is assigned a new dropdown list will be displayed. Options found in this list are comprised of Incident Artifact fields, which are the incident fields Cloud SOAR parses out when issuing new incidents.
Continuing from the example above, an Enrichment action is being called to gather Domain Reputation information from VirusTotal for the domain observed in the Incident. Once all enrichment variables are identified, click **Create** to continue.
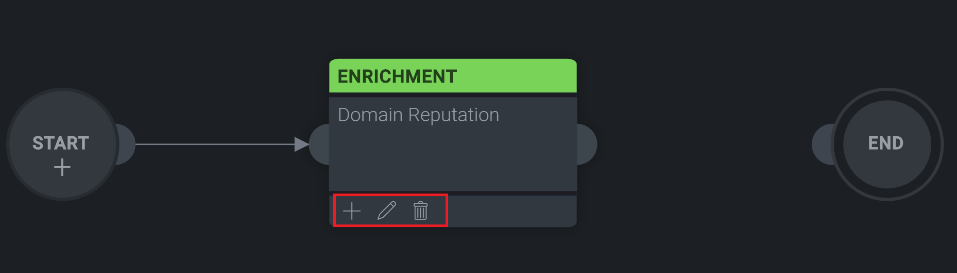
The newly added node will now be visible in playbook configuration screen. To add an additional node hover over the newly created enrichment task. A menu bar will be displayed at the bottom of the node, click + to add a new node, the pencil icon to edit the existing node, or the trash can to delete the existing node.
Task
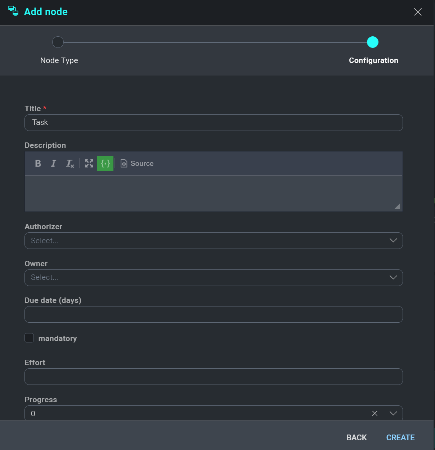
From the node selection menu, choose Task. A new configuration screen will be displayed. Title the new task and add any description if desired. The next dropdown lists are Authorizer and Owner fields. The Authorizer field is the user who is assigning the task, and the Owner field is the user who will be assigned the task to complete. When the task has been developed, click Create.
For playbook entities which support user-defined text input, such as email notifications, help desk ticket creation and task creation, variable placeholders may be added to the user defined text which will be replaced with incident variables at run
time. These variable placeholders may be added by clicking on the
![]() icon. To add a variable placeholder,
begin typing in the newly inserted placeholder box and Cloud SOAR will
display a list of available options which match. For example, typing
incident. will display a list of all the valid incident fields which
may be added as variable placeholders.
icon. To add a variable placeholder,
begin typing in the newly inserted placeholder box and Cloud SOAR will
display a list of available options which match. For example, typing
incident. will display a list of all the valid incident fields which
may be added as variable placeholders.
Condition
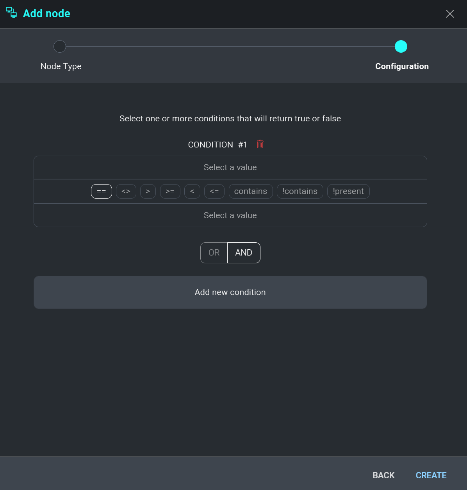
From the node's menu, choose Condition. A new configuration screen will be displayed which will enable a user to define a conditional statement to be met before the next node type can be executed. Under Condition 1, click on Select a value to define the first condition.

When developing the first condition, users have multiple options to choose from:
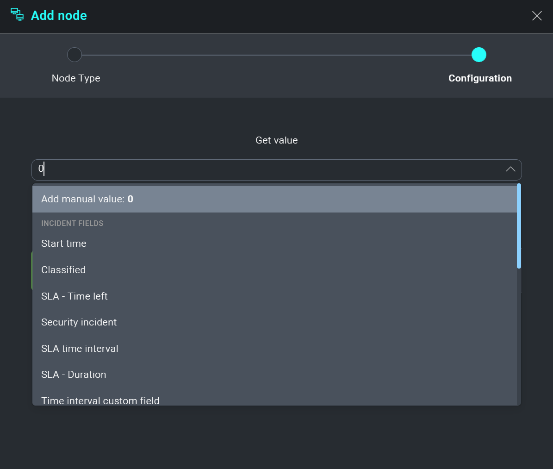
- Insert a custom value. Will execute when a user-defined variable is observed within an Incident.
- Get value from an Incident field. Will execute when a value is observed within an Incident Field (see Incident Fields).
- Get value from Triage Field. Will execute when a value is observed within a Triage Field (see Triage Fields).
- Get value from previous action. Will execute when a value is observed from a previous input or output field.
From our earlier example, we are going to choose to evaluate the output from our Domain Reputation check of the observed domain. Click Output from Get value from previous action.
A list of available results or outputs from the previously selected integration will be displayed in JSON format. Select which output type (e.g., hashes, IP addresses, domains) to evaluate and add it to the condition.
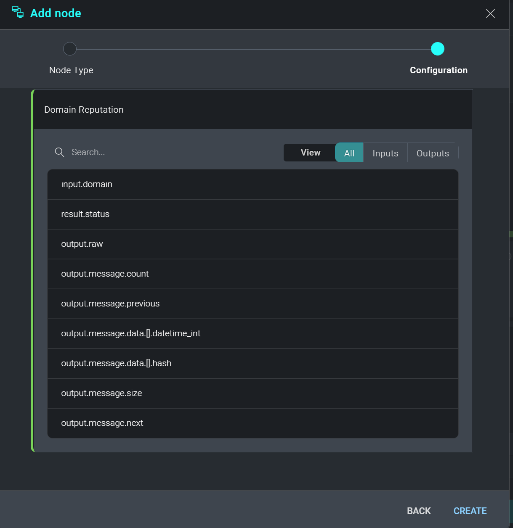
The selected output type will be displayed under Condition 1. Select which condition you would like for the output results to meet from the inequality operators below and click Select a value to define the condition.
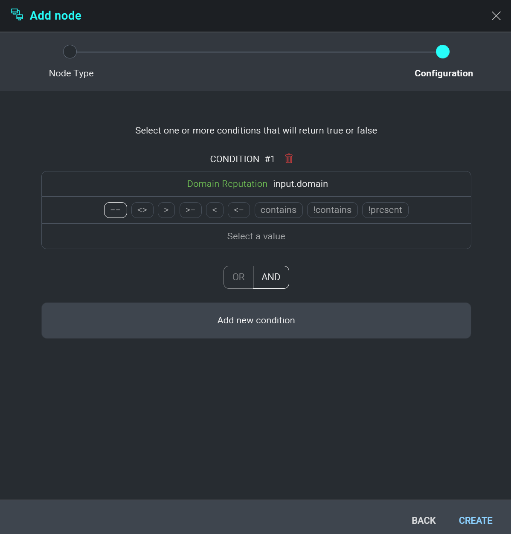
The condition we want to meet for this example is "Advance this Incident forward if the observed domain returns at least 1 result or row from VirusTotal". We insert 0 into the custom value field and click + to add it to the condition.
Now that Condition 1 is defined, users can choose to filter their results further by selecting an AND/OR operator to define another condition.
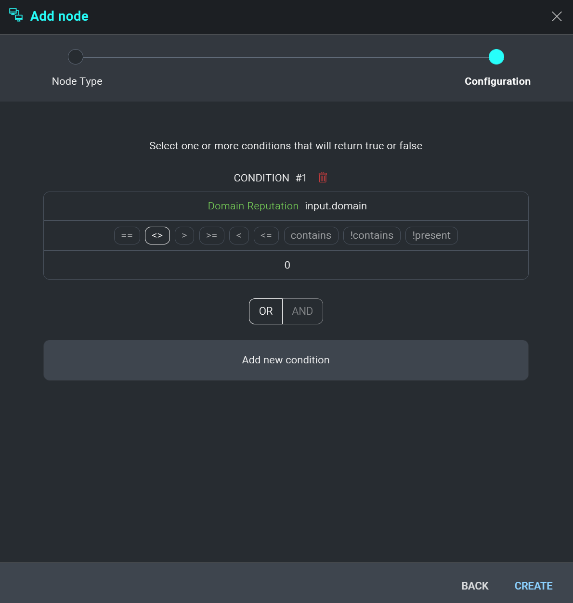
Once the condition is defined, click Create to add it to the playbook.
When new conditions are created, we will need to define what happens when their results meet one of our criteria. A new node is added to the condition below. This node breaks the condition down into successes and failures and can be modified by hovering over it and clicking +.
This new node represents a decision tree in which both results, success or failure, will have to be defined. Follow the steps above to finalize the condition
User Choice
From the node's menu, select User Choice. The User Choice option allows for the system to pose a question to the incident owner. Based off of the analysis the incident owner performs on the previous information gathered, they will be presented a choice to take an automated action such as blocking an IP at the firewall or Quarantining an end-user workstation from the network.
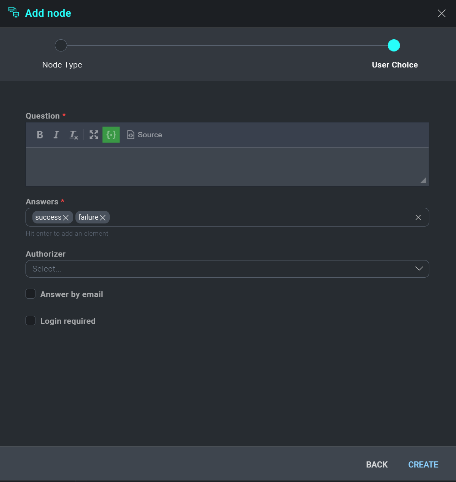

Define the question to be answered and the authorizer of the user choice selection and click **Create** to finalize.
The results of execution - successes, failures, and outcomes - are visible the Playbook's individual node details. The results of enrichment, containment and custom Playbook actions undertaken on incident artifacts, e.g., IP addresses, URLs, domains, etc., are catalogued in the incident's Entities module.
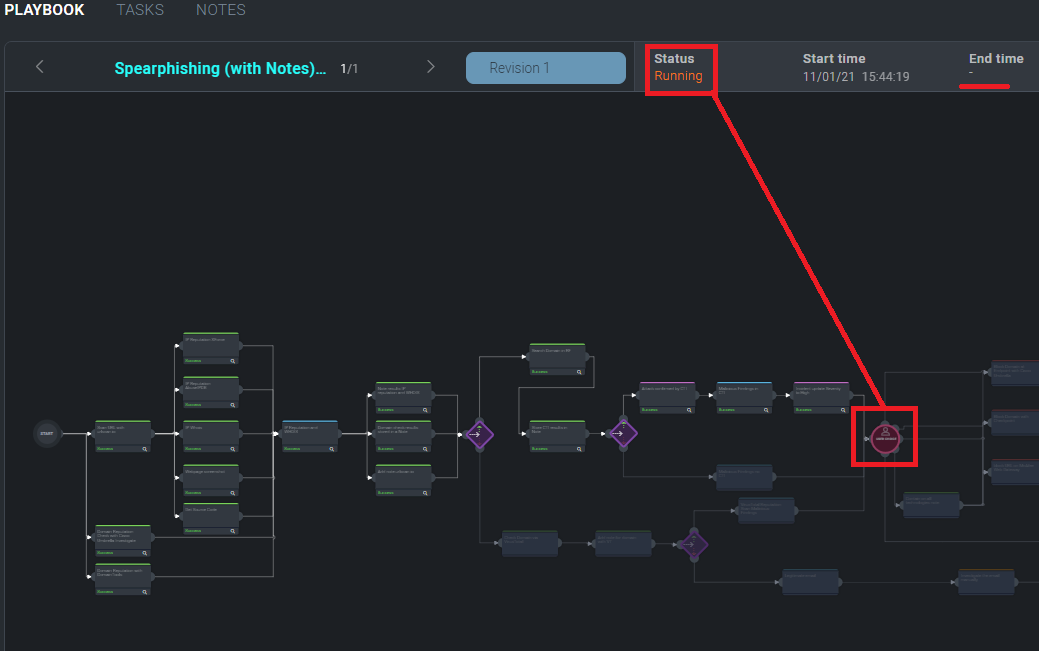
If a playbook fails, it can be re-executed inside the incident again or on the failing node with the Kill  and Run
  processes available in the playbook screen of the incident. However, a failed node will not stop the playbook from being executed. Only tasks and User Choices will lock the playbook in a Running state until the user takes action.

Playbook Template
When a Playbook is assigned to an incident, these predefined actions and tasks can be converted to actual tasks within Cloud SOAR for assignment to users and oversight by management. Each individual task can be assigned attributes, such as who it is assigned to, who has authorized the task, and when it is due. A Playbook Template permits administrators to predefine some of these attributes based on an existing Playbook so that they appear as defaults when the Playbook Template is utilized.
Playbooks are the core of Cloud SOAR's automation capabilities. Playbooks permit administrators to create automated and semi-automated workflows utilizing Cloud SOAR integrations, tasks and a variety of flow control decisions and other actions.
playbook workflows can be configured to execute automatically without human intervention, or can be executed in an interactive mode, where user input is required to authorize predefined actions.
Incident Templates
Incident Templates define the way in which incidents will be created for a specific alert, incident type or event. They allow you to define a certain number of incident attributes (e.g., incident type, severity, assignment, and any other default or custom incident parameters) that will automatically be set each time an incident is generated, based on the template. This may include type, classification, incident assignment, playbooks, Playbooks, knowledge base articles, or any other incident attribute. As rules are created for generating incidents based on syslog messages, email, SIEM integrations or other data sources, it is the Incident Templates that will define how the initial incident will be created.
Create a new template
To create a new template, click the cog icon (![]() ) > Automation > Incident Templates.
) > Automation > Incident Templates.

From the Incident Templates page, you'll find all previously created templates on the left-side of the screen. To add a new Incident Template, click + to proceed.
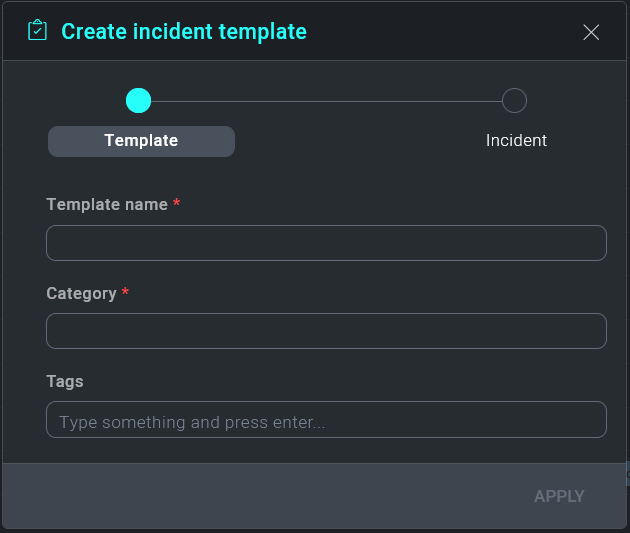
A new configuration box is displayed. As seen in our previous configurations, you will need to name your template. Make sure it is something easily identifiable and related to the activity it is developed for. The next section is asking for a Category. This field, as well as all other fields within the Cloud SOAR platform, can be customized to fit the user's environment (see Custom Fields).
In our example, we're building an Incident Template for a DLP incident. The category we chose is titled Data Theft but can be called anything in which we choose to identify it as. Users also have the option to add Tags which can be used to further categorize of define the incident, and can be used when searching for or correlating events. Once our template is named and categorized, click Next to continue.
Under the Incident tab administrators may define any incident parameters they wish to set by default when an incident is creating using the template. This often includes parameters such as type, kind and severity. All variables marked with an asterisk (*) are required to complete the Incident Template (see Custom Fields to adjust the fields requirements). As mentioned earlier, all fields are customizable via the Custom Fields section. Once all required variables have been defined, click Next to continue.
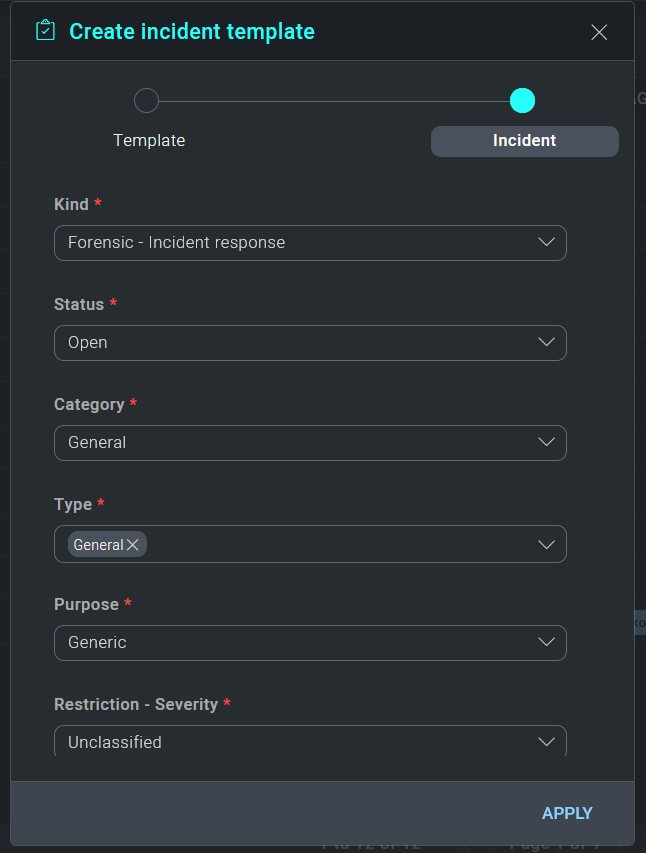
The remaining tabs in the Incident Template dialogue are as follows:
- Incident details: To set up details for a specific incident type.
- Description: Free text area to describe details of the template.
- Playbook: Playbook which should be automatically assigned to an incident. For each playbook, user can choose to have the Playbook automatically execute immediately upon incident creation or assigned and wait for manual execution.
- Investigators: Investigators who should be automatically assigned to the incident.
- Notes: Notes which should be created for the incident.
Report Template
Report Templates allow users to build their own reports by selecting various components of an incident they wish to include in the report. These components can include incident details, evidence, hosts, observables and many others.
Custom Fields
Custom Fields allows administrators to edit existing fields as well as add new fields for almost every section of Cloud SOAR. All Cloud SOAR sections which permit custom fields are displayed on the left-hand side of the page. Clicking on any one of these sections will display all current fields for that section on the right-hand side of the page. Any existing field may be edited, to include changing the name or adding list values. The only attribute which cannot be changed is the type of the field, such as text or date. New fields may also be added from this page. Integrations
The Integrations section allows administrators to configure bidirectional integrations with third-party technologies, as well as view the supported actions for each integration. In addition, this section allows administrators to manage custom scripts, which can be written in Python, Perl, PowerShell or Bash.
Creating Incidents from Automation Rules
Cloud SOAR can ingest, parse, and process incident data from email, syslog and bidirectional integrations. For Cloud SOAR to begin processing incident data from these sources, the Automation Rules features need to be configured.
To access, click the cog icon (![]() ) > Automation > Rules.
) > Automation > Rules.
Integrations
Cloud SOAR's orchestration and automation capabilities are achieved through its unidirectional and bidirectional integrations with the industry's leading network and security vendors. To configure, click the cog icon (![]() ) > Automation > Integrations.
) > Automation > Integrations.
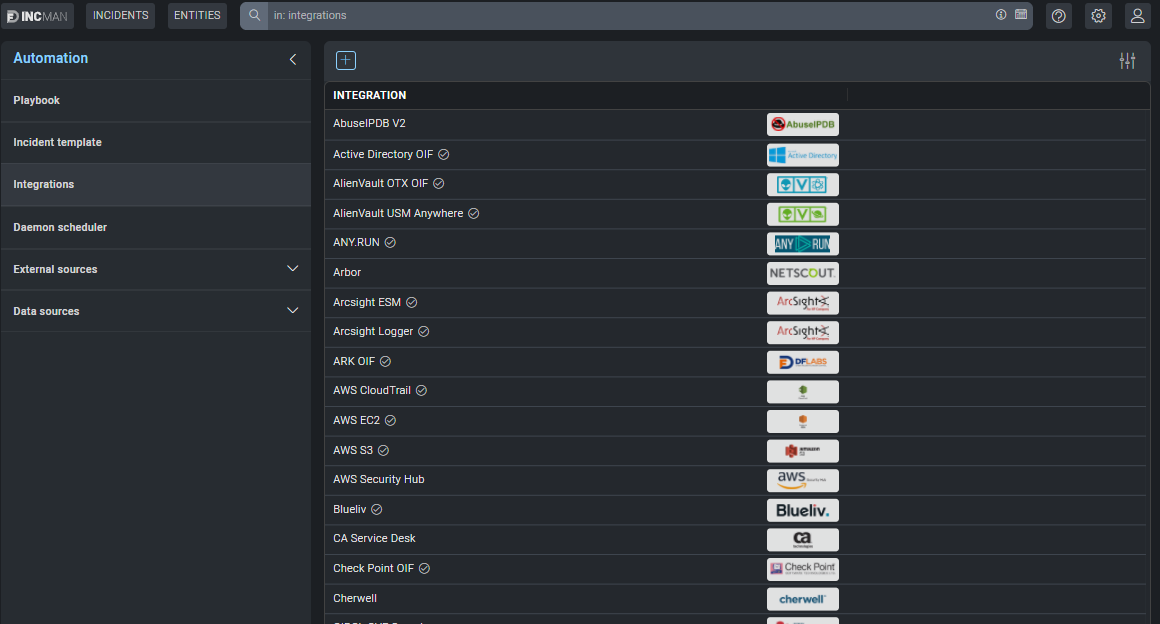
A list of available integrations within the organization can be found to the left-side of the screen. To begin to configure, click on a product to continue.
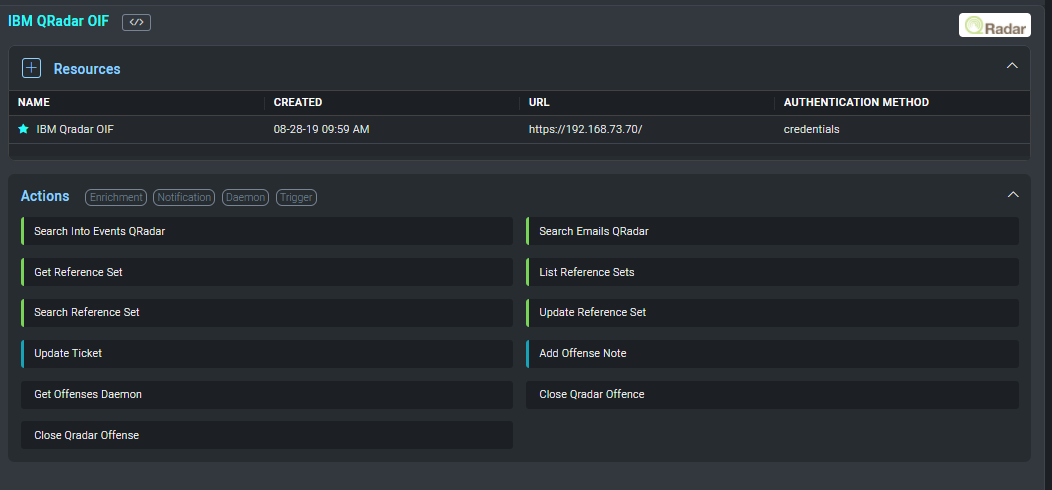
A product overview screen will be displayed with what actions a product can perform and a link to configure the integration. These actions are categorized into five separate types: Enrichment, Containment, Custom, Daemon, and Notification actions. Each selection will list its associated actions and if there are required fields which need to be configured for Cloud SOAR to utilize its functionality within its Playbooks.
To add a new integration resource, click the + Resources button in the upper left-hand corner of the integrations screen. To edit an existing integration resource, hover over the resource and click the pencil icon to the far right of the resource name in the resource list.
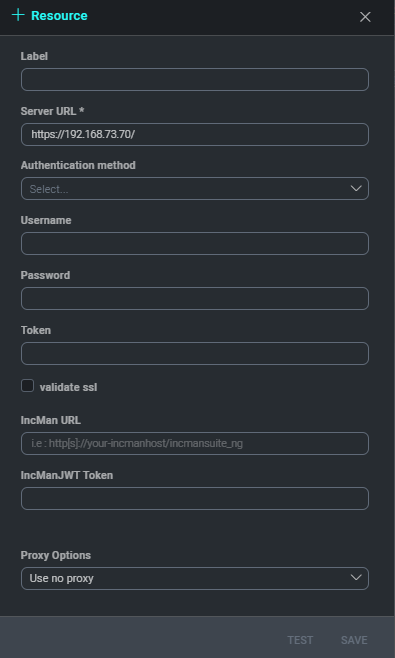
Each Integration's configuration screen may be different, but in most cases, administrators will need information such as IP addresses, API tokens, usernames and passwords for their network/security products.
To test the configuration, click save and reopen the Integration. Once the Integration is reopened, click test and successful connections will display a success message at the bottom of the screen. Any unsuccessful attempts will display an error message with information needed to remediate the issue.
Additionally, some integration types also allow users to use a pre-configured general proxy or define a specific one for its integration with Cloud SOAR. To configure a proxy for an integration, open the integration and click the Proxy dropdown. Select "Use different proxy** and add the corresponding proxy information.
Once the information has been added, click save to commit the integration. Open the integration up again and click the Test button to test the new configuration settings. A successful connection attempt will be displayed at the bottom right-side of the screen. Once the proxy test is successful, click save again to commit the final configuration settings for the integration.
Integration Framework
Cloud SOAR's Integration Framework allows Sumo Logic and Cloud SOAR users to develop and extend integrations using a common, open and easy to use framework. For increased security and isolation, each integration is executed in its own Docker container, which can be easily customized by the user when the integration is created.
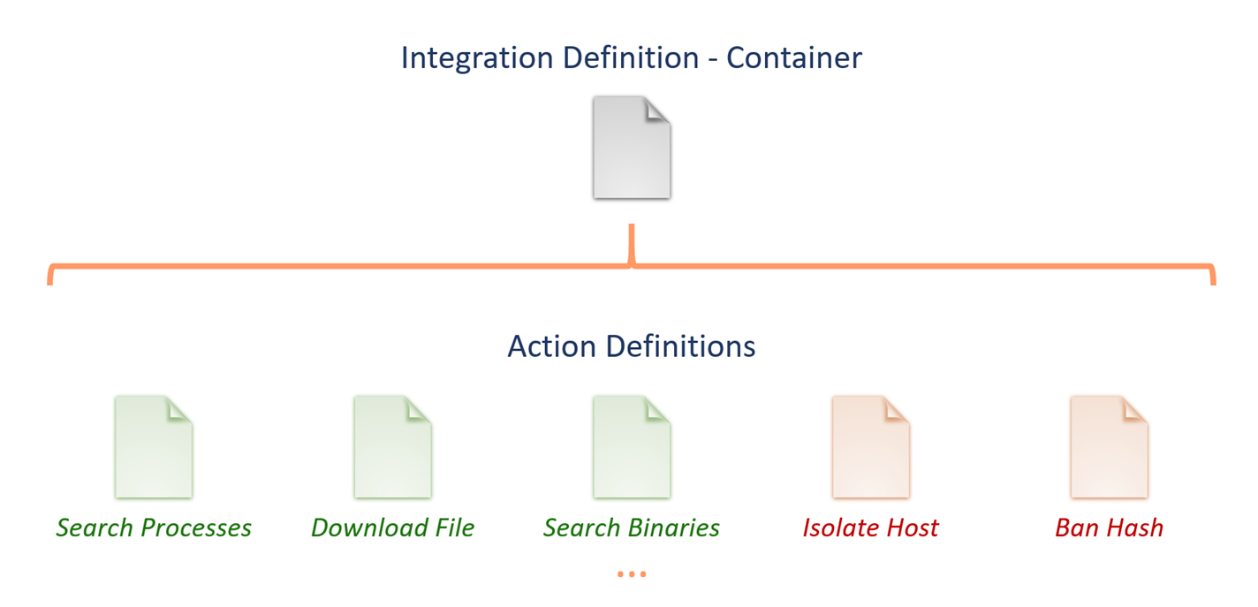
Integrations are defined using two types of YAML text files. The first type, the integration definition file, is used to define the properties of the product with which the integration connects. This includes information such as the name, logo, connection parameters, test code and the Docker container used to execute the actions. One integration definition file is required for each integration and serves as a container for all of the actions that the integration will perform.
The second type of file is an action definition file, which is used to define a single action that will be performed using the integration. Each integration action is defined in a separate action definition file, which will be associated by Cloud SOAR with the appropriate integration definition. Action definition files are the files which contain the actual code which will be executed to perform the action. Supported languages include Perl, Python, PowerShell and Bash. In addition to the action code, action definition files also contain information such as the name, required and optional fields and the format in which the resulting information will be displayed.
Integration File Hierarchy
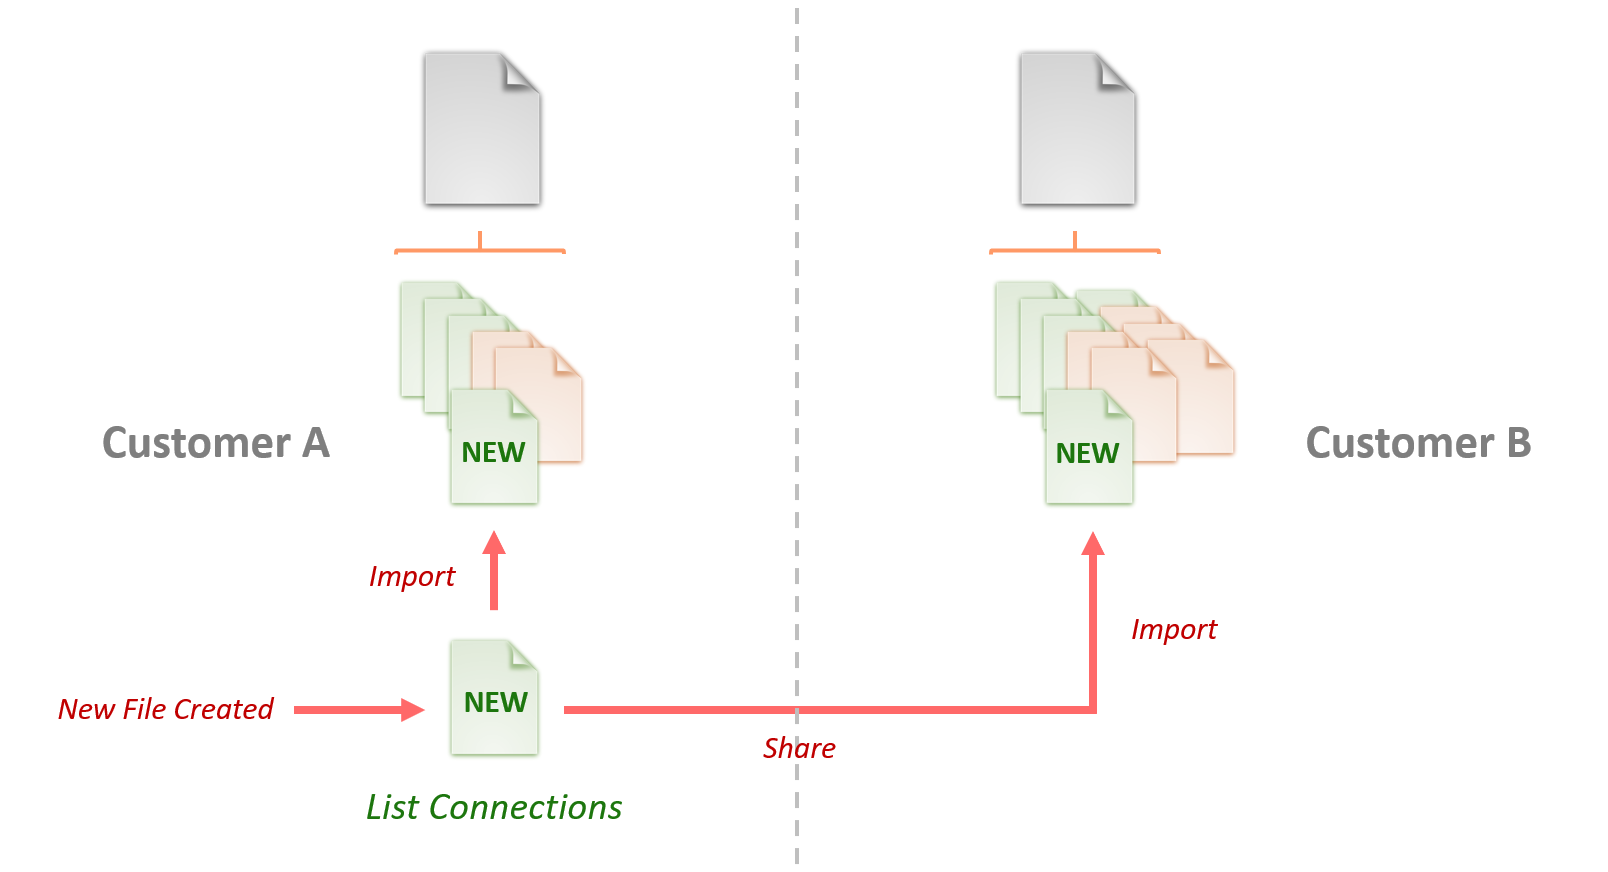
Defining integrations at the action level allows users greater flexibility in customizing existing integrations and sharing new actions with other users. For example, a user may choose to extend Sumo Logic' existing RSA Netwitness integration to include an additional action which retrieves all network connections for a given host.
Once the user has created this new action, it can easily be added to the existing RSA Netwitness integration by uploading the new integration action file. This new action can also be shared between customers and used to extend the functionality of the integration in other customer instances as well.
See the Integration Framework manual for more details on utilizing the integration framework within Cloud SOAR.
Rules
Creating a Rule
Select Automation Rules page follows the same format as all customizable Cloud SOAR features, click + to create a new automation ruleset:
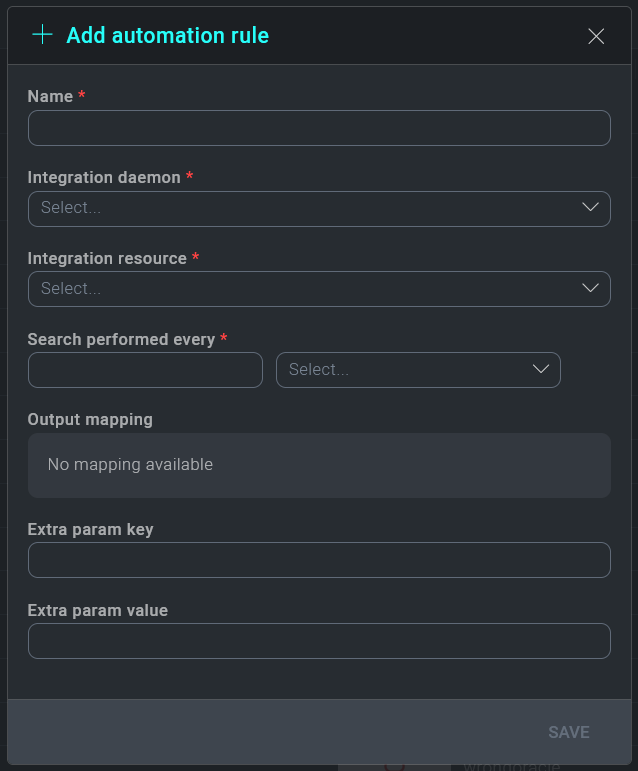
Select a name for the rule, then select the daemon to use with this new rule and the resource and fill all the remain parameters.
In the detail section of the rule you can define filters to be used in the rule and the action to be performed.
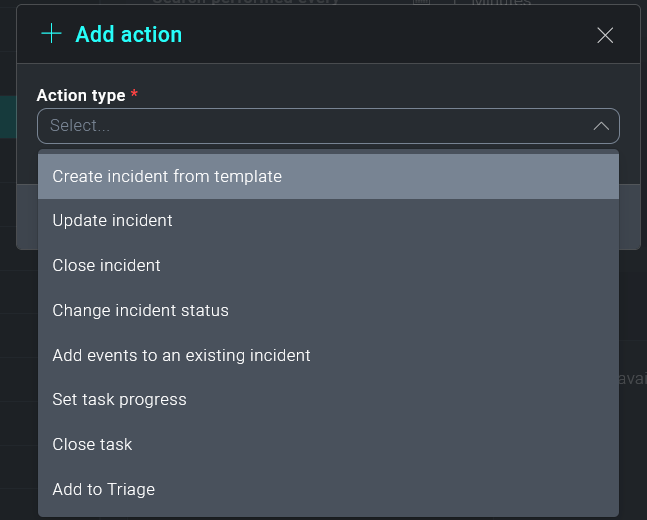
The Action Type dropdown will contain the specific actions Cloud SOAR can take when the specified activity is observed. Users have the option to take the following actions:
- Create incident from template. Specify what incident template to use (See Incident Templates), the incident owner, and incident ID format. This is the most common action.
- Close incident. Allows for the automatic closure of a known false positive incident
- Update incident. Updates a field in an existing incident based on parameters from the parsed message
- Change incident status. Change the incident status based on parameters from the parsed message
- Set task progress. Set task progress based on parameters from the parsed message
- Close task. Close a task based on parameters from the parsed message
- Add to Triage. Create a new triage event based on parameters from the parsed message
To add a new mapping setting, click on the plus button near Mapping if enable for that action.