Parser Editor
This topic has instructions for using the Sumo Logic parser editor. You can use the editor to customize system parsers, and to create your own custom parsers.
For information about the Sumo Logic CSE parsing language, see Parsing Language Reference Guide.
The instructions that follow assume that you have already written your parser code.
Check parser code for mapping hints
Your parser code must contain statements that tell CSE what log mapping to use when creating Records from the field dictionary the parser creates for log messages.
Make sure your parser code includes MAPPER statements that specify the vendor, product, and the event ID that the log messages to be parsed contain, and a FORMAT statement that defines the message format.
MAPPER:vendor—Use this statement to identify the vendor that supplies the product. For example:MAPPER:vendor = AWS.MAPPER:product—Use this statement to identify the product whose logs will be parsed by your parser. For example:MAPPER:product = CloudTrail.MAPPER:event_id—Use this statement to specify the event ID to assign to parsed events. For some log messages this is a constant, for example, for a Windows Event:MAPPER:event_id = Security-4624. In other cases, you may need to form the event ID from fields contained in log messages. In that case, you can define an event ID pattern. For example:MAPPER:event_id = {{eventType}}-{{eventName}}.FORMAT—Use this statement to specify the format of the log messages to be parsed. For example:FORMAT = JSON.
Configure and test a custom parser
- Go to Manage Data > Logs > Parsers.
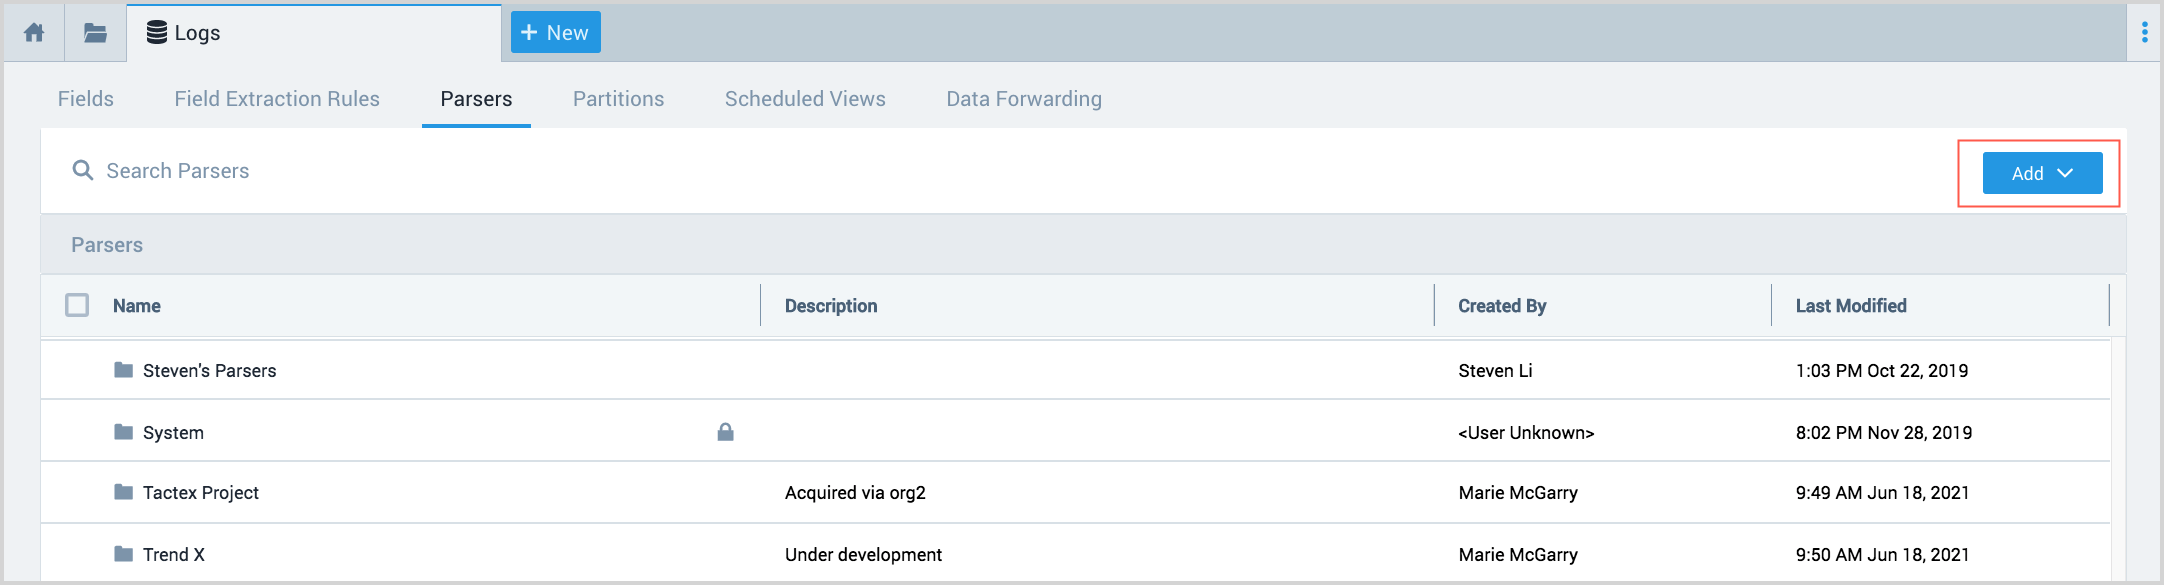
- Navigate to the folder where you’d like to create the parser. If you want to create a new folder, click Add and select New Folder. You don’t have to organize your parsers in folders, but it's easier to manage them if you do.
- Click Add and select New Parser to display the Create Parser page.
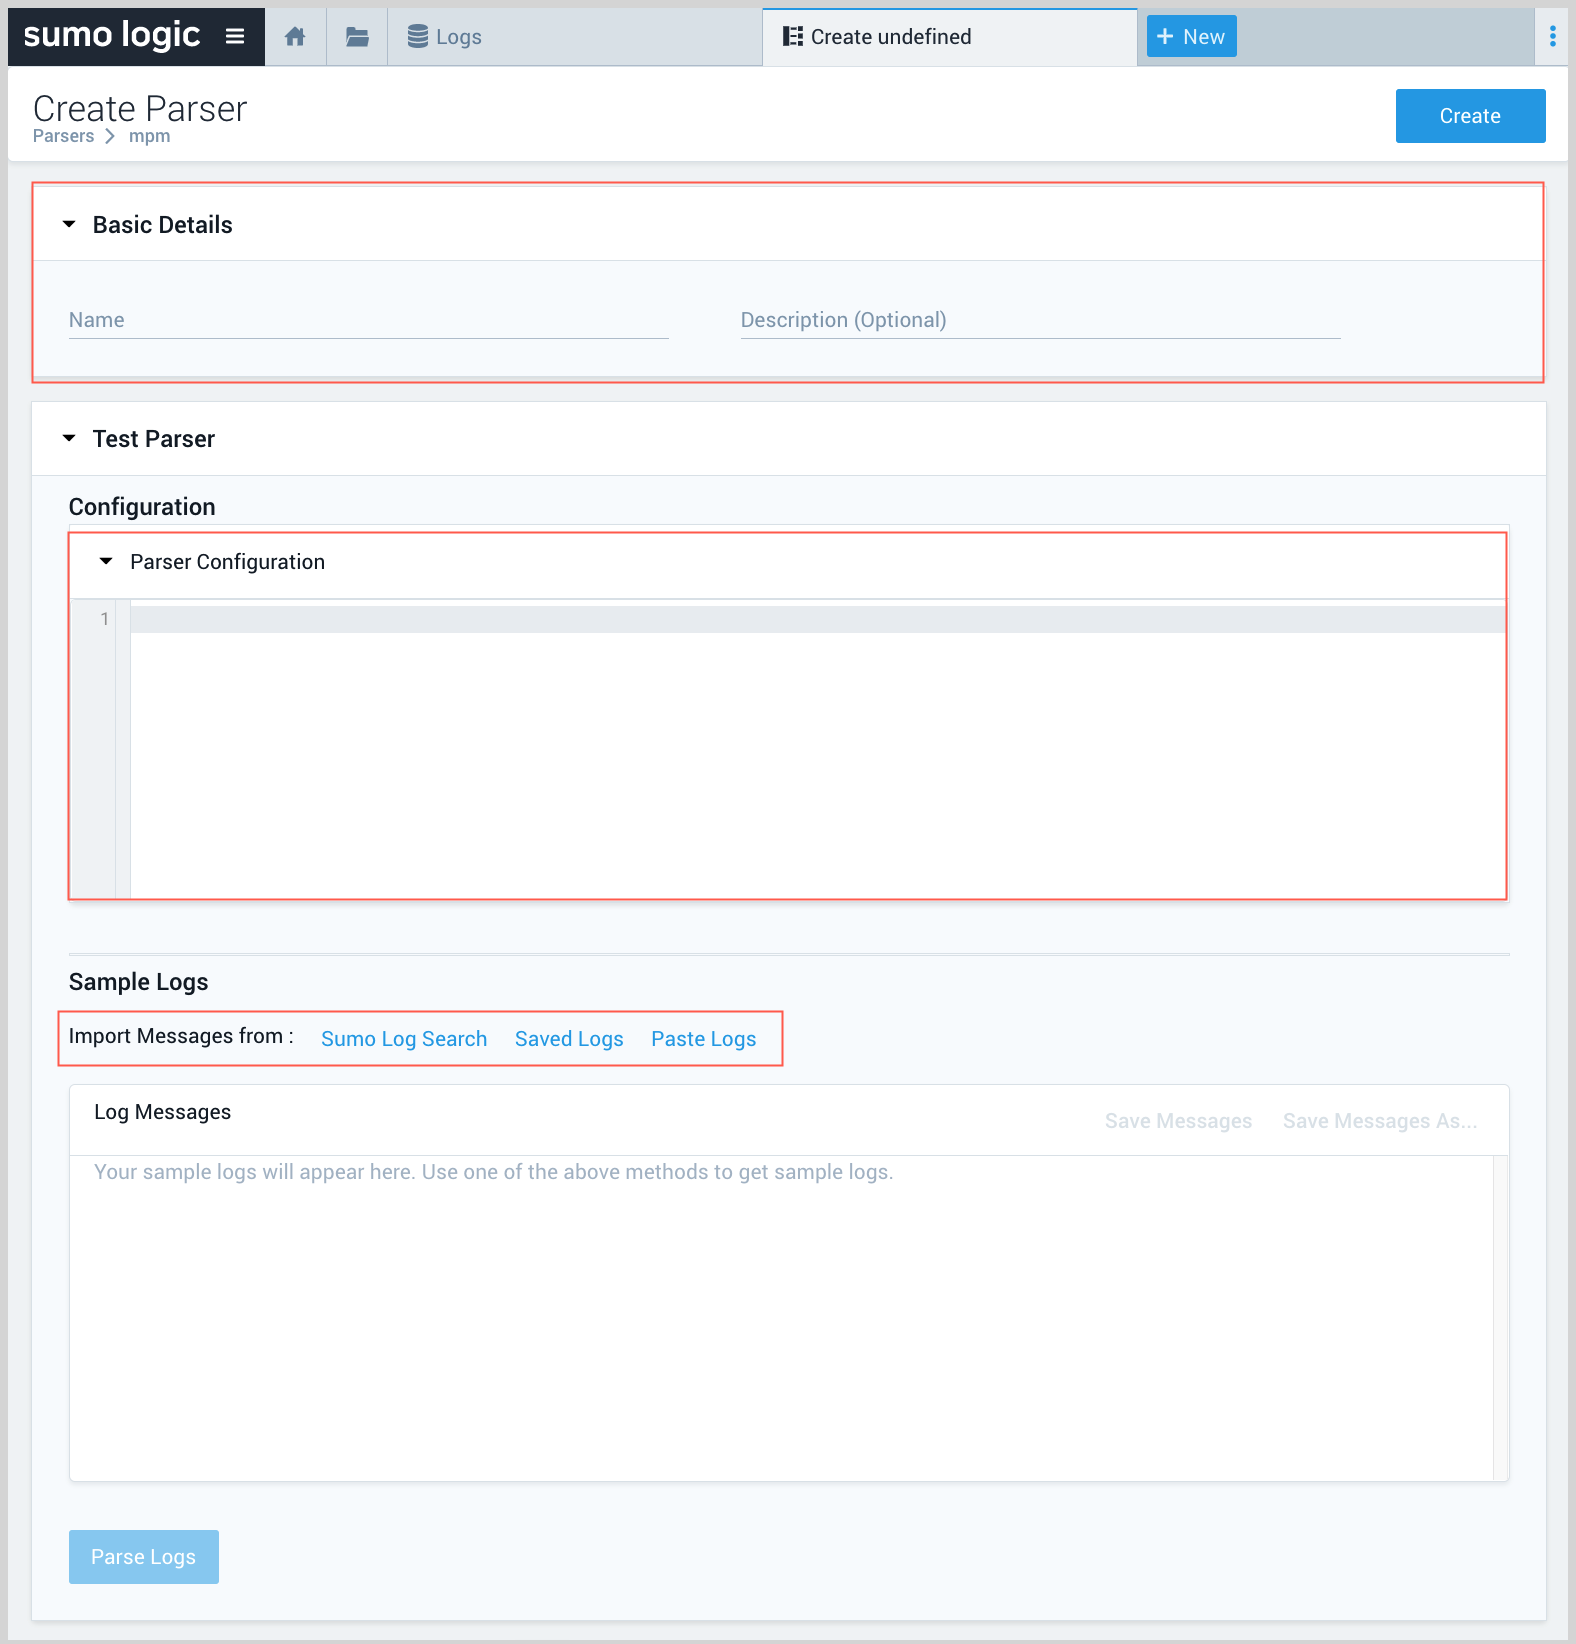
- Name. Enter a distinctive name for the parser. Typically the parser name indicates the product or service whose messages it will parse.
- Description. (Optional) Describe the parser.
- Parser Configuration. Paste your parser code in this area.
- Import Messages from. In this step, you enter or fetch messages that you’ll use to test whether the parser parses the messages correctly. There are three options:
- Sumo Log Search. You can enter a log search query to obtain a selected number of log messages. Follow the instructions in Using Sumo log search below.
- Saved Logs. You can select a set of messages that you saved when previously using the Paste Logs option. Follow the instructions in Using saved logs below.
- Paste Logs. You can paste logs directly into the Log Messages area. Follow the instructions in Using paste logs below.
Parse Logs
- After you’ve obtained sample messages using one of the methods above, click Parse Logs.
- If all of the sample messages are parsed successfully, you’ll see results like those shown below in the Parsed Messages section of the editor. The Event Details section shows the key-value pairs that were parsed from the raw message. If your results indicate that there were warnings, unparsed, or dropped messages, see Understanding parsing failures and warnings.
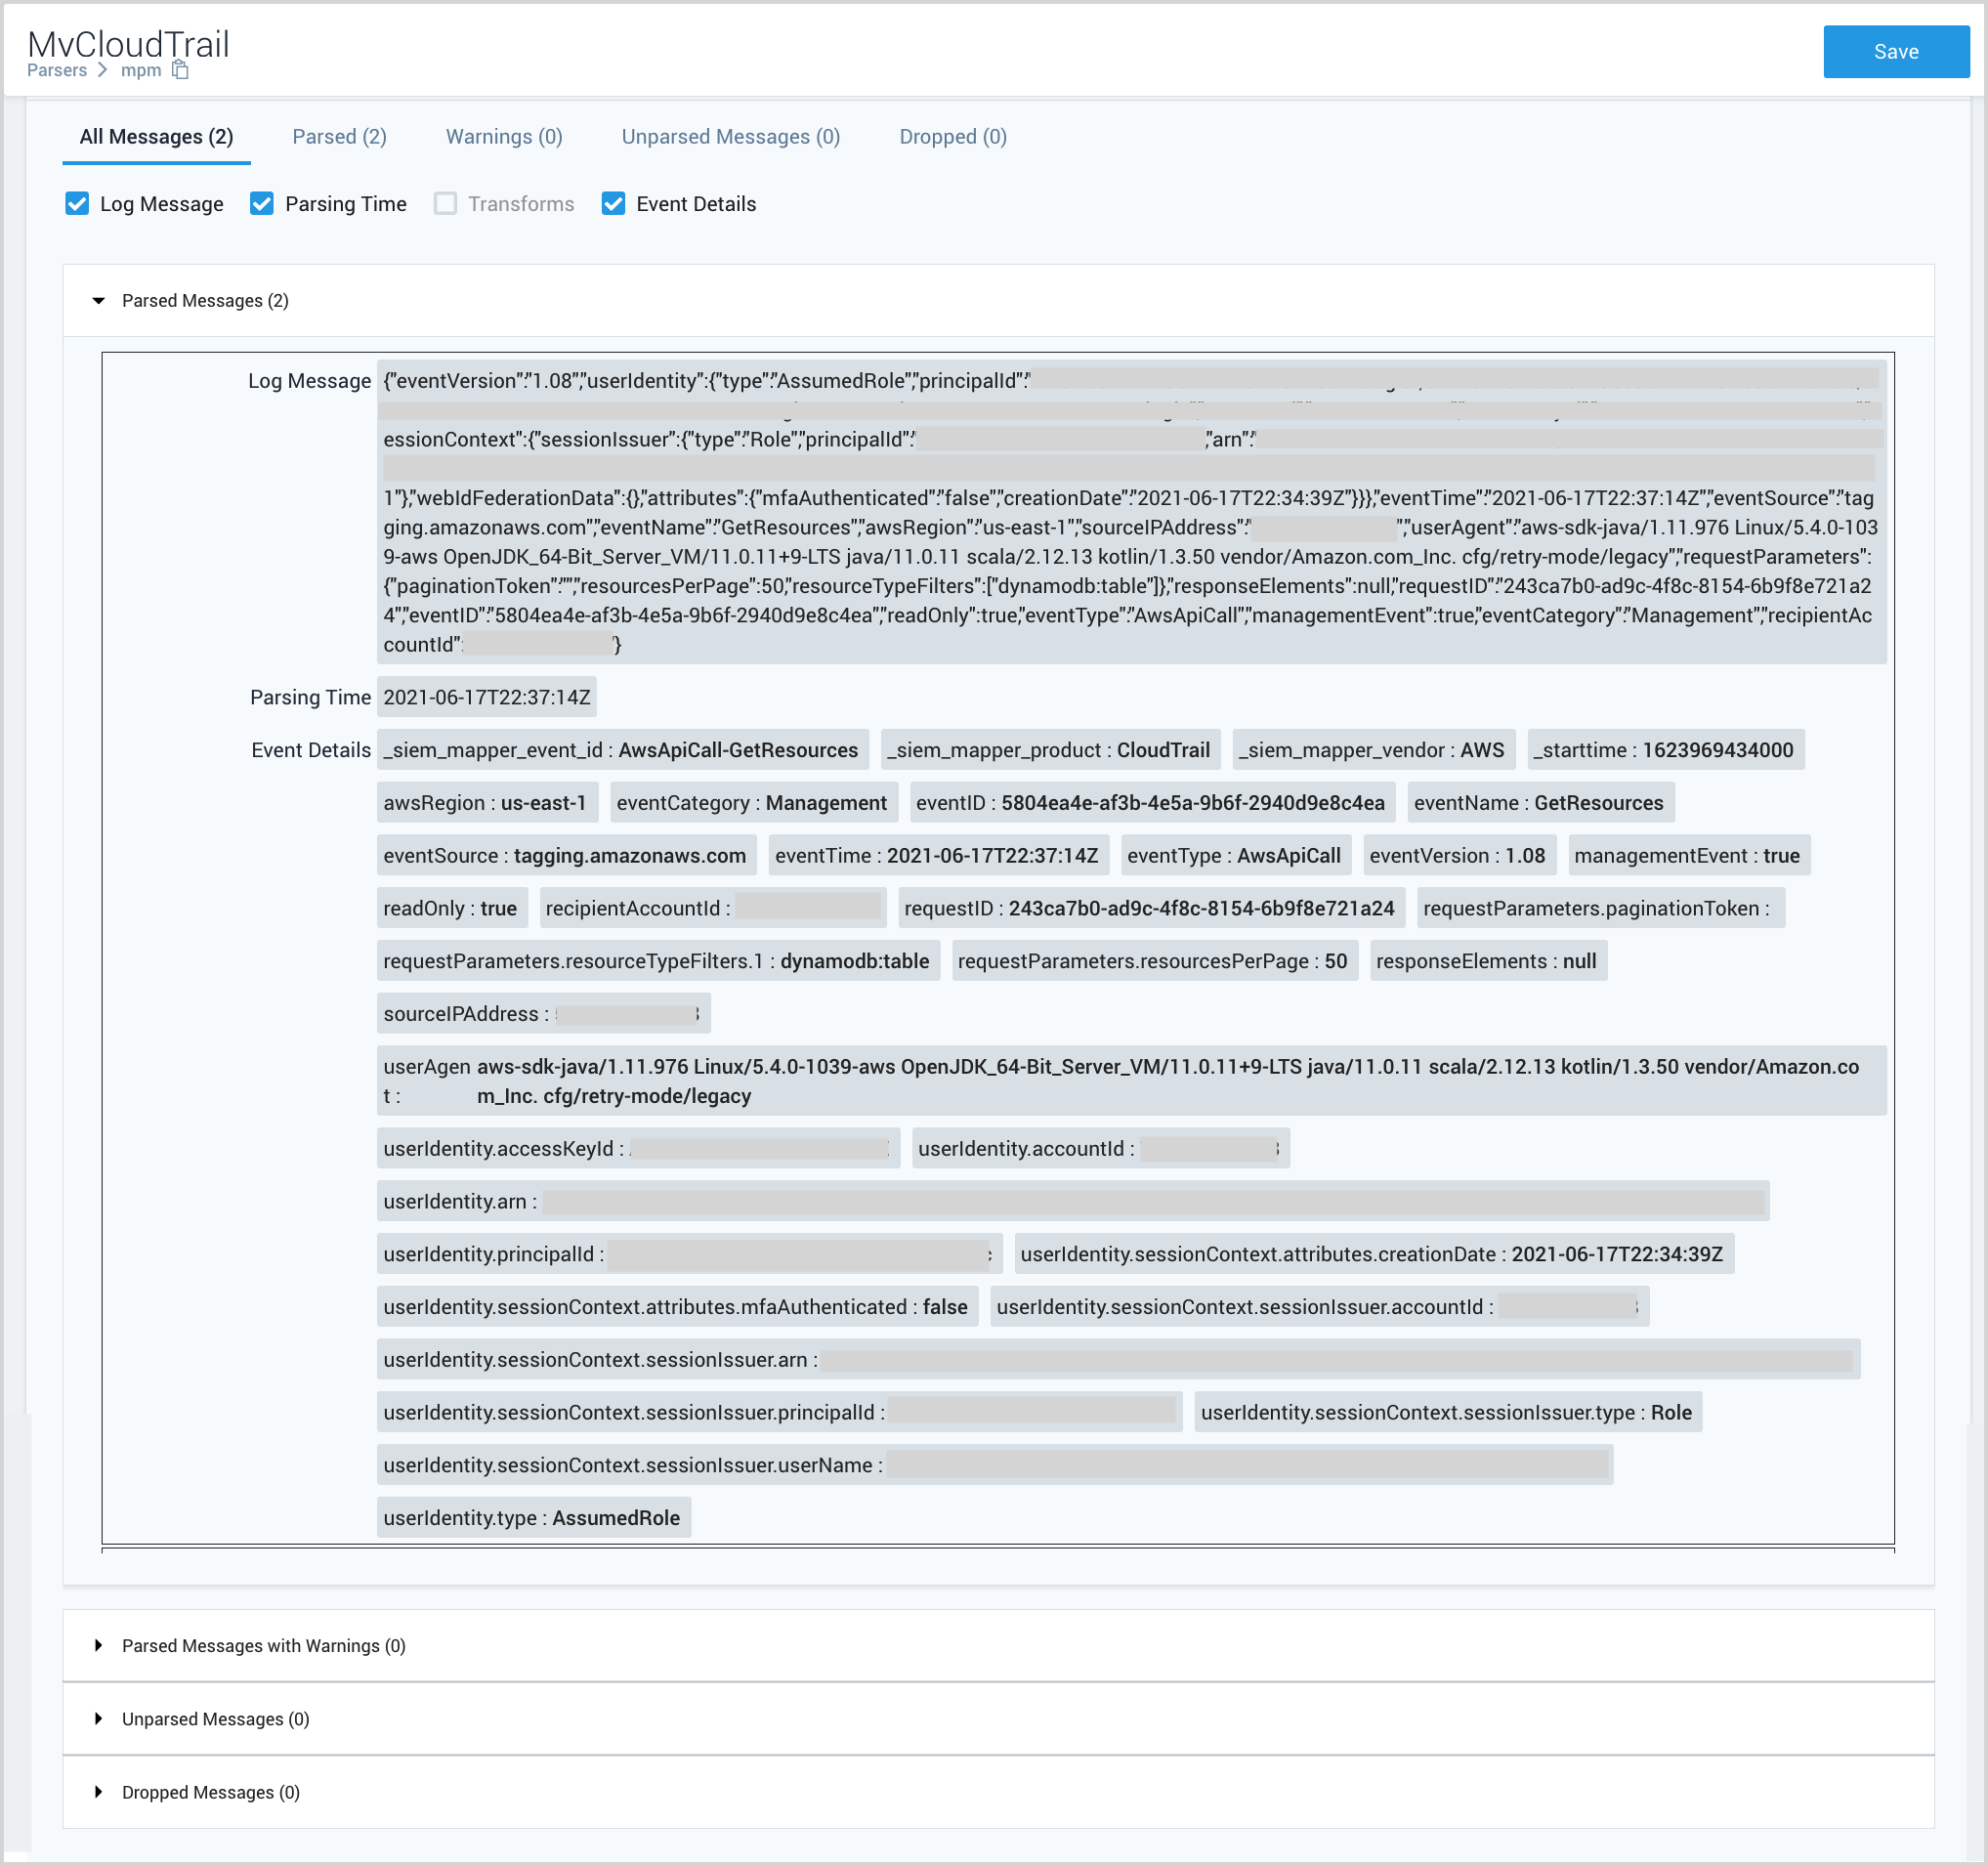 note
noteOne of the two messages that was parsed was cut out of the screenshot to make the image shorter.
- Once your new parser is working, and you want to start using it, follow the instructions in Configuring a source to use a parser.
Get sample messages
This section describes the three methods of obtaining messages for use in testing your parser.
Using Sumo log search
To import messages by running a Sumo Logic search:
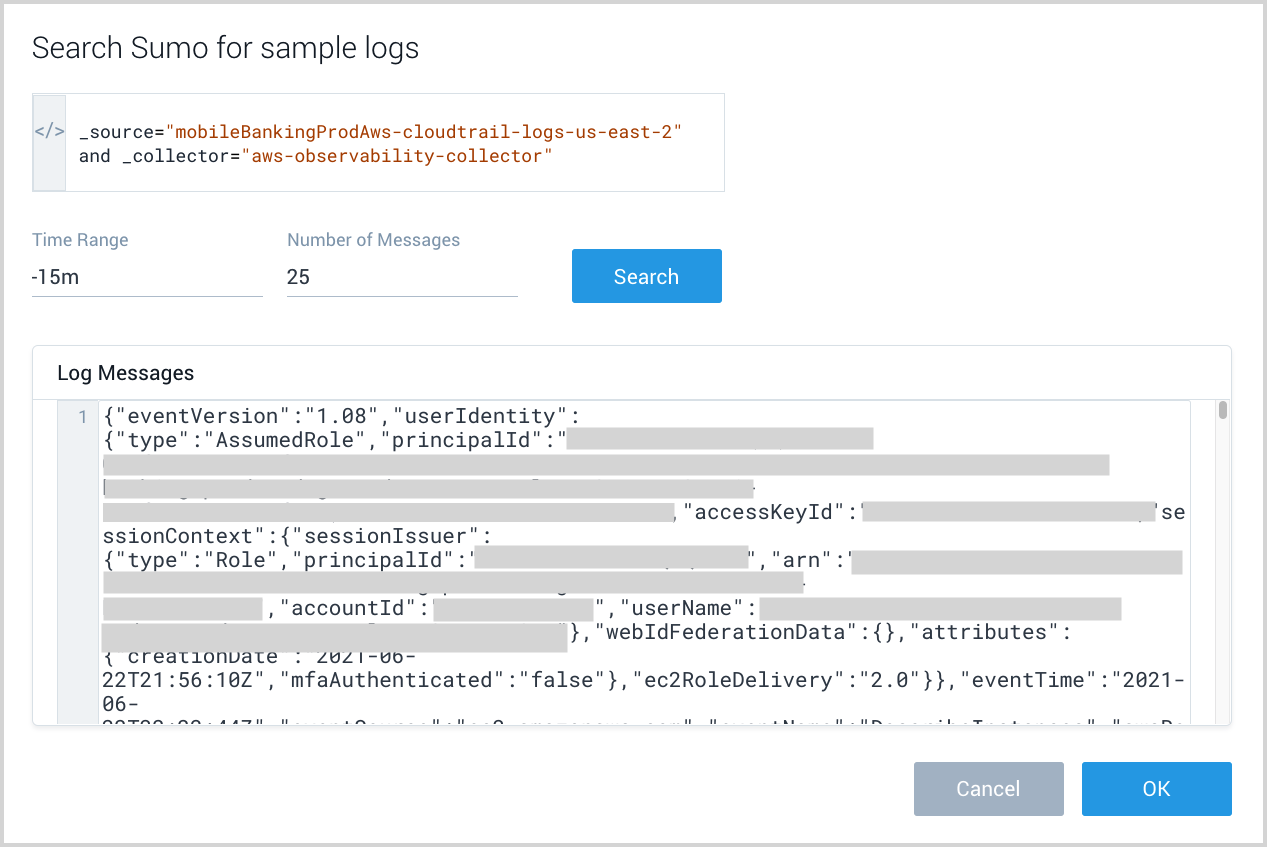
- Choose the Sumo Log Search option to display this popup.
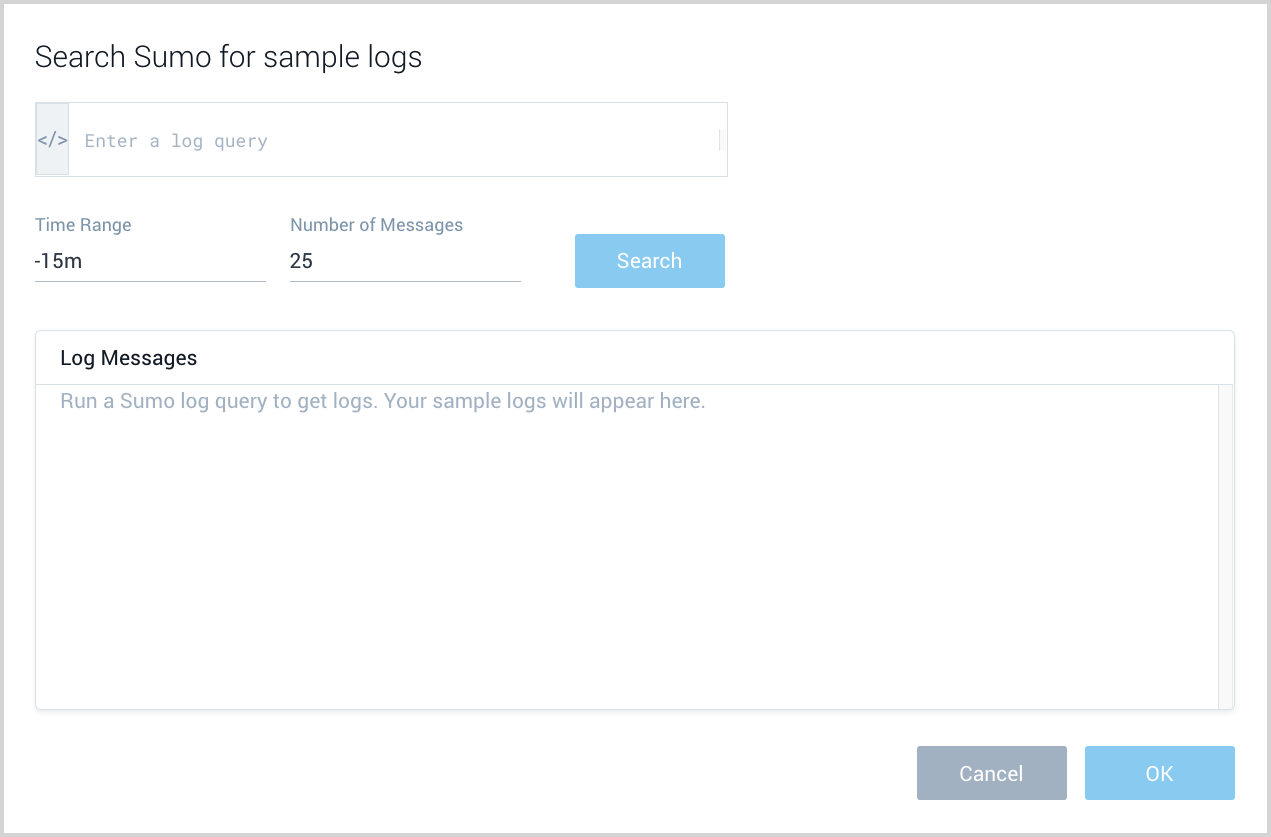
- Enter a log query, time range, the number of messages you want returned, and click OK.
- The popup now displays the results of your search.
- Click OK to close the popup.
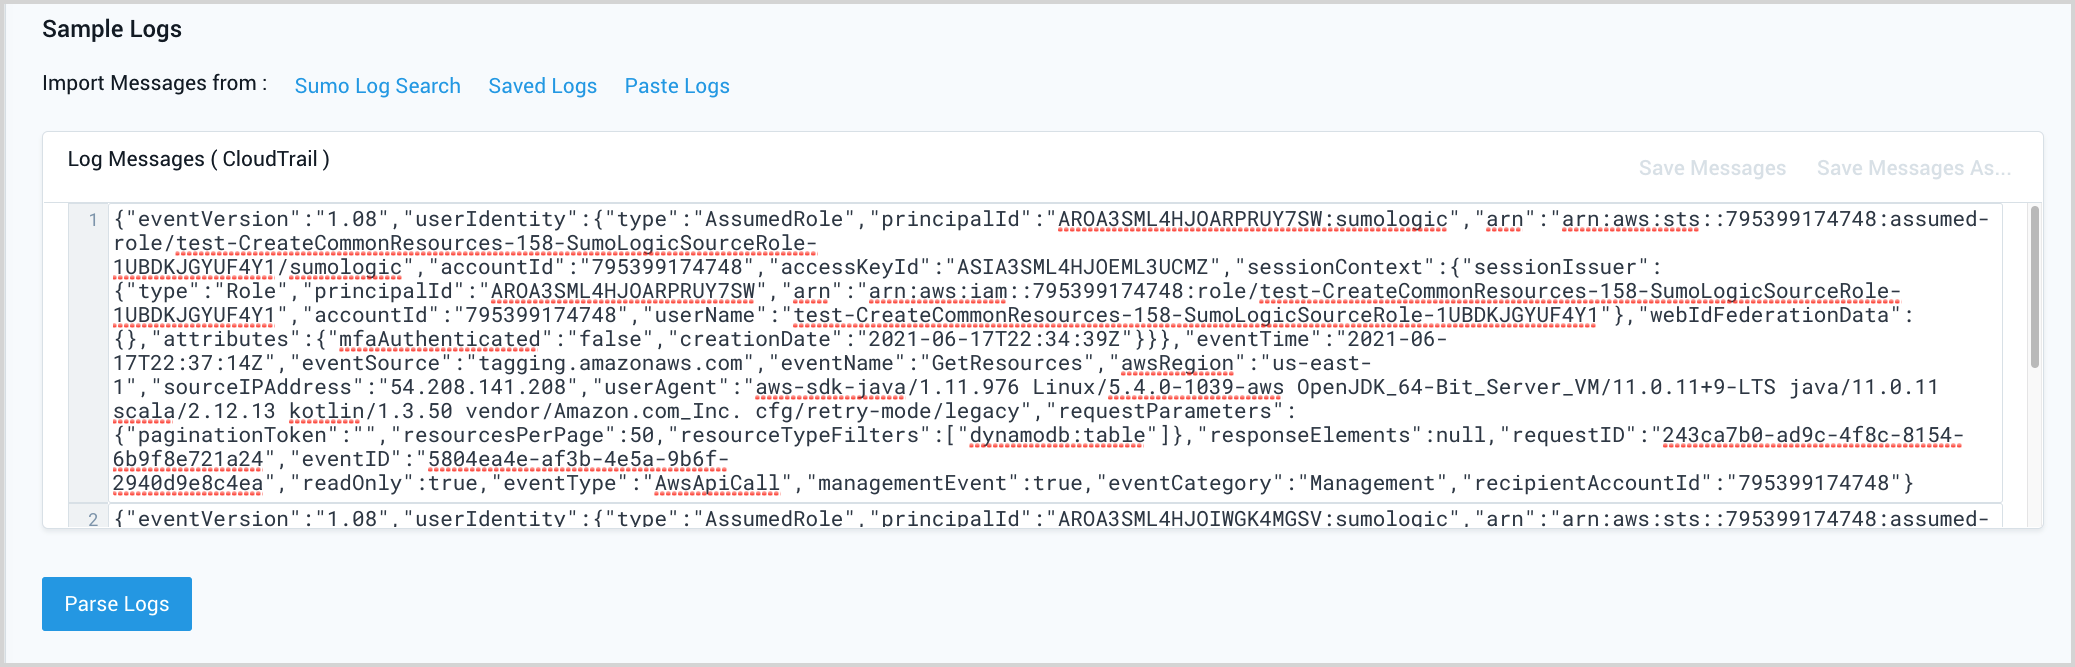
- The Sample logs portion of the parser editor now contains the sample messages.
- Proceed to Parse logs.
Using paste logs
To import messages by pasting them in the editor:
- Choose the Paste Logs option to display this popup.
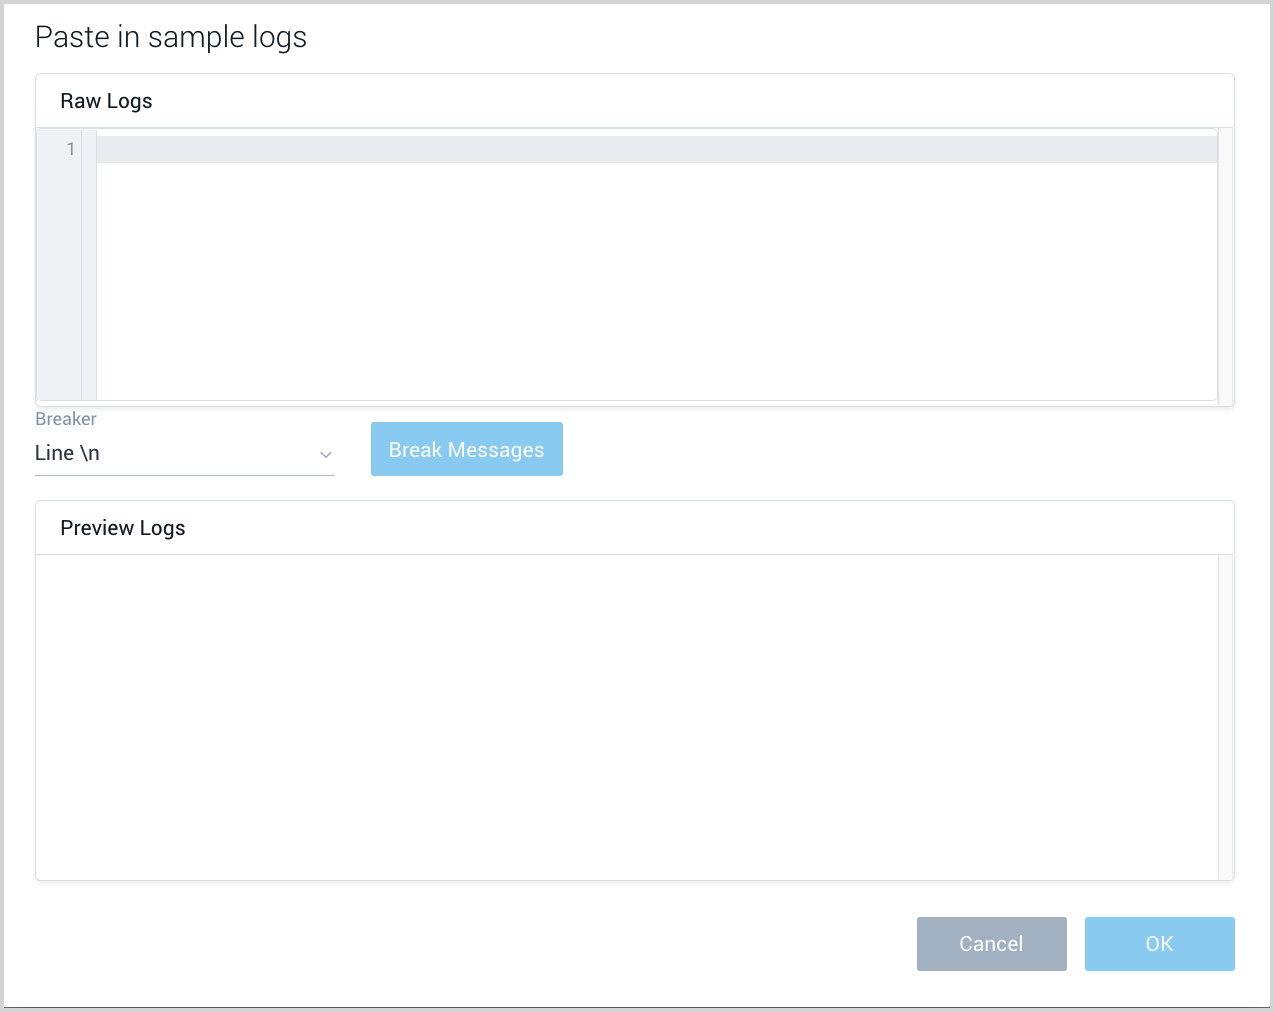
- Raw Logs. Paste your log messages into this area.
- Breaker. Use this option to tell the parser editor how to split the text you entered into messages. The options are:
- Line \n. Choose this option to break the text at line breaks.
- JSON. Choose this option for JSON messages.
- Custom Regex. Choose this if you want to use a regex to define the split. The popup will refresh and prompt you for the regex.
- Click Break Messages.
- The popup refreshes and shows how the pasted text was broken into individual messages. Review the messages to verify they were split correctly.
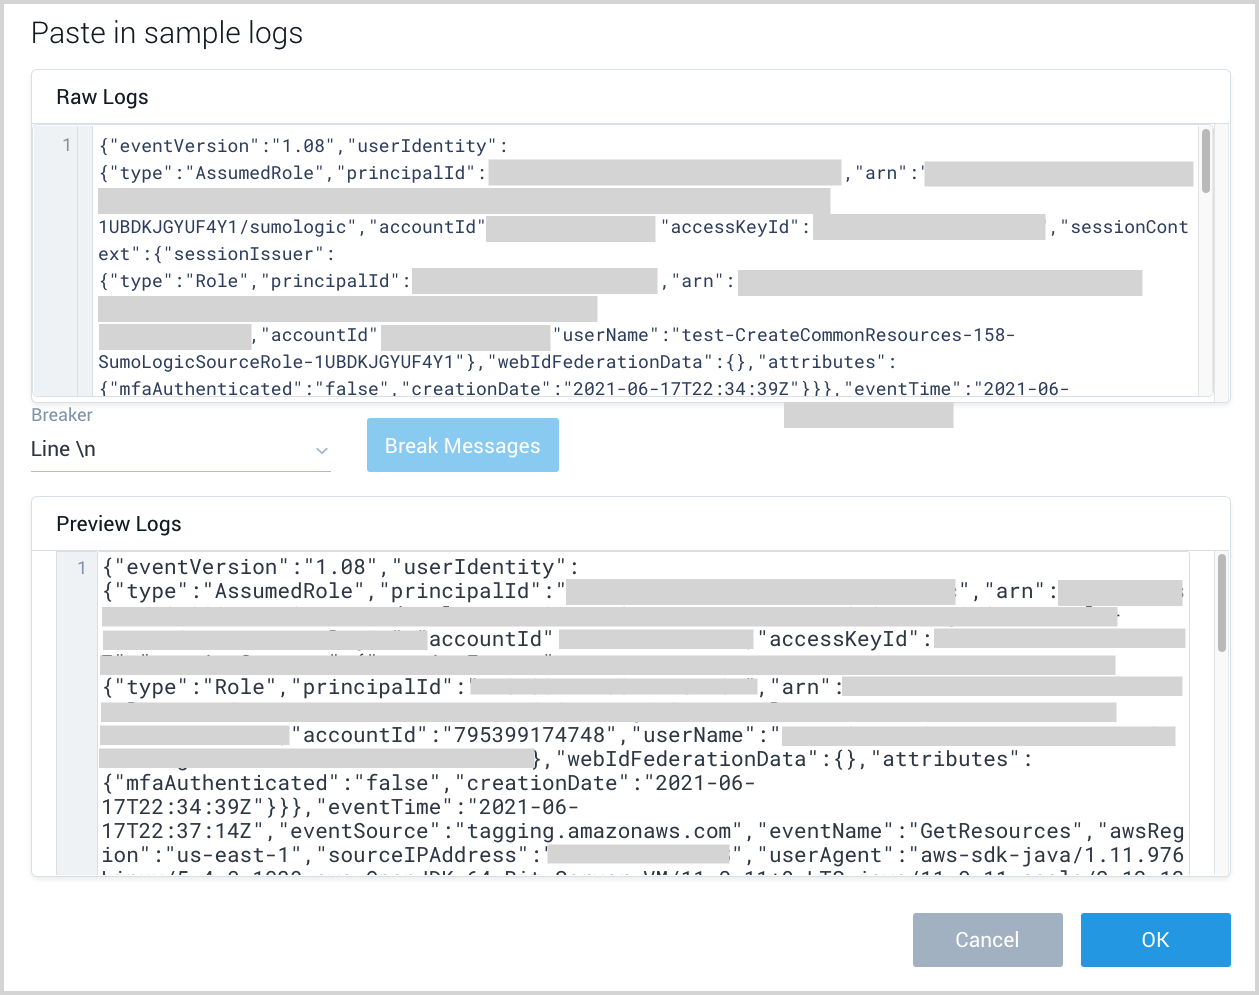
- Click OK to close the popup. The Sample logs portion of the parser editor now contains the sample messages. Note the Save Messages As option. You can save the messages you just broke up for use in any additional testing of the parser that you may need to do.

- To save the message, click the Save Messages As option.
- On the Save Messages popup, enter a name for the saved messages, and click Save.
- Proceed to Parse logs.
Using saved logs
To import previously saved messages:
- Click Saved Logs in the Sample Logs section of the editor. This popup appears:

- Select a saved file of sample messages from the list in the File Name section of the popup.
- The messages from the selected file appear in the Preview Logs section of the page.
- Click Get Logs.
- The popup closes and the logs that you retrieved now appear in the Sample Logs section of the editor.
- Proceed to Parse logs.
Understanding parsing failures and warnings
When you test your parser, the editor presents a count of how many messages were successfully parsed, and the counts of messages in the following categories:
Parsed messages with warnings—A warning or error occurred but the message was was partially parsed, depending on where the warning or error occurred. The most common cause of a warning is applying a RENAME_FIELD statement to a field that isn't present in the message.
Unparsed messages—An error occurred that caused parsing to fail. Potential causes of parsing failures include:
- An unmatched regex.
- Invalid XML, when using XML parsing.
- Invalid JSON parsing, when using JSON parsing.
- Fewer CSV fields in the message than expected.
- Attempting a transform on a field that doesn't exist unless you use TRANSFORM_FIELD_IF_PRESENT.
Dropped messages—The message was dropped due to a [DROP](/docs/cse/schema/parsing-language-reference-guide statement in the parser.
Create a local configuration for a system parser
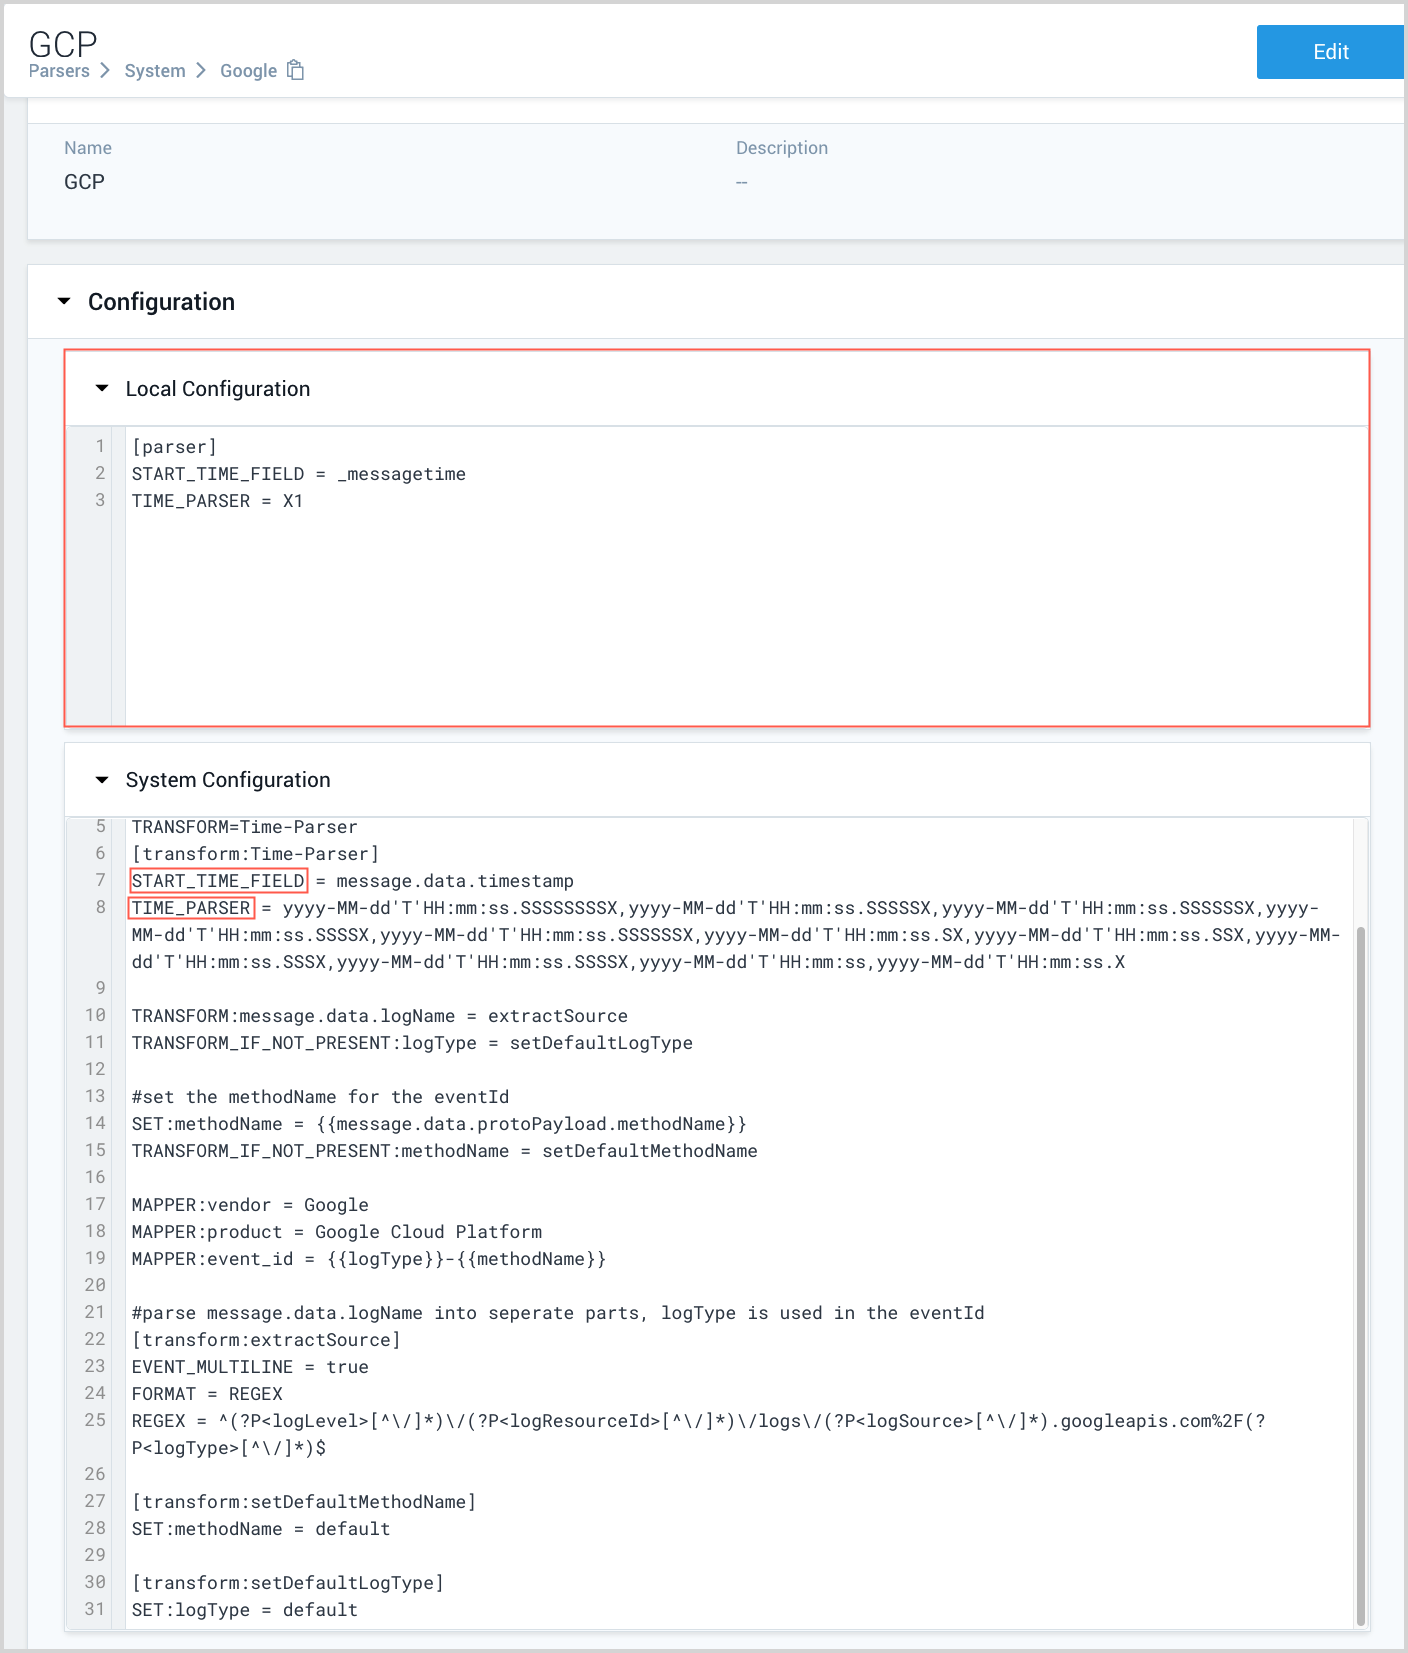
You can customize any of the system parsers that are built into CSE. When you open an system parser for editing, you'll see its code in the System Configuration section. For a system parser, the UI also provides an area for entering your customizations — that's the part of the page labeled Local Configuration. The parsing language statements you enter there will be executed in addition to the those in the system configuration. If a statement you add to the system configuration already exists in the system configuration, the local statement will override the system statement. For example, if the system configuration has:
START_TIME_FIELD = eventTime
and the local configuration has:
START_TIME_FIELD = _messagetime
the local statement overrides the system statement.
Here is an example of a local configuration that overrides the START_TIME_FIELD and TIME_PARSE statements.
The system configuration and local configuration are separate, so your customizations are preserved when Sumo Logic updates the parser.
Use cases for local configuration
You can use a local configuration to override any statement in a system parser, and add additional logic to the parser using any of the statements supported by the parsing language.
One use case for a local configuration to override one or more of a parser’s time handling statements. For example, if the logs to be parsed don’t have a timestamp, you could set START_TIME_FIELD = _messagetime. This causes the CIP message time to be used as the _starttime in the field dictionary your parser creates from a message. Or, if the time formats in the logs to be parsed don't exactly match the format that a system parser assumes, you use a local configuration to specify a different TIME_PARSER setting.
Another common reason to set up a local configuration is to pre-parse the content of a JSON object. If your parser is going to process an encapsulated JSON object, you can use a local configuration to pre-parse the original log message from the object.
To create a local configuration:
- Go to Manage Data > Logs > Parsers.
- In the System folder, navigate to the parser you want to modify and choose Edit from the three-dot more options menu.
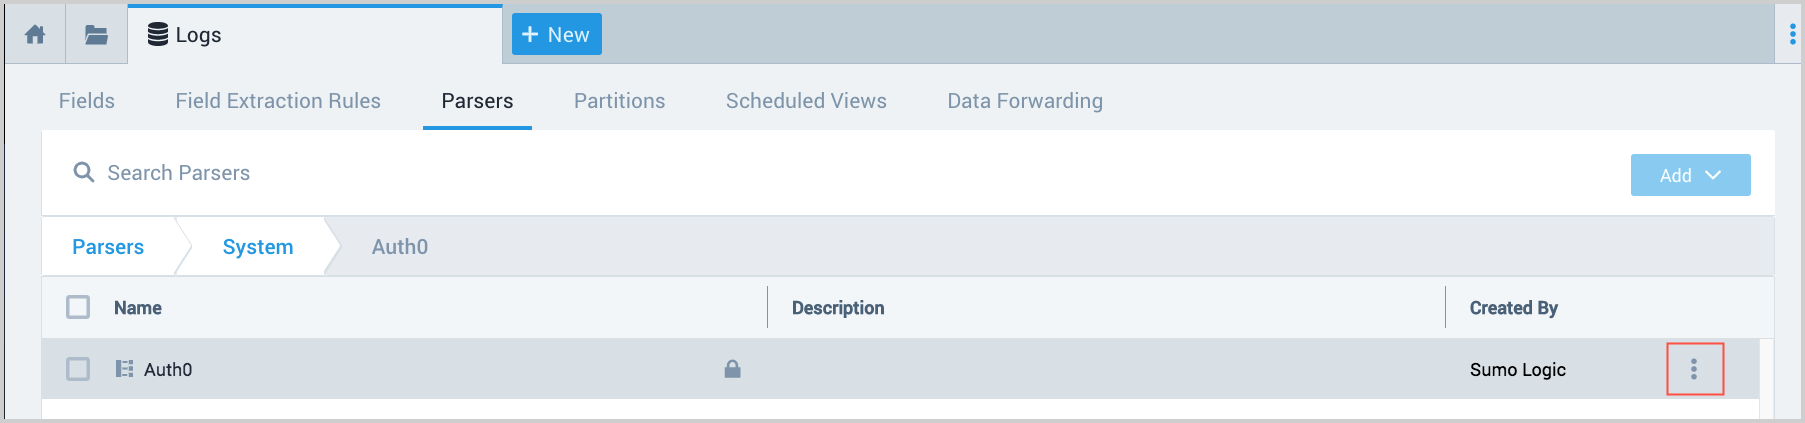
- The parser editor opens. The parser code is shown in the System Configuration area.
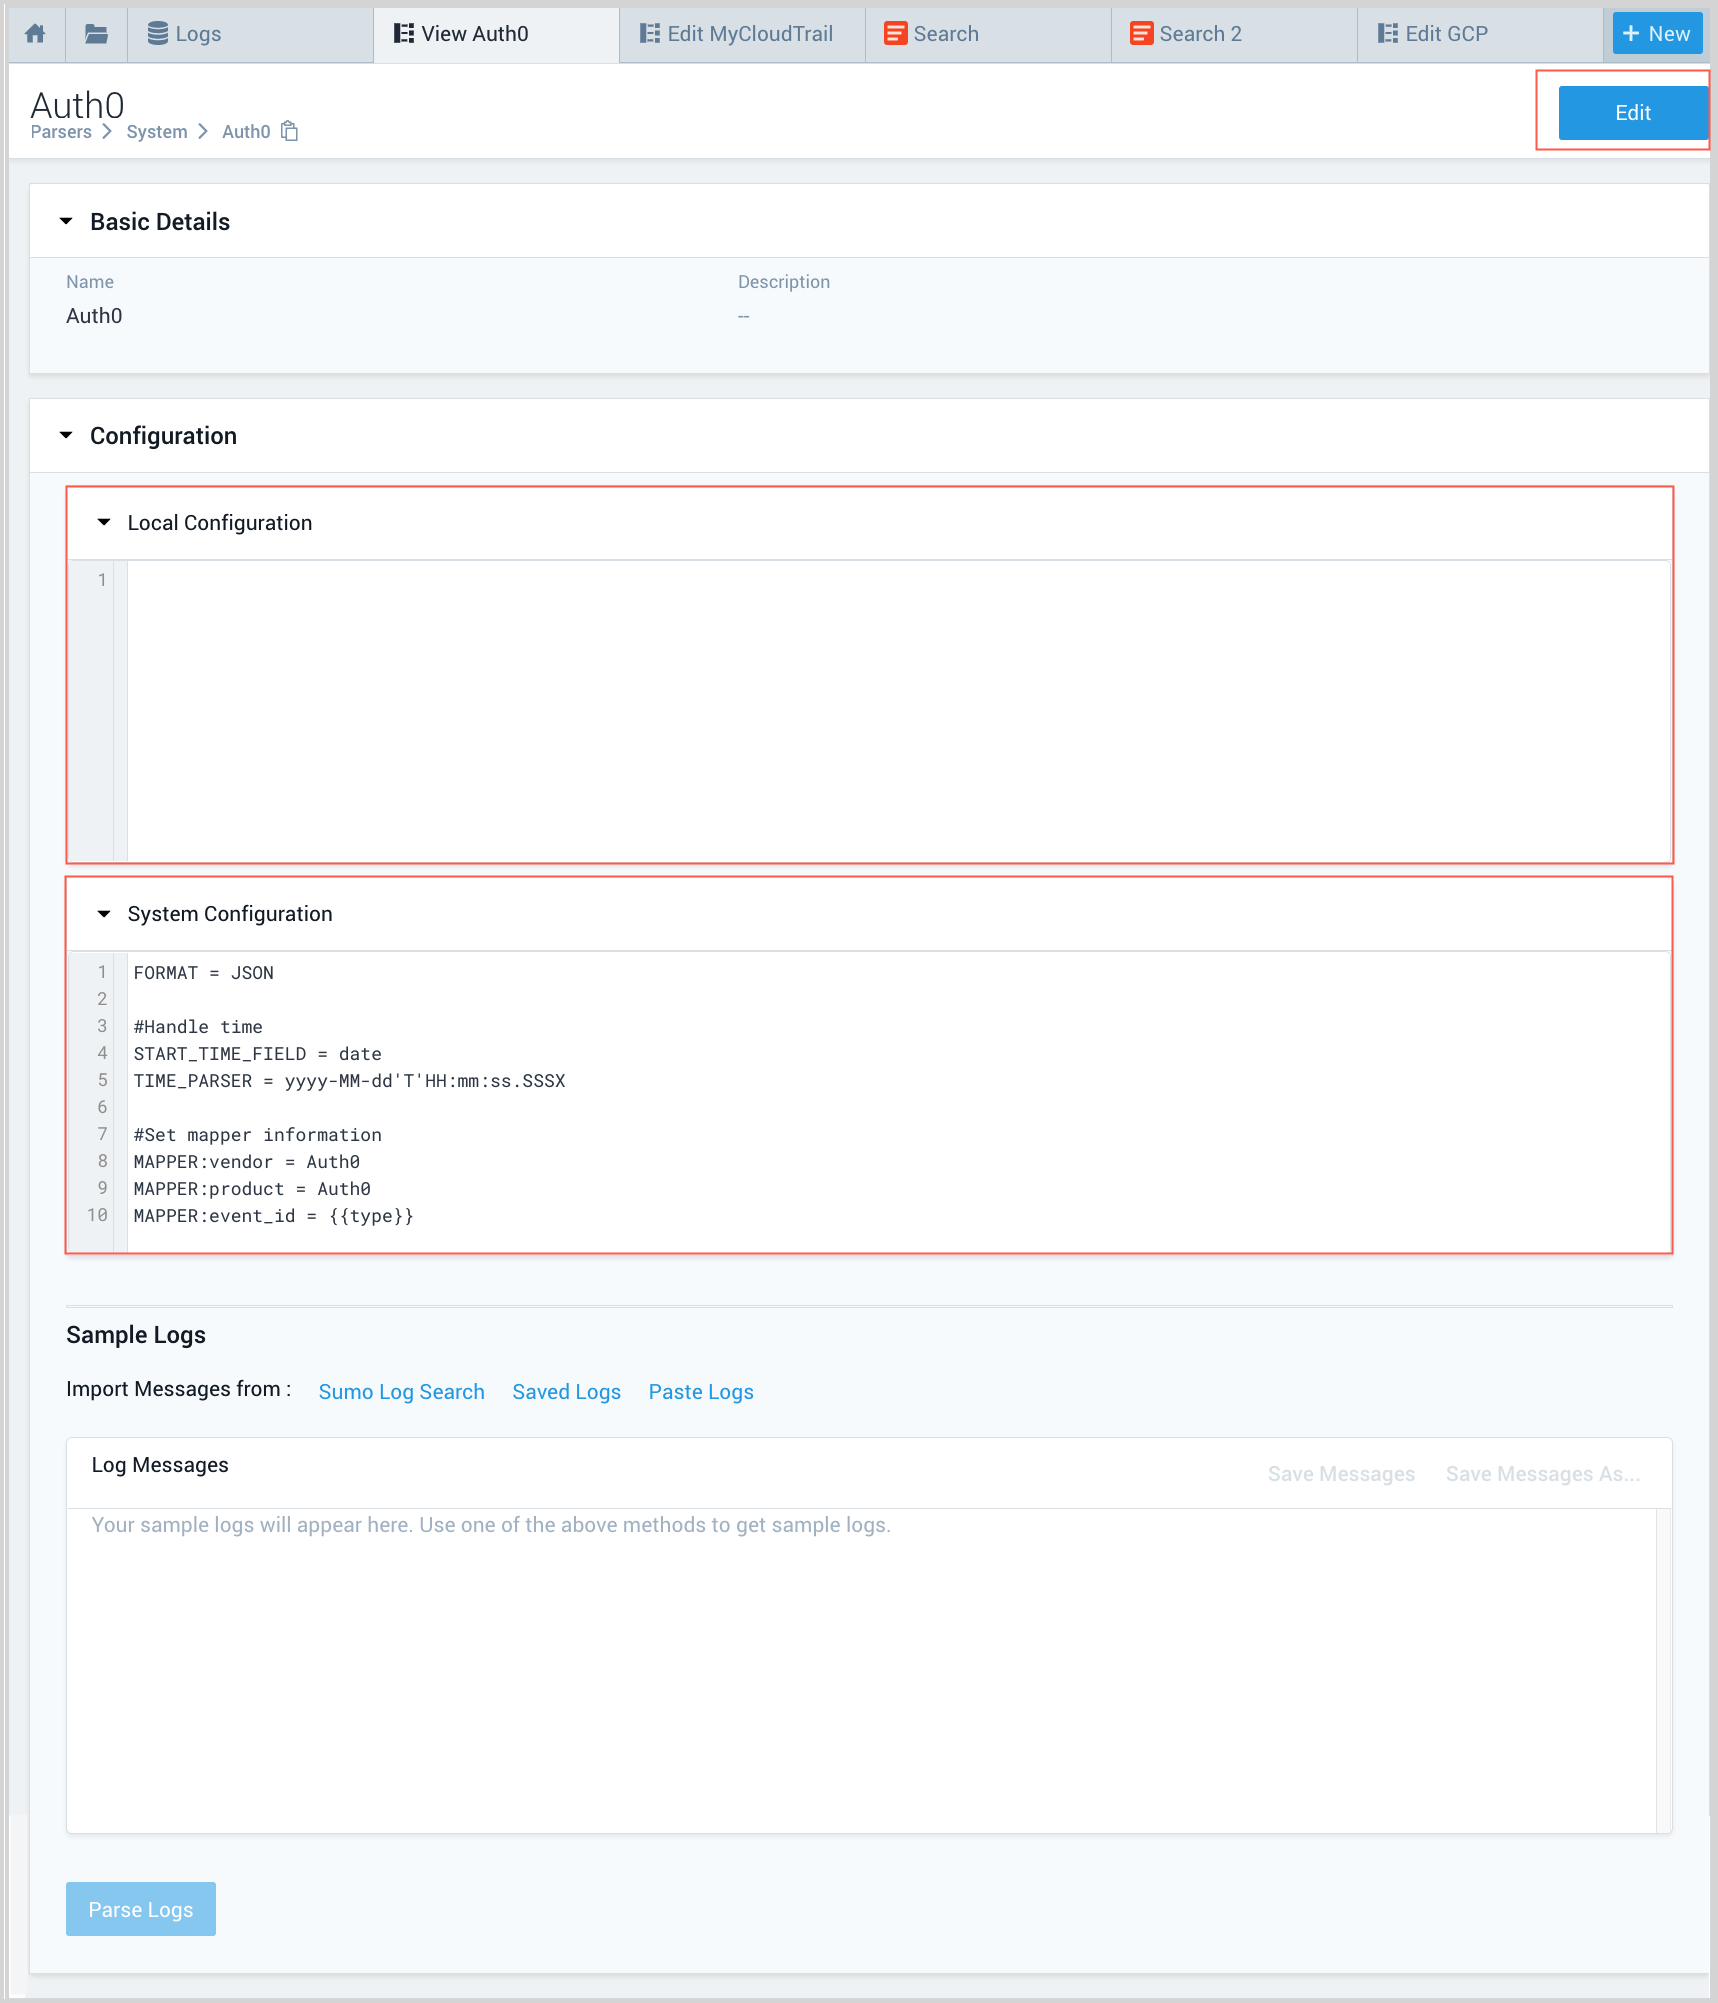
- Paste your custom parser code in the Local Configuration area.
- Use one of the methods in Get test messages above, and then click Parse Logs.
Move a parser
You can move a parser from one location to another within the parser editor’s folder structure. To do so, navigate to the parser you want to move, and select Move from the three-dot more options menu.
Export and import a parser
You can export a parser as JSON, and import it to another Sumo Logic org.
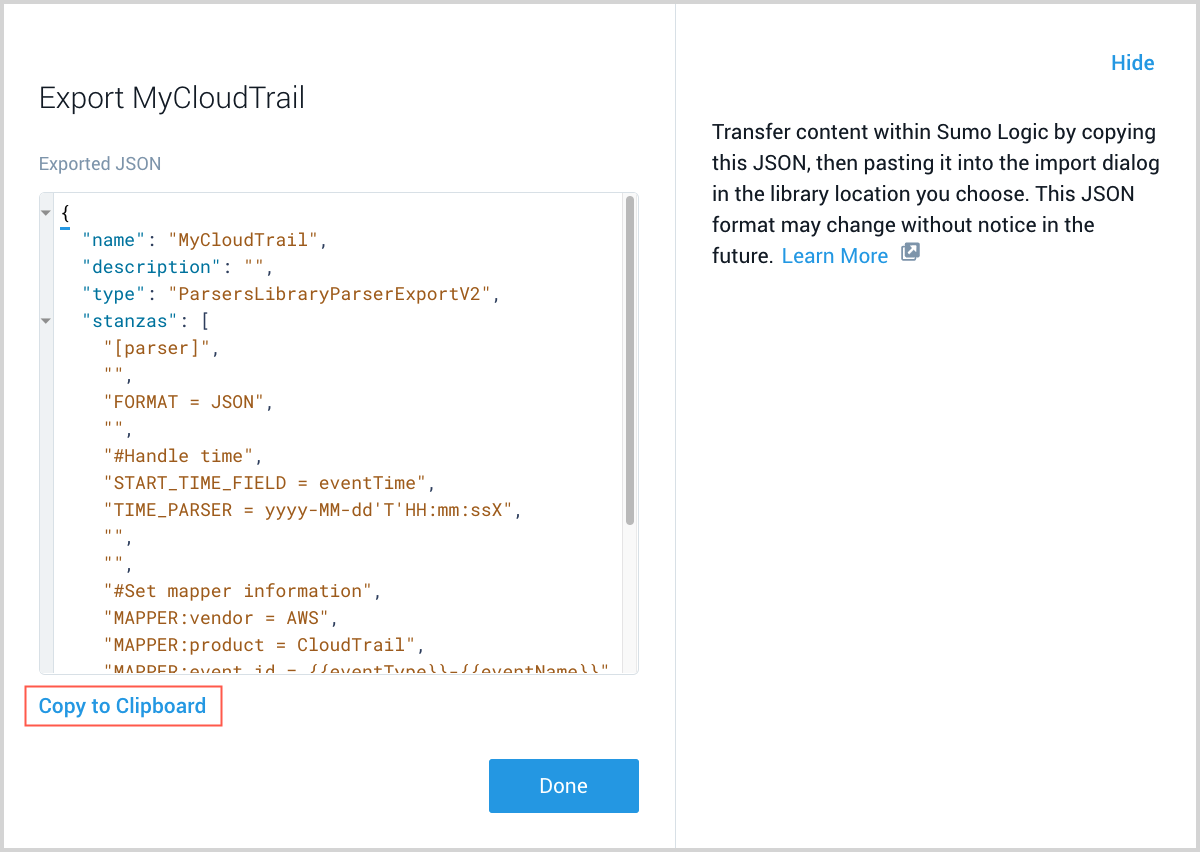
- Navigate to the parser you want to export and choose Export from the three-dot more options menu.
- On the Export popup, click Copy to Clipboard and then click Done.
- Access the Sumo Logic org where you want to import the parser.
- Go to Manage Data > Logs > Parsers.
- Navigate to the folder where you want to store the parser.
- Choose Import from the three-dot more options menu.
- Enter a name for the parser, paste the code you exported into the popup, and click Import.

Setting CSE log mapping information
In this step you configure one or more Log Mappings. If all of the messages your parser will process contain the same fields, and you want to create Records of the same type, a single Log Mapping will suffice. For some data sources, you will likely need to create more than one Log Mapping. For example:
With some CloudTrail logs messages, you might want to create a different Record type, depending on the event ID in a message. In some cases, an Authorization Record is appropriate, while in others, an Audit or Audit Change Record would be a better fit.
In some CloudTrail messages, the field mapping (the mapping between a key in the field dictionary and a CSE Record) will vary, depending on the Event ID in the message. For example, you may want to map data into the CSE schema field action, but the data you want to map is located in different keys of the original CloudTrail JSON messages depending on the CloudTrail event type.
To create your mapping, see Creating a Structured Log Mapping. After setting up the mapping or mappings, complete the steps in Configuring a source to use a parser, below.
Configuring a source to use a parser
This section explains how to configure a Sumo Logic CIP source to send the messages it collects to a parser. This involves configuring a Field for the source: you'll create a _parser Field that defines the path to the parser.
- Navigate to your custom parser in the editor.
- Hover over the row that contains the parser.
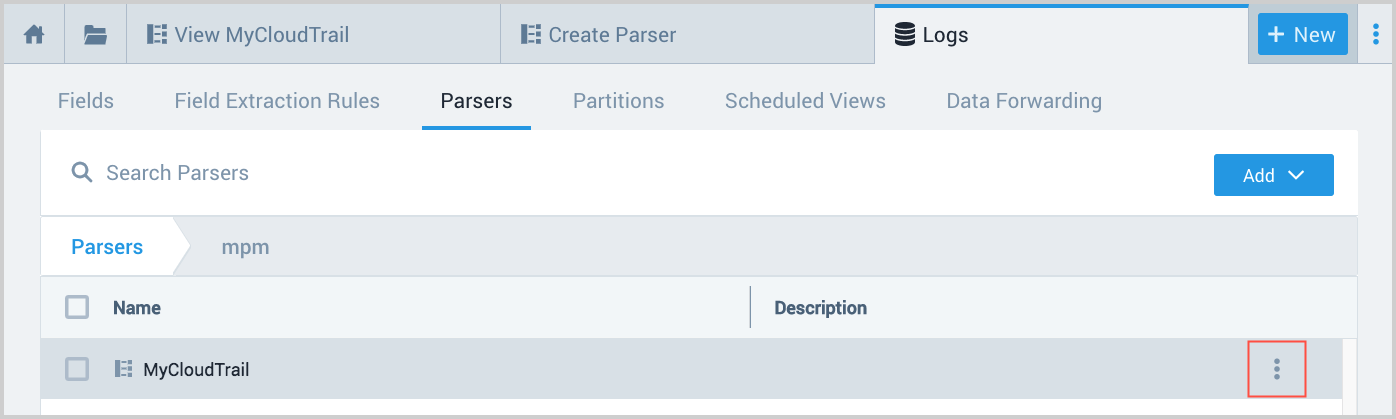
- Click the three-dot more options icon, and select Copy Path and save the path.
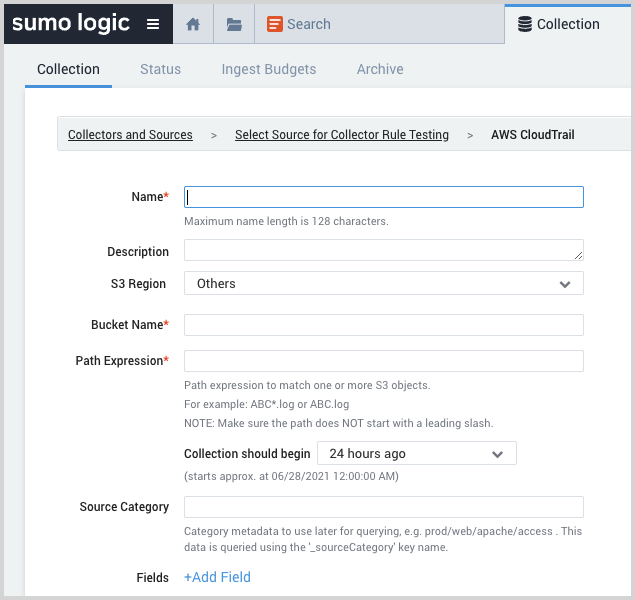
- In Sumo Logic CIP, go to Manage Data > Collection > Collection.
- Navigate to the source that produces the messages your custom parser will process.
- Click +Add Field.
- Two blank fields appear, below any Fields that have already been defined for the source. Enter
_parseras the field name and the path to your parser as the value.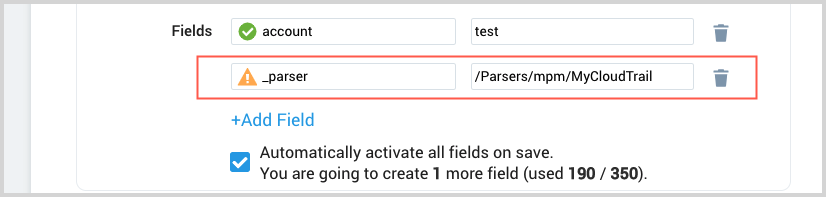 An orange icon indicates that the
 _parserfield has not been created in your CIP org yet.