Installing Collector on Linux
Follow the steps in this topic to install or uninstall an OpenTelemetry Collector on Linux. See OpenTelemetry Collector for information on other operating systems.
System Requirements
The Sumo Logic OpenTelemetry Collector is supported on both amd64 and arm64 architectures.
Minimal resource requirements are the following:
- 200 MB of disk space
- 64 MB of RAM
Supported Versions
- RHEL (7-9), Debian (9-11), Ubuntu (18-22), SUSE (ES12, ES15), Amazon Linux 2, CentOS (7, 8)
Install
You can install our OpenTelemetry Collector using one of the following methods:
Install Script
1. Get the Installation token
Get your installation token if you don't have it already and assign it to an environment variable:
export SUMOLOGIC_INSTALLATION_TOKEN=<TOKEN>
2. Run the Installation script
You can run the script in two ways:
- By piping
curlstraight intobash:sudo curl -s https://raw.githubusercontent.com/SumoLogic/sumologic-otel-collector/main/scripts/install.sh | sudo -E bash -s -- --tag "host.group=default" --tag "deployment.environment=default" - By first downloading the script, inspecting its contents for security, and then running it:
curl -Lso install-otelcol-sumo.sh https://github.com/SumoLogic/sumologic-otel-collector/releases/latest/download/install.sh
sudo -E bash ./install-otelcol-sumo.sh
The -E argument to sudo is needed to preserve the SUMOLOGIC_INSTALLATION_TOKEN environment variable in sudo session.
This will perform the following operations:
- Install or upgrade operation by placing the latest version as
/usr/local/bin/otelcol-sumo - Get static configuration and place it as
/etc/otelcol-sumo/sumologic.yaml - Create user configuration directory (
/etc/otelcol-sumo/conf.d) withcommon.yamlfile which will contain installation token - For Systemd:
- The script will get Systemd service configuration and place it as
/etc/systemd/system/otelcol-sumo.service - Create a
otelcol-sumouser and group that will be used to run the service - Enable
otelcol-sumoservice - Start
otelcol-sumoservice
- The script will get Systemd service configuration and place it as
3. Script Options
The following arguments can be passed to the script:
| long name | short name | description | takes value |
|---|---|---|---|
--skip-installation-token | k | Skips requirement for installation token. This option do not disable default configuration creation. | No |
--tag | t | Sets tag for collector. This argument can be use multiple times. One per tag. | Yes, in key=value format |
--download-only | w | Download new binary only and skip configuration part. | No |
--version | v | Version of Sumo Logic Distribution for OpenTelemetry Collector to install. By default, it gets latest version. | Yes, e.g. 0.71.0-sumo-0 |
--skip-config | s | Do not create default configuration | No |
--skip-systemd | d | Preserves from Systemd service installation. | No |
--fips | f | Install the FIPS-compliant binary. See FIPS section for more details. | No |
--install-hostmetrics | H | Install the hostmetrics configuration to collect host metrics. | No |
--yes | y | Disable confirmation asks. | No |
--uninstall | u | Removes Sumo Logic Distribution for OpenTelemetry Collector from the system and disable Systemd service eventually. Use with --purge to remove all configurations as well. | No |
--purge | p | It has to be used with --uninstall. It removes all Sumo Logic Distribution for OpenTelemetry Collector related configuration and data. | No |
--help | h | Prints help and usage. |
The following env variables can be used along with script:
| name | description |
|---|---|
SUMOLOGIC_INSTALLATION_TOKEN | Installation token |
UI Installation via App Catalog
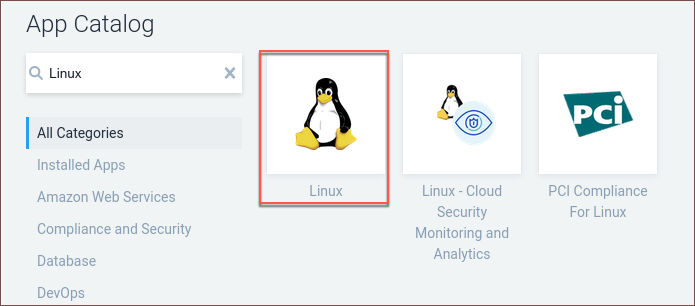
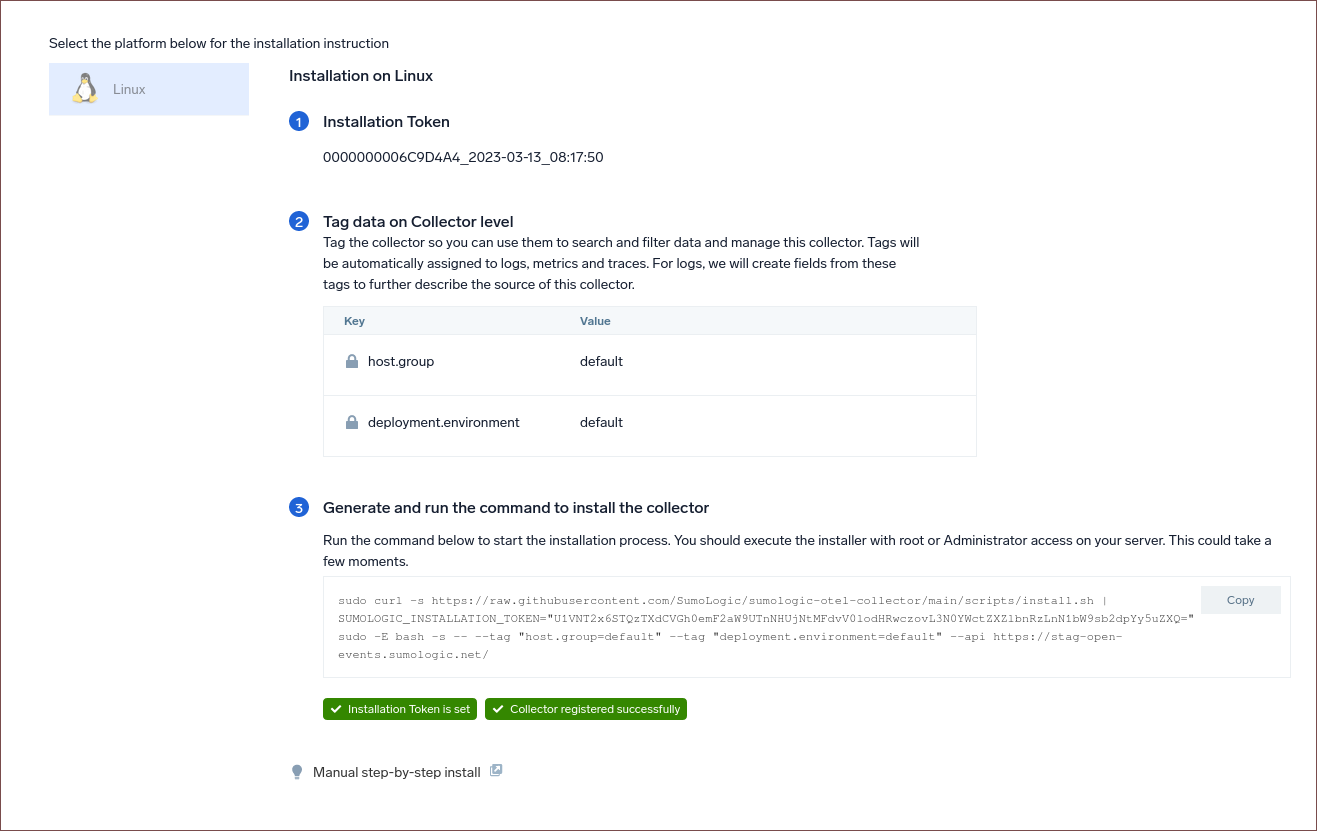
- Go to App Catalog and select Linux.
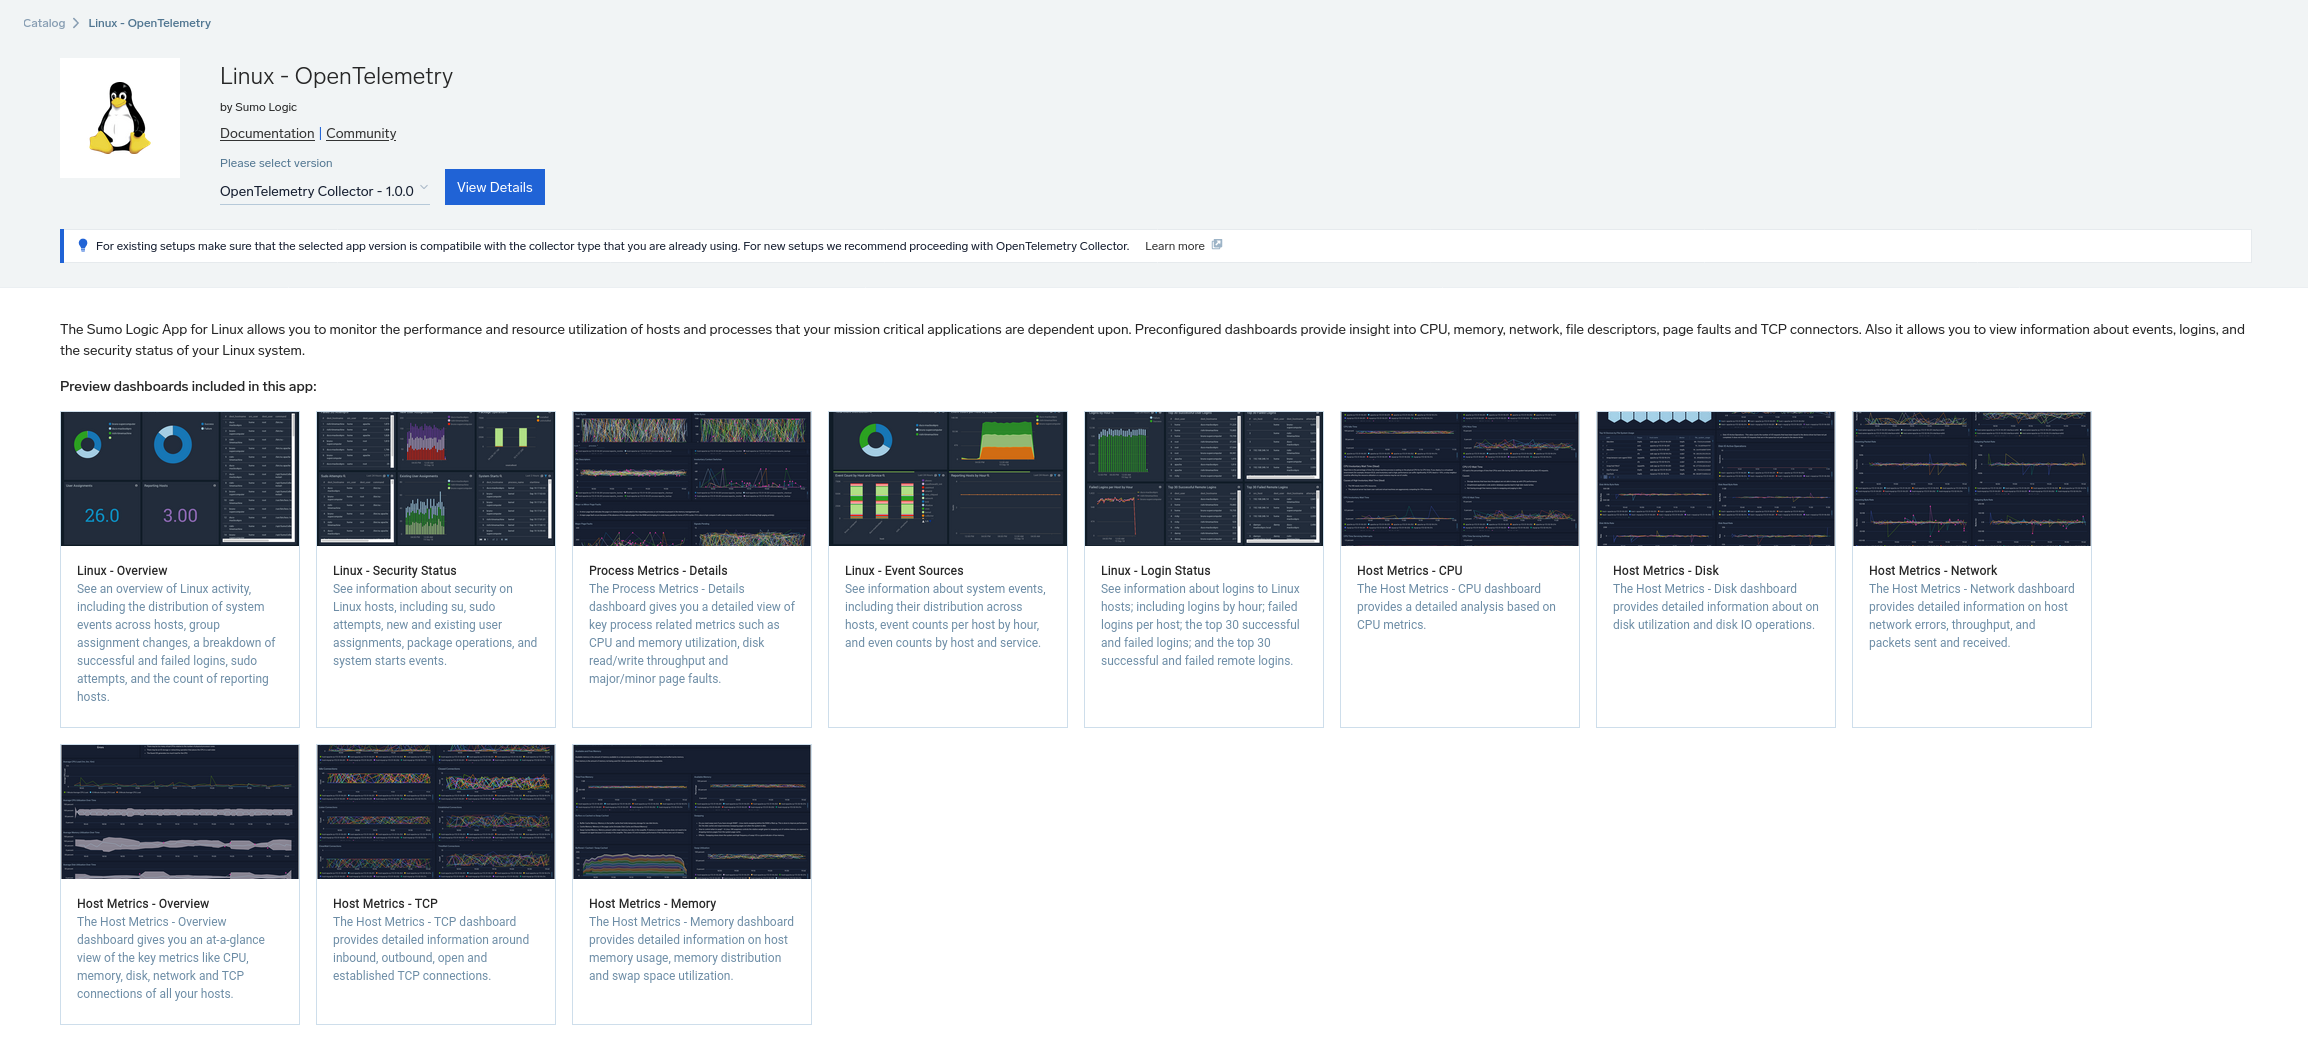
- Click Install App for your first installation, or View Details, then More Actions and finally Add another Host for next installation.
- Select Add New Collector and click Next.

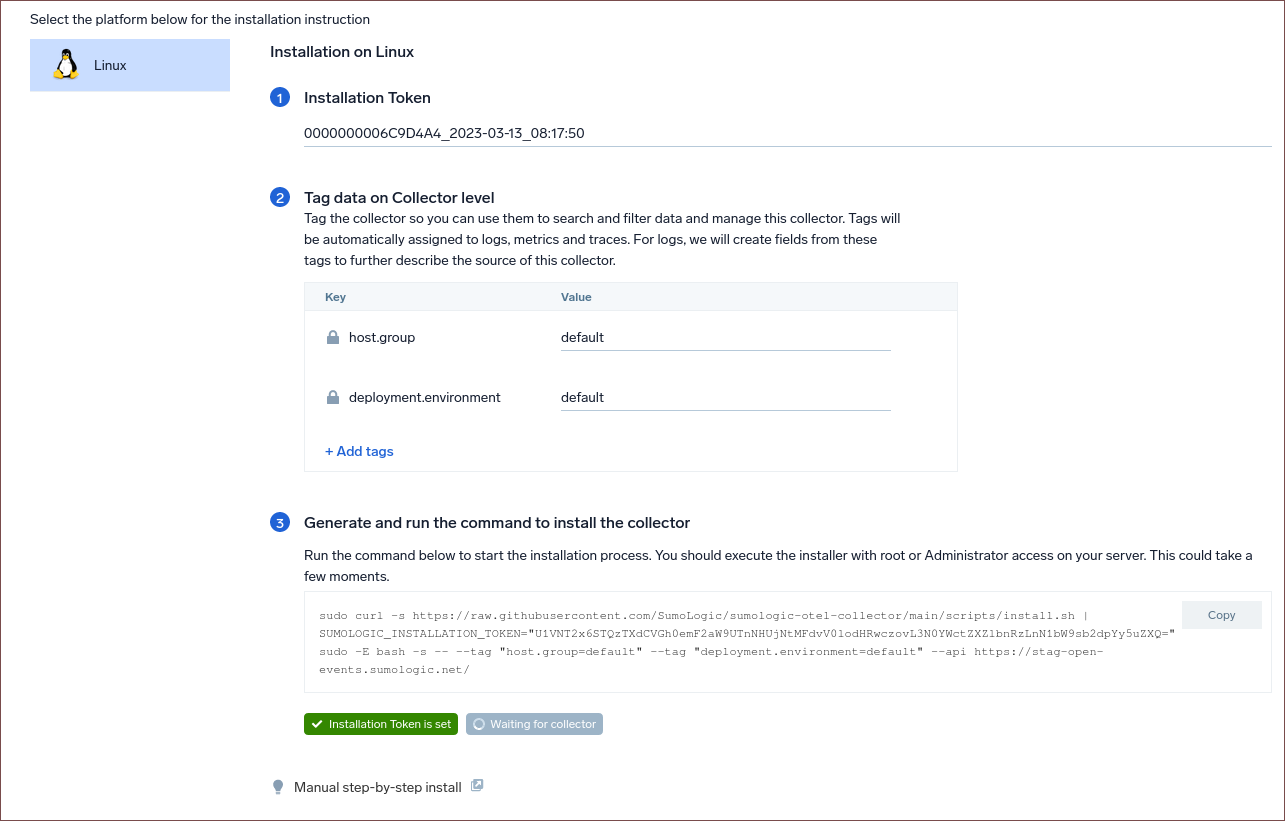
- Select installation token and customize your tags.
- Copy command and execute it in your system terminal.
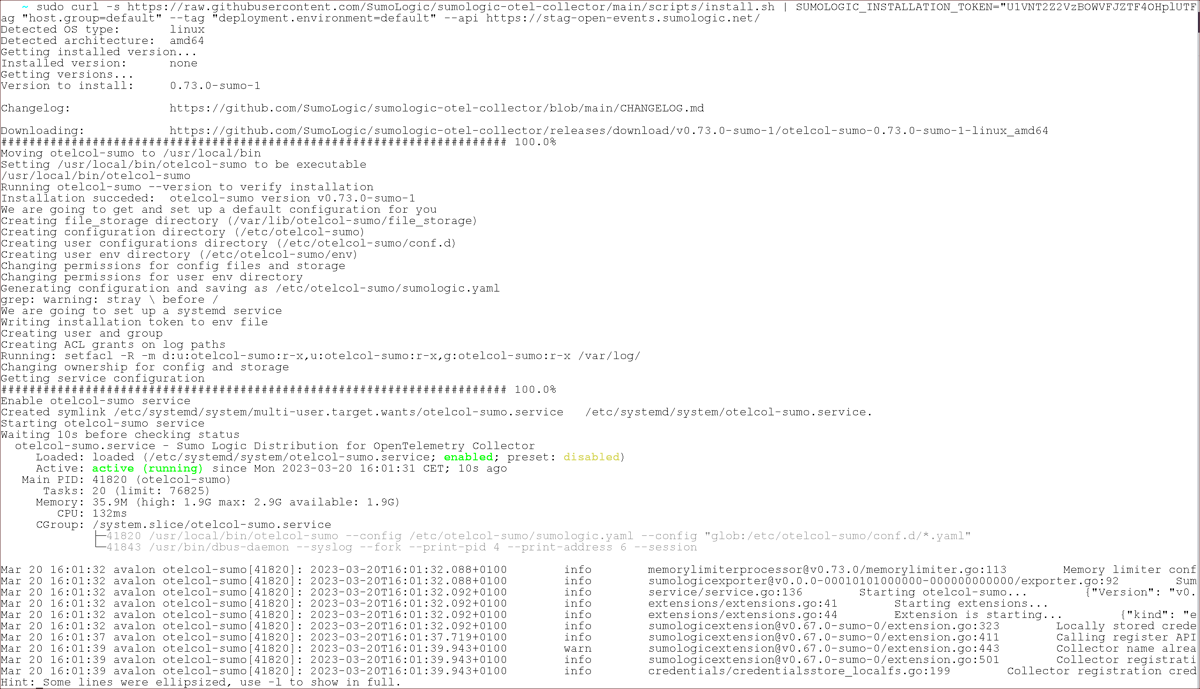
- Wait for the installation to complete.
- Read the prerequisite section.

- Customize your source configuration, download it, place it in the directory
/etc/otelcol-sumo/conf.d, and then restart your collector.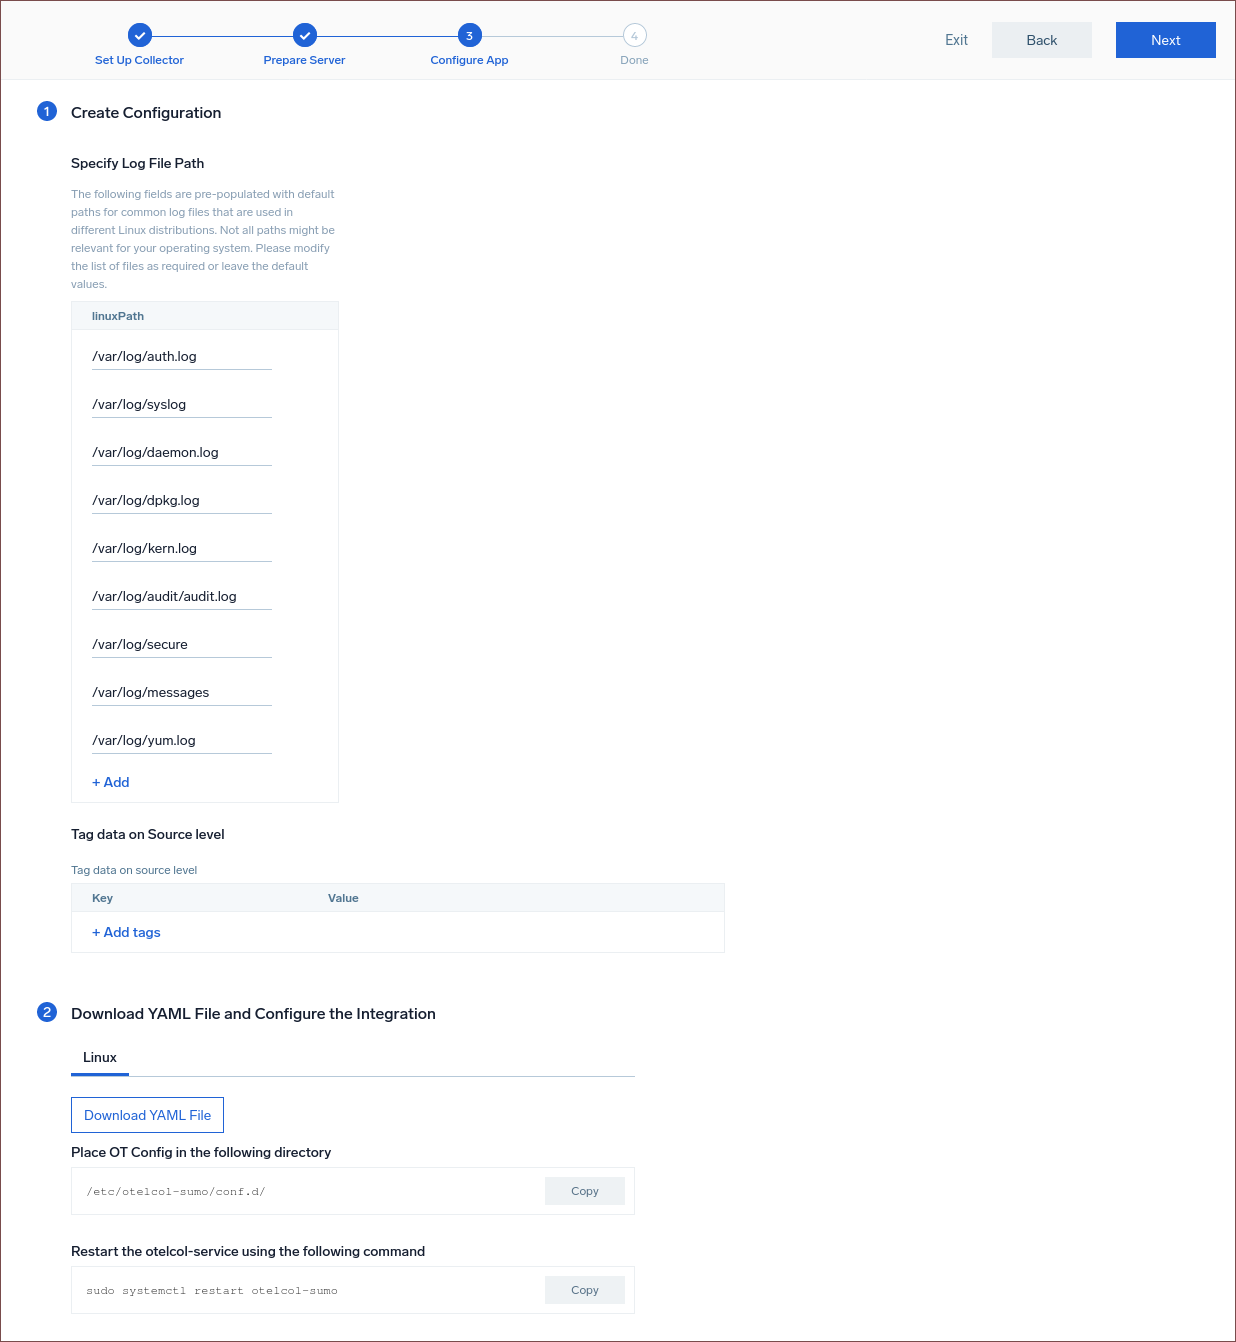
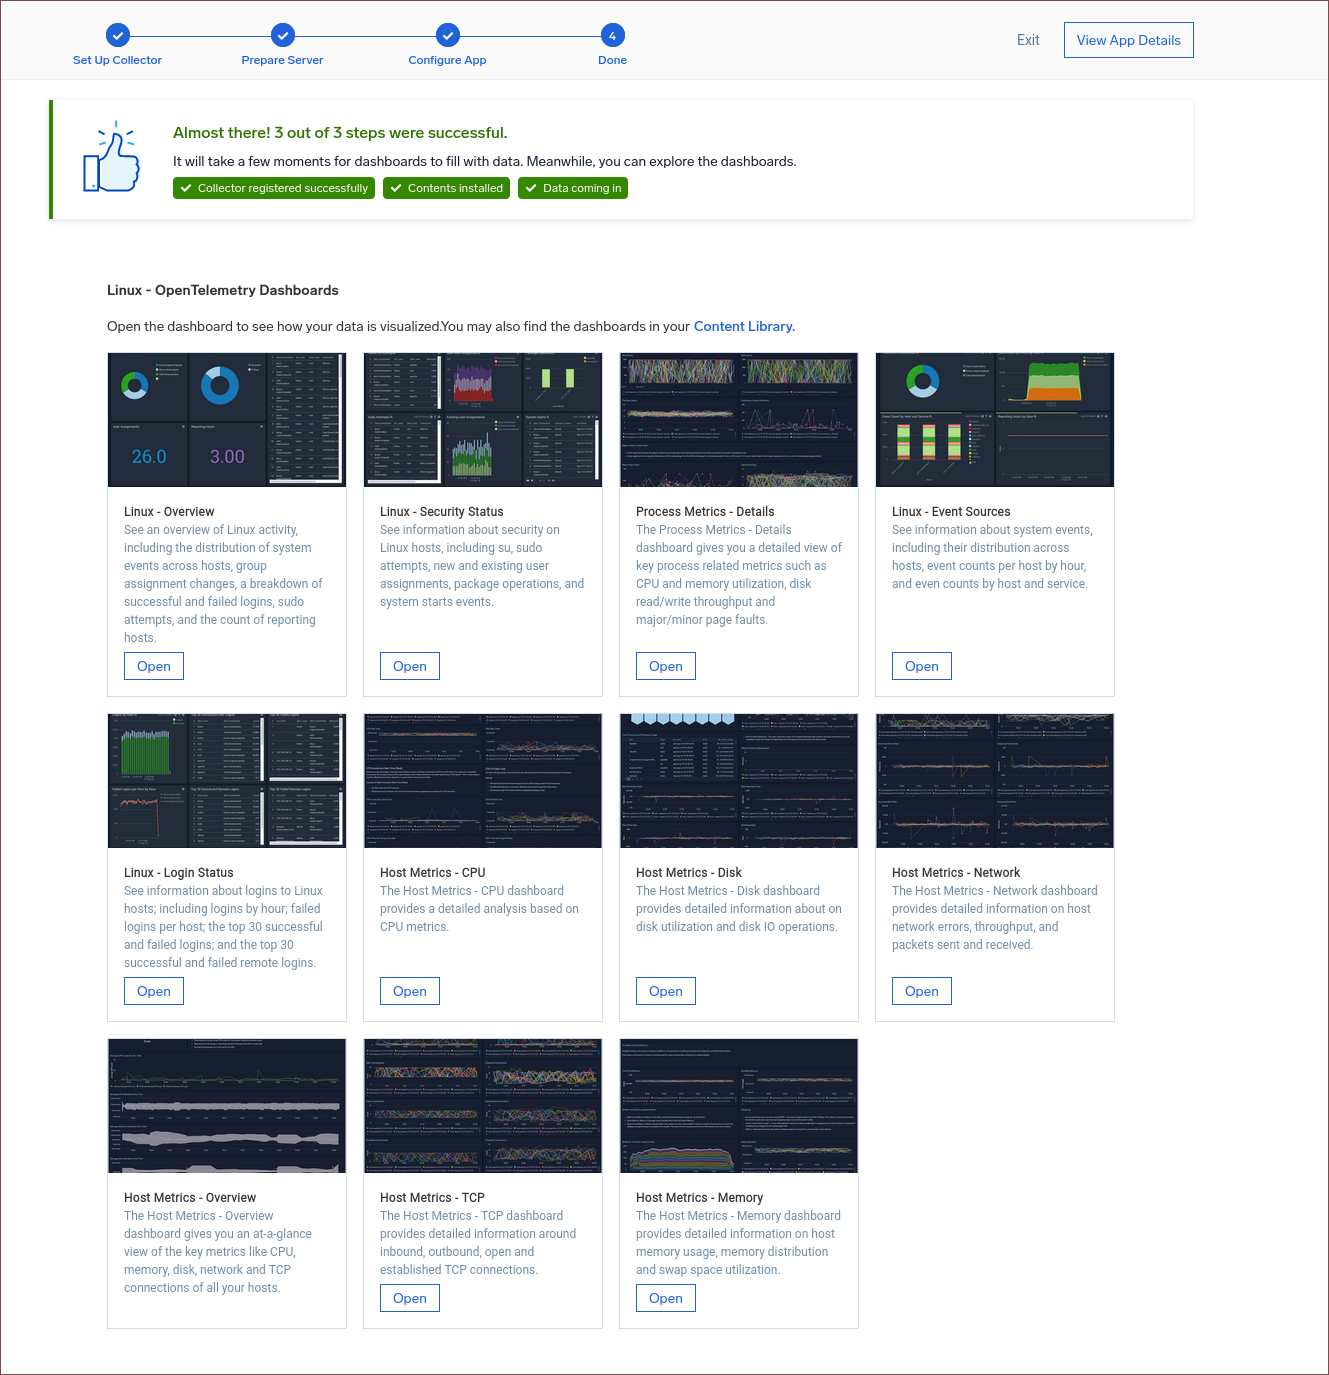
- Wait for the installation to complete.
Manual step-by-step Installation
Step 1. Download the Binary
Examples for OpenTelemetry Collector version 0.73.0-sumo-0.
- amd64 (x86-64)
- arm64
curl -sLo otelcol-sumo \
"https://github.com/SumoLogic/sumologic-otel-collector/releases/download/v0.73.0-sumo-0/otelcol-sumo-0.73.0-sumo-0-linux_amd64"
curl -sLo otelcol-sumo \
"https://github.com/SumoLogic/sumologic-otel-collector/releases/download/v0.73.0-sumo-0/otelcol-sumo-0.73.0-sumo-0-linux_arm64"
Step 2. Move the binary to your PATH environment
Move the downloaded binary into a directory from your PATH environment, so that it can be used by simply invoking otelcol-sumo.
chmod +x otelcol-sumo
sudo mv otelcol-sumo /usr/local/bin/otelcol-sumo
Step 3. Verify the Installation
To verify installation, run the OpenTelemetry Collector.
otelcol-sumo --version
Step 4. Run OpenTelemetry Collector as Systemd Service
We recommend using the installation script as it supports the Systemd scenario. This section describes how to install it manually.
Ensure that the user who will run the otelcol-sumo process has access to any directories used in your configuration within the filesystem.
For example, if you use the file_storage extension in your configuration like this:
extensions:
file_storage/custom_settings:
directory: /var/lib/otelcol/mydir
timeout: 1s
Then the user running the process must have access to /var/lib/otelcol/mydir.
To run OpenTelemetry Collector as Systemd Service, follow the steps below:
- Ensure that
otelcol-sumohas been installed into/usr/local/bin/otelcol-sumoby running this command./usr/local/bin/otelcol-sumo --version - Create configuration, follow the steps below.
- Get recommended configuration from Sumo Logic repository and save it as
/etc/otelcol-sumo/sumologic.yaml. - Create your custom configuration file in the
/etc/otelcol-sumo/conf.ddirectory. For example, you can create a file calledcommon.yamlin this directory to store your custom configuration, like this/etc/otelcol-sumo/conf.d/common.yaml.noteIt is recommended to limit access to the configuration file as it contains sensitive information.
- You can change the access permissions to the configuration file by running the following command:
mkdir -p /etc/otelcol-sumo/{conf.d,env}
chmod 551 /etc/otelcol-sumo /etc/otelcol-sumo/{conf.d,env}
chmod 440 /etc/otelcol-sumo/conf.d/common.yaml /etc/otelcol-sumo/sumologic.yaml
- Get recommended configuration from Sumo Logic repository and save it as
- Create
userandgroupto run OpenTelemetry by running the following command:sudo useradd -mrUs /bin/false -d /var/lib/otelcol-sumo otelcol-sumo- This command will create a home directory for the user. By default, the
sumologicextension stores the credentials in a subdirectory of the home directory. However, if the user with nameotelcol-sumoalready exists, it won't be overwritten, so you should make sure that a home directory has been created for this user. If you don't want the user to have a home directory, useuseraddwith theMflag instead ofm(sudo useradd -MrUs ...) and explicitly change the directory for saving the credentials. For example:For more information, refer to the sumologic extension documentation.extensions:
sumologic:
# ...
collector_credentials_directory: /var/lib/otelcol-sumo/credentials
- This command will create a home directory for the user. By default, the
- Ensure that the configuration can be accessed by
otelcol-sumouser which will be used to run the service by running this command.$ sudo find /etc/otelcol-sumo/ -type 'f' | sudo xargs ls -al
-r--r----- 1 otelcol-sumo otelcol-sumo 48 Feb 16 09:00 /etc/otelcol-sumo/conf.d/common.yaml
-r--r----- 1 otelcol-sumo otelcol-sumo 4569 Feb 16 09:00 /etc/otelcol-sumo/sumologic.yaml - Verify if OpenTelemetry collector runs without errors by running this command:
sudo su -s /bin/bash otelcol-sumo -c '/usr/local/bin/otelcol-sumo --config /etc/otelcol-sumo/sumologic.yaml --config "glob:/etc/otelcol-sumo/conf.d/*.yaml"' - Get service file and save as
/etc/systemd/system/otelcol-sumo.service:sudo curl https://raw.githubusercontent.com/SumoLogic/sumologic-otel-collector/main/examples/systemd/otelcol-sumo.service -o /etc/systemd/system/otelcol-sumo.servicenoteAdjust memory configuration to your setup.
- Enable autostart of the service by running the following command:
sudo systemctl enable otelcol-sumo - Start service and check status by running the following command:
sudo systemctl start otelcol-sumo
sudo systemctl status otelcol-sumo  # checks status
sudo journalctl -u otelcol-sumo  # checks logs
Using Environmental variable to store Installation token
We recommend keeping the install token in environmental variable for Systemd installation:
- Ensure that the service file
/etc/systemd/system/otelcol-sumo.servicecontainsEnvironmentFile=-/etc/otelcol-sumo/env/*.envby running this command.$ sudo cat /etc/systemd/system/otelcol-sumo.service
[Service]
...
EnvironmentFile=-/etc/otelcol-sumo/env/*.env - Ensure that the
/etc/otelcol-sumo/envdirectory exists by running this command.sudo mkdir -p /etc/otelcol-sumo/env - Create
/etc/otelcol-sumo/env/token.envdirectory with your installation token. In this example, we useSUMOLOGIC_INSTALLATION_TOKEN, as it will be automatically used by the recommended configuration.SUMOLOGIC_INSTALLATION_TOKEN=<your token> - Ensure that the file has the correct owner and permissions by running this command.
sudo chmod 440 /etc/otelcol-sumo/env/token.env
sudo chown otelcol-sumo:otelcol-sumo /etc/otelcol-sumo/env/token.env - Remove
install_tokenoverrides from/etc/otelcol-sumo/conf.d/*.yaml. You can find them using the following command:$ sudo grep -Rn install_token /etc/otelcol-sumo/conf.d
/etc/otelcol-sumo/conf.d/common.yaml:3: install_token: <some token> - Restart
otelcol-sumoservice by running this command.sudo systemctl restart otelcol-sumo
Running Binary Manually
If your system does not support Systemd, or you don't want to create a service, you can run Collector manually.
sudo otelcol-sumo --config=/etc/otelcol-sumo/sumologic.yaml --config "glob:/etc/otelcol-sumo/conf.d/*.yaml"
Additional Settings
This section describes common OpenTelemetry customizations.
Using Proxy
Exporters leverage the HTTP communication and respect the following proxy environment variables:
HTTP_PROXYHTTPS_PROXYNO_PROXY
You may either export proxy environment variables locally, for example:
export FTP_PROXY=<PROXY-ADDRESS>:<PROXY-PORT>
export HTTP_PROXY=<PROXY-ADDRESS>:<PROXY-PORT>
export HTTPS_PROXY=<PROXY-ADDRESS>:<PROXY-PORT>
or make them available globally for all users, e.g.
tee -a /etc/profile << END
export FTP_PROXY=<PROXY-ADDRESS>:<PROXY-PORT>
export HTTP_PROXY=<PROXY-ADDRESS>:<PROXY-PORT>
export HTTPS_PROXY=<PROXY-ADDRESS>:<PROXY-PORT>
END
To exclude a specific domain or IP address from using the proxy, you can add it to the NO_PROXY environment variable. For example, to exclude the domain sumologic.com from using the proxy, you can add the following command:
export NO_PROXY=sumologic.com
For Systemd service, the variables can be placed in /etc/otelcol-sumo/env/proxy.env, as default configuration (EnvironmentFile=-/etc/otelcol-sumo/env/*.env) will load them automatically.
Service need to be restarted in order to apply the changes.
FIPS
To install FIPS compliant binary, you should add --fips switch to installation command, so it will look like the following:
sudo curl -Ls https://github.com/SumoLogic/sumologic-otel-collector/releases/latest/download/install.sh | SUMOLOGIC_INSTALLATION_TOKEN="TOKEN" sudo -E bash -s -- --tag "host.group=default" --tag "deployment.environment=default" --fips && sudo otelcol-sumo --config=/etc/otelcol-sumo/sumologic.yaml --config "glob:/etc/otelcol-sumo/conf.d/*.yaml"
Refer to BoringCrypto and FIPS compliance in our repository for more details.
Uninstall
The recommended way to uninstall the OpenTelemetry Collector depends on how you installed it.
Install Script
If you installed the Collector with the install script, you can use it to uninstall the Collector:
sudo curl -Ls https://github.com/SumoLogic/sumologic-otel-collector/releases/latest/download/install.sh | sudo -E bash -s -- -u -y
You can also use flag -p to remove all existing configurations as well:
sudo curl -Ls https://github.com/SumoLogic/sumologic-otel-collector/releases/latest/download/install.sh | sudo -E bash -s -- -u -y -p
Manual step-by-step Uninstall
If you installed the Collector manually, simply remove the binary from the directory you have placed it in by running the following command:
sudo rm /usr/local/bin/otelcol-sumo
Upgrading the Collector
Upgrade OpenTelemetry Collector
First, you have to upgrade the Collector's version. The way you should do it, depends on how you installed it.
Install Script
Running install script will simply upgrade collector to the latest version:
sudo curl -Ls https://github.com/SumoLogic/sumologic-otel-collector/releases/latest/download/install.sh | sudo -E bash -s -- -u -y
You need to restart collector process manually in order to apply changes.
Manual step-by-step Installation
If you installed the Collector manually, the simplest way to upgrade is to follow these steps:
Update your Config
After an upgrade, you should make sure that your config for OpenTelemetry Collector is up to date.
To see changes in upstream OpenTelemetry components, refer to the core changelog and contrib changelog.
List of breaking changes specific to Sumo Logic Distribution of OpenTelemetry Collector can be found here.
Troubleshooting
For information on troubleshooting and solutions, refer to Troubleshooting and FAQ.