Configure a Custom Inventory Source
This topic explains how you can extract inventory data from logs in Sumo Logic and send it to CSE. If you want to leverage inventory data from a system or service that isn’t supported by a Sumo Logic Source inventory source, you can follow the instructions in this topic. This procedure assumes that you already ingest log data that contains inventory data.
CSE uses inventory data—information about hosts and users in your environment—to provide context to Signals. Inventory data can also be used in Entity Groups to set attributes on Entities (users, hosts, and so on); those attributes can be later used in detection rule definitions, to adjust the severity of Signals (using criticality), and for further context in Signals.
Sumo Logic provides a number of Sources you can use to ingest inventory data from services such as Microsoft Azure AD, Carbon Black, and AWS EC2. For more information, see Inventory Sources and Data.
How it works
In the steps below, you’ll configure a Sumo Logic scheduled search that returns inventory data that’s been ingested by your inventory source. You configure a Webhook connection as the alert type for the scheduled search. The webhook’s payload is inventory data, and its destination is an HTTP Source that you’ve set up to receive the data.
Before you start
Identify your source of inventory data and review the CSE inventory schema below. The schema identifies the attributes supported for the two different CSE inventory types: user and computer. For each attribute in the user or host schema, identify the field from your inventory source that maps to the schema attribute. You’ll use this mapping when you set up a Webhook in Step 2 below.
Limitations
This approach uses Scheduled Searches, which are limited to 100 unique rows of data each time they trigger. This means that if you have more than 100 inventory items, only the first 100 will be sent using this method.
Step 1: Set up an HTTP Source
In this step, you configure an HTTP Source that will receive the inventory data from the Webhook you’ll set up later in this procedure. You can add the source to an existing Hosted Collector or configure a new collector.
- Go to Manage Data > Collection > Collection in the Sumo Logic UI.
- Navigate to an existing Hosted Collector, or if you prefer to set up a new one, follow the instructions in Configure a Hosted Collector.
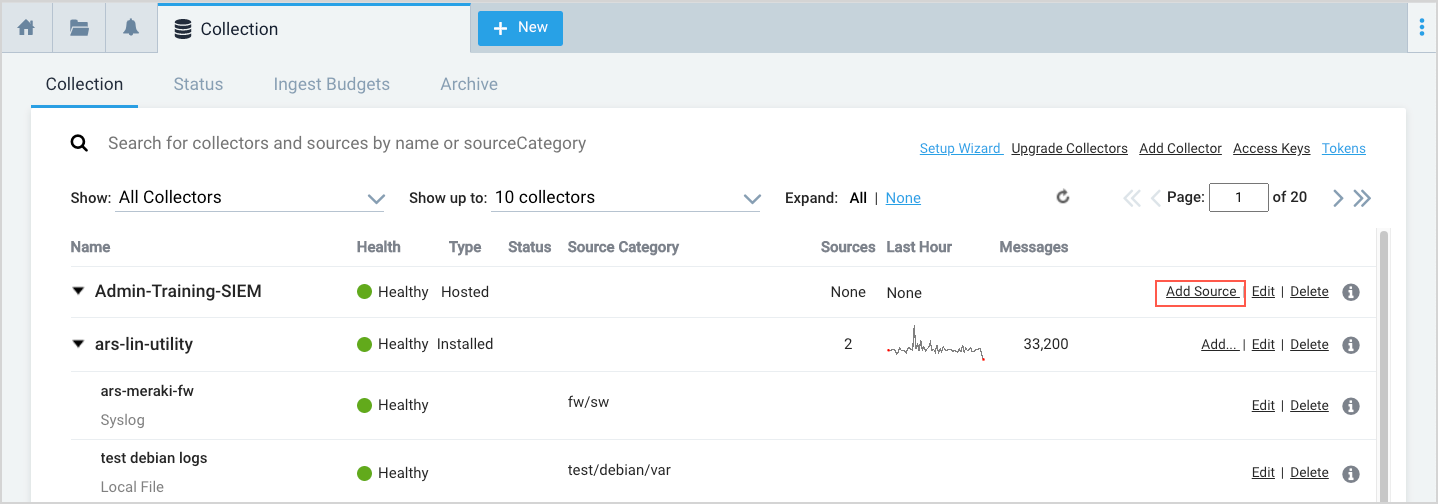
- In the row for the Hosted Collector, click Add Source.
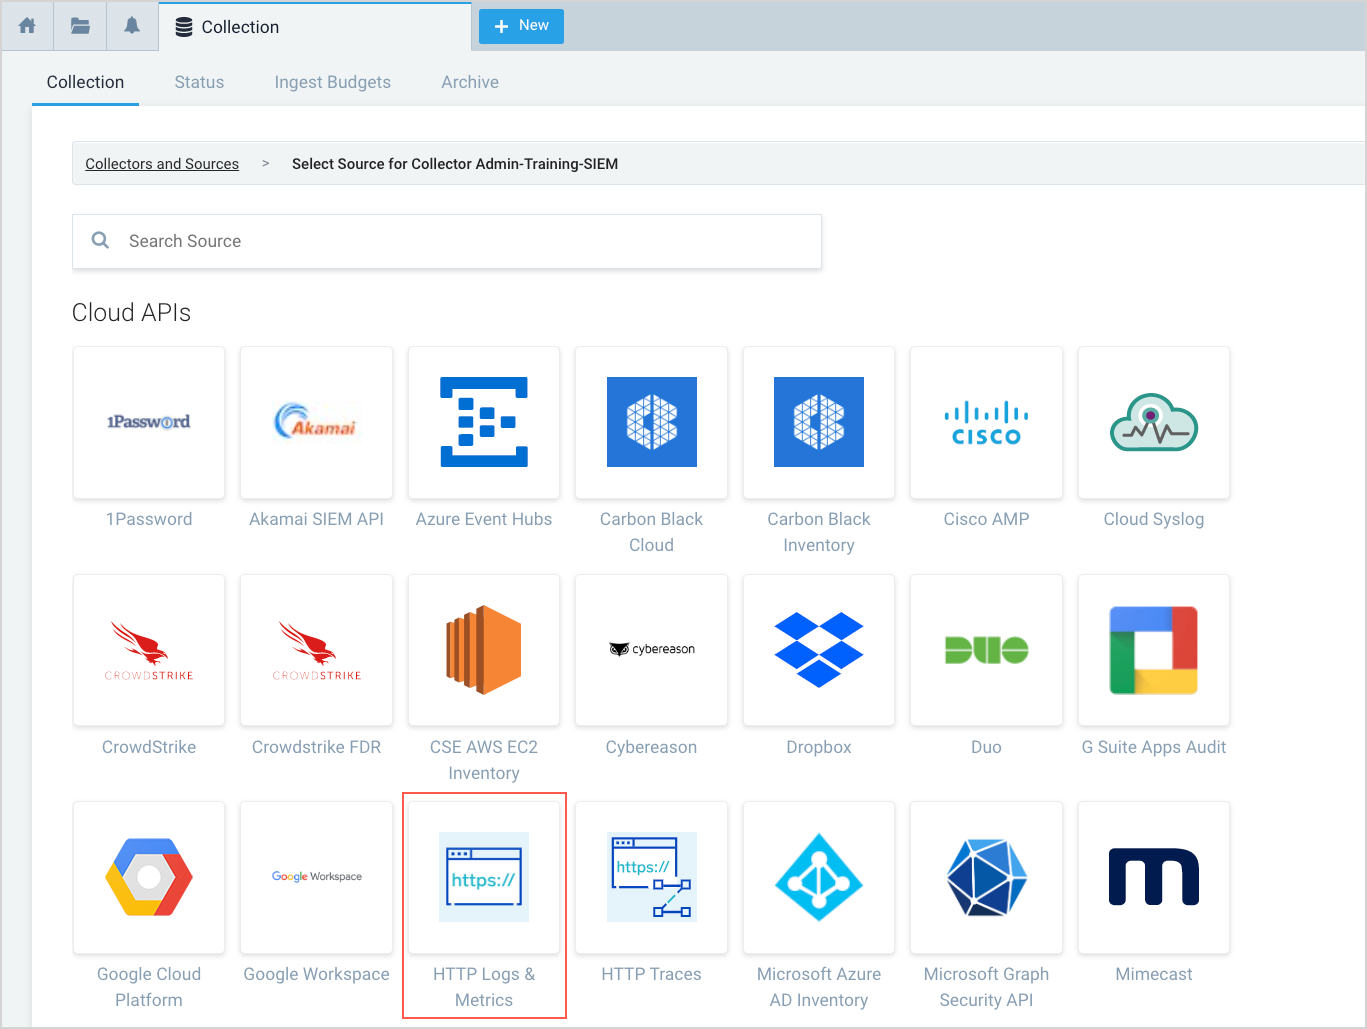
- Click HTTP Logs & Metrics.
- The source configuration page appears.
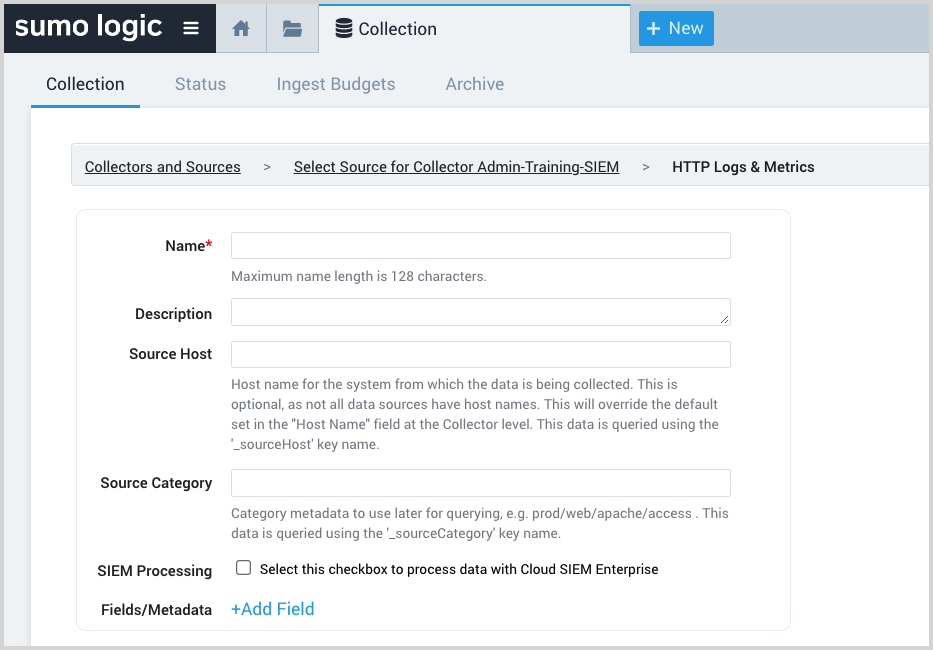
- Name. Enter a name for the source.
- Description. (Optional)
- Source Host. (Optional) Enter a string to tag the messages collected from the source. The string that you supply will be saved in a metadata field called
_sourceHost. - Source Category. Enter a string to tag the output collected from the source, for example, cse/custom/inventory. The string that you supply will be saved in a metadata field called
_sourceCategory. - SIEM Processing. Click the checkbox to configure the source to forward log messages to CSE.
- Fields. Click +Add Field, and add a field whose name is
_siemdatatypewith value inventory. - Click Save
- Copy the URL that appears. You will need this to create the Webook in the next step.
Step 2: Create a Webhook connection
In this step you create a WebHook that points to the HTTP source.
- Go to Manage Data > Monitoring and select the Connections tab.

- Click the plus sign (+) icon.
- On the Select Connection Type page, click Webhook.
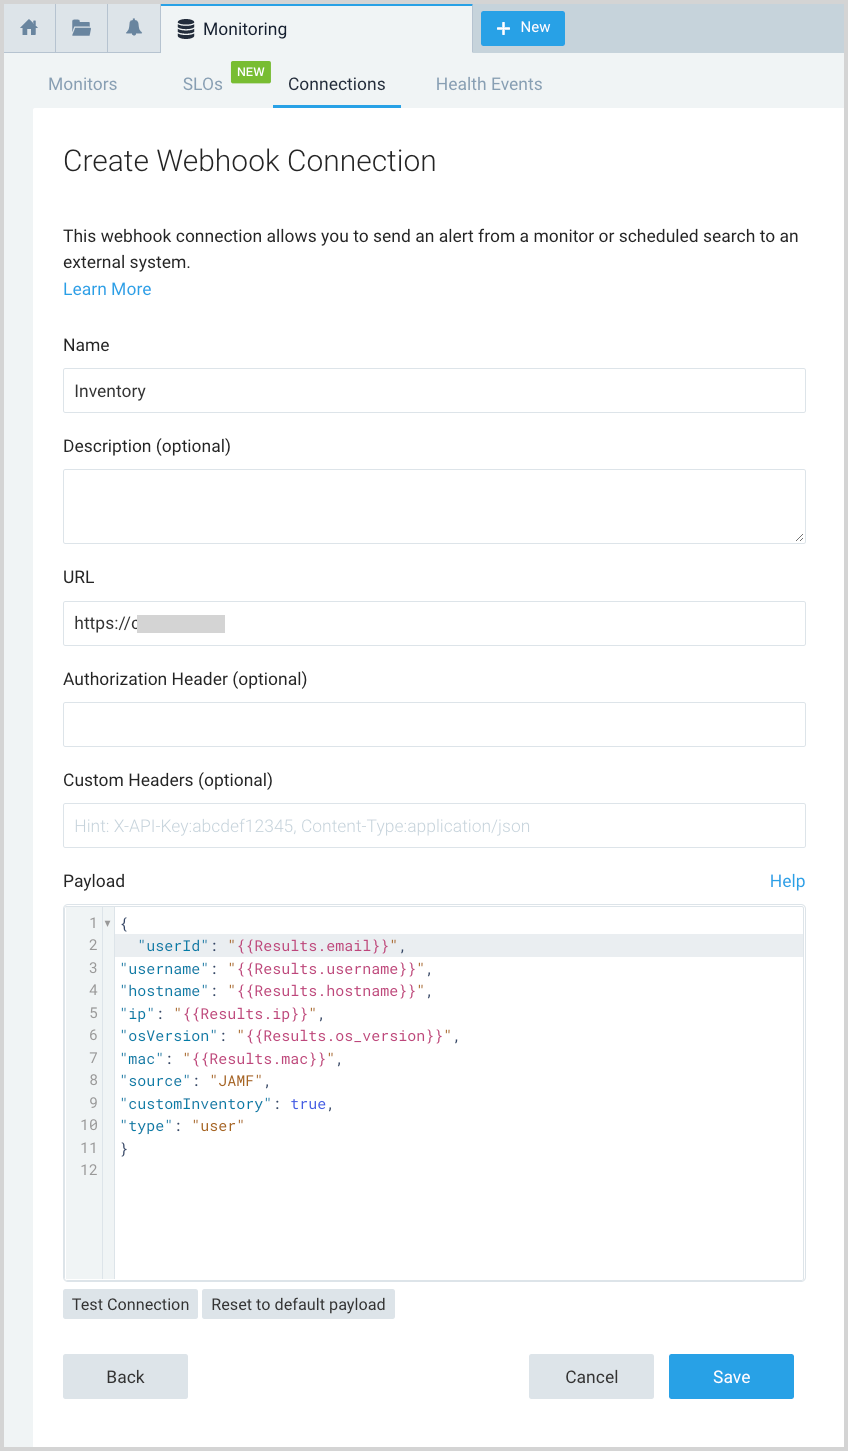
- Give it a name and input the URL from the HTTP Endpoint as your URL.
- On the Create New Webhook page:
- Name. Enter a name for the Webhook.
- URL. Enter the URL of the HTTP Source you created above.
- Payload. Enter a JSON object
Step 3: Create search query
In this step, you create a log query that extracts inventory-related fields from your inventory source. Refer to CSE inventory schema for the inventory attributes that are supported for host and user objects.
Step 4: Create a Scheduled Search
In this step, you schedule the search you created above to send results to the Webhook you created.
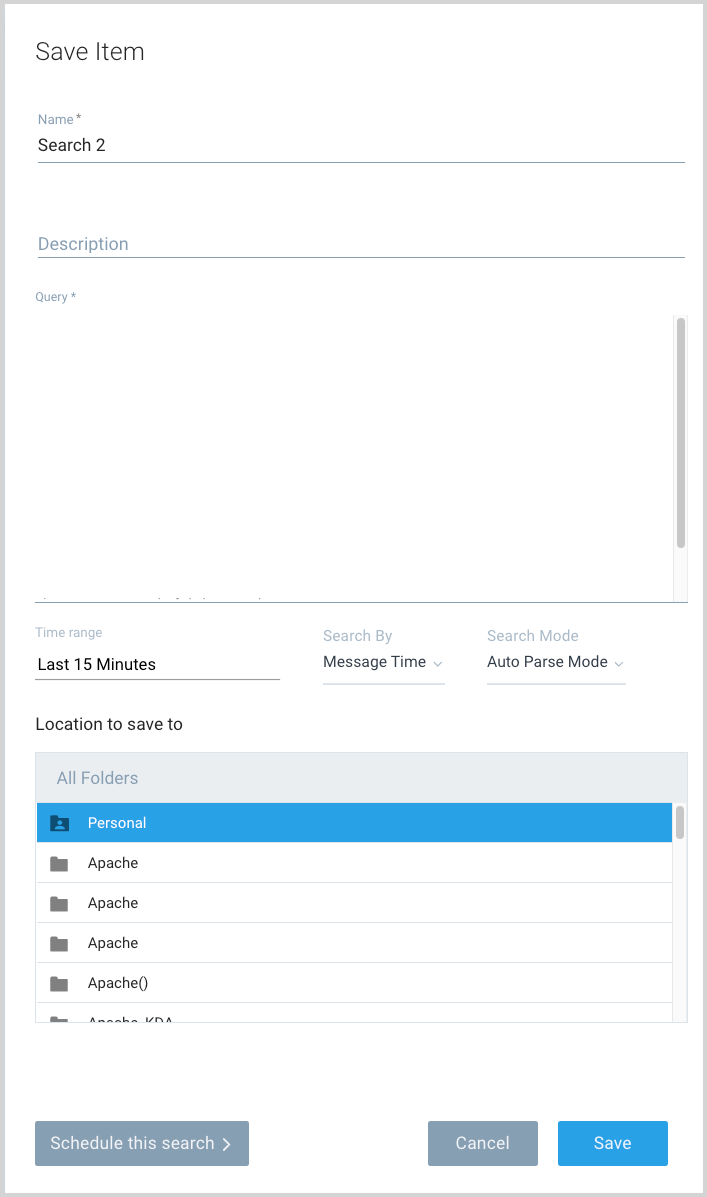
- In your log search tab, click Save As.
- On the Save Item popup:
- Name. Enter a name for your search,
- Time range. Select a time range.
- Click Schedule This Search.
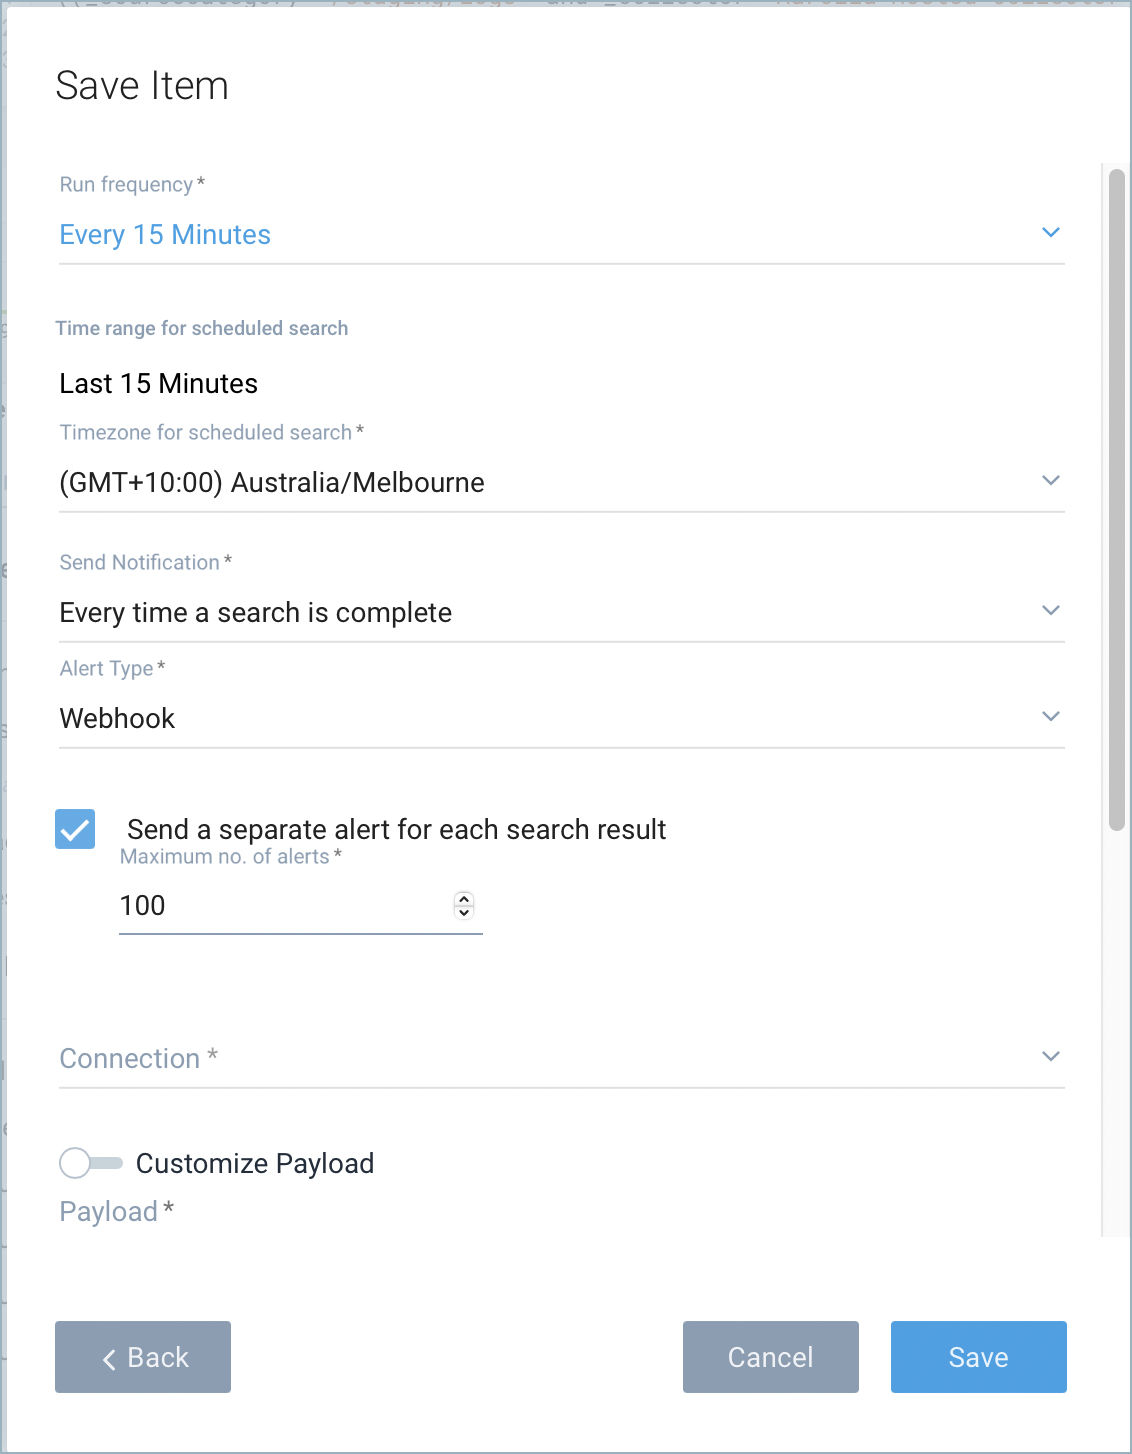
- The popup refreshes.
- Run Frequency.
- Time range for scheduled search.
- Timezone for scheduled search.
- Alert Type. Select Webhook, and pick the one you created that goes to the HTTP Endpoint. Check Send a separate alert for each search result.
- Location to save to. Choose a folder location for the search.
CSE inventory schema
This section defines the attributes in the CSE inventory schema for hosts and users. Note that the same attributes can be used for either host or user inventory data.
Host inventory attributes
The table below lists attributes most typically used in host inventory records. The ones you choose depend on the fields available from your inventory data source. For a host, you might consider using computername, deviceUniqueId, and hostname, at a minimum.
| Inventory attribute | Notes |
computername | |
deviceUniqueId | A unique ID that distinguishes an inventory item from other inventory items from the same source. |
groups | The directory service (for example, Azure AD) group that the inventory item belongs to. |
hostname | |
ip | |
location | |
mac | |
natIp | |
normalizedComputerName | |
normalizedHostname | |
os | |
osVersion | |
uniqueID | A unique ID that distinguishes an inventory item from all other inventory items from all inventory sources. |
User inventory attributes
The table below lists attributes most typically used in user inventory records. The ones you choose depend on the fields available from your inventory data source. For a user, you might consider using username, userID, emails, and groups, at a minimum.
| Inventory attribute | Notes |
department | |
emails | |
givenName | |
groups | The directory service (for example, Azure AD) group that the inventory item belongs to. |
lastName | |
middleName | |
uniqueID | A unique ID that distinguishes an inventory item from all other inventory items from all inventory sources. |
userId | |
username |
Example saved search and Webhook payload
Scheduled search
The search below extracts inventory fields from JAMF logs.
_sourceCategory="security/jamf" and _collector="Jamf"
| json field _raw "event.computer.osVersion as os_version
| json field _raw "event.computer.deviceName as hostname
| json field _raw "event.computer.deviceName as hostname
| json field _raw "event.computer.ipAddress as ip
| json field _raw "event.computer.macAddress as mac
| json field _raw "event.computer.username as username
| json field _raw "event.computer.emailAddress as email
| json field _raw "event.computer.position as role
| where !(isEmpty(username))
| count by os_version, hostname, ip, mac, username,email, role
Notes
_collectorand_sourceCategoryand specify the collector that ingests the inventory data and the source category assigned it. In your own search, you can use these and other metadata fields to scope your search.
Webhook payload for User Entity
{
"userId": "{{Results.email}}",
"username": "{{Results.username}}",
"hostname": "{{Results.hostname}}",
"ip": "{{Results.ip}}",
"osVersion": "{{Results.os_version}}",
"mac": "{{Results.mac}}",
"source": "JAMF",
"customInventory": true,
"type": "user"
}
Webhook payload for Computer Entity
{
"computername": "{{Results.hostname}}",
"hostname": "{{Results.hostname}}",
"ip": "{{Results.ip}}",
"natip": "{{Results.natip}}",
"os": "{{Results.os}}",
"mac": "{{Results.mac}}",
"source": "CarbonBlack",
"uniqueID": "{{Results.uniqueID}}",
"deviceUniqueId": "{{Results.uniqueID}}",
"customInventory": true,
"type": "computer"
}
Notes
- The
sourcekey is an arbitrary string that identifies the source of the inventory data. - The
customInventorykey identifies the payload as custom inventory data. You must include this in your webhook payload. - The
typekey specifies what type of inventory data the webhook sends. Set the value to user or computer. You must include this in your webhook payload.